
Say you want to build a blog or a personal portfolio. Your blog will contain the articles that you continuously publish.
This is the blog you want 🙂This means that every time you want to add a new article to your blog, you have to get your hands dirty again with the code base. This kind of project is different from the others, since it’s a project that never ends, as you have to constantly update it with your newest publications…
Is there a better way to manage the content of your blog without having to code every time?
Content Management Systems (CMS) seemed like the right answer to this question. This article will help you, a reader who has a blog or a portfolio or any kind of website, to maintain your app in a smart and easy way forever 🤓
For the sake of this article, I’ll explain how to integrate Contentful, a CMS with a blog built with Gatsby, a fast framework based on React.
📝 Contentful
Step #1: Create a space
Once you create an account in Contentful, you’ll be prompted to create a space.
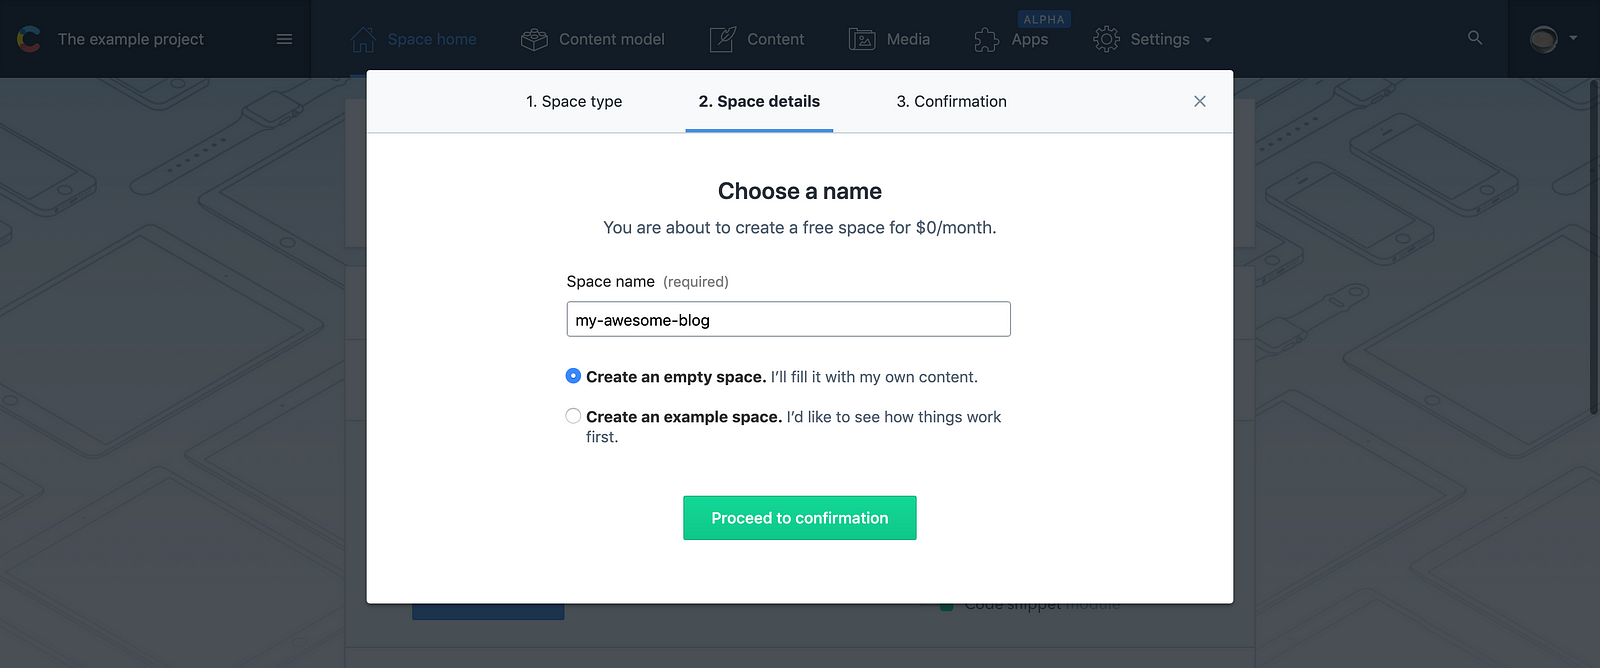
A space is a collection of content, housing content types, entries, and assets, all with a certain goal. You can think of it as the environment or container in which we’ll have all of our data in.
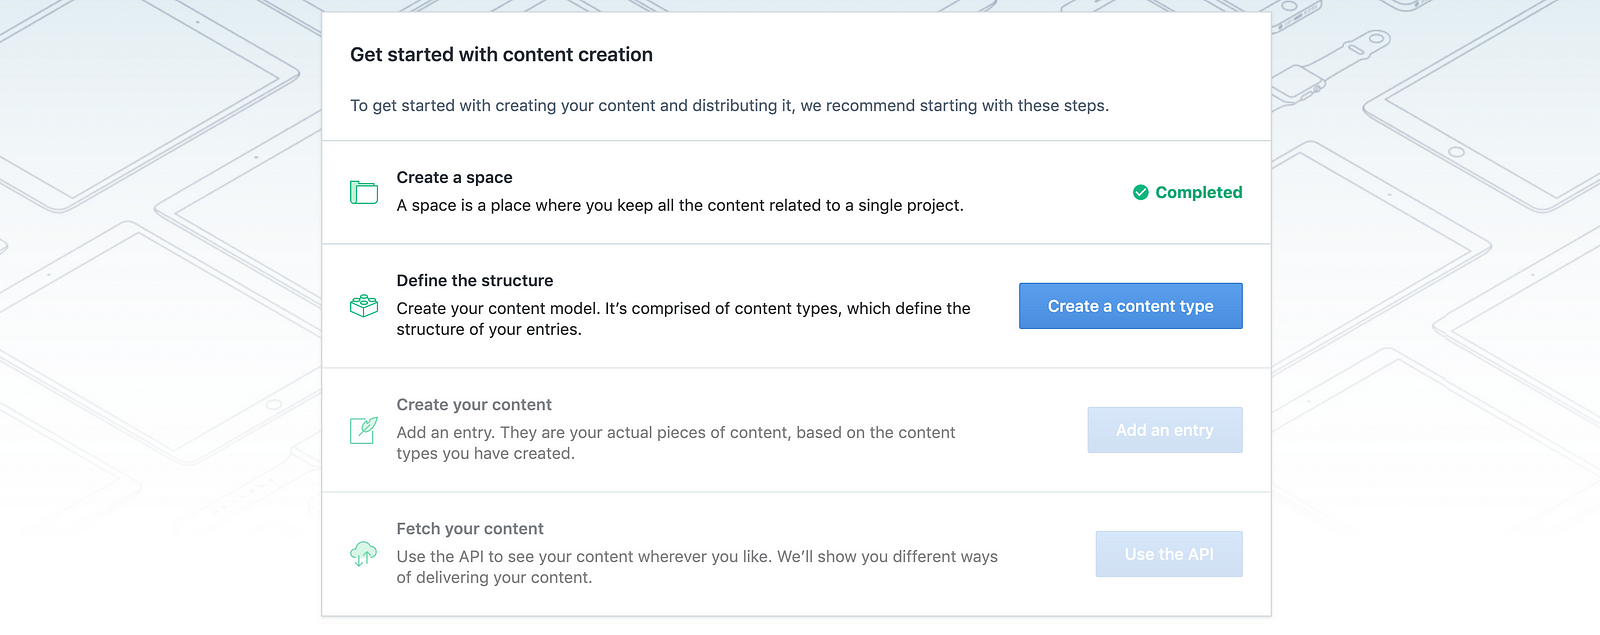
Step #2: Creating a model
Once you’ve done that, you’ll see that Contentful prompts you to follow the next step, which is creating a content type.
Think of a content type as a model of a component in your blog. That model can have fields such as text, number, media, etc. For our blog, we’ll need to make a content model for an Article component, which can have a title, a subtitle, etc.
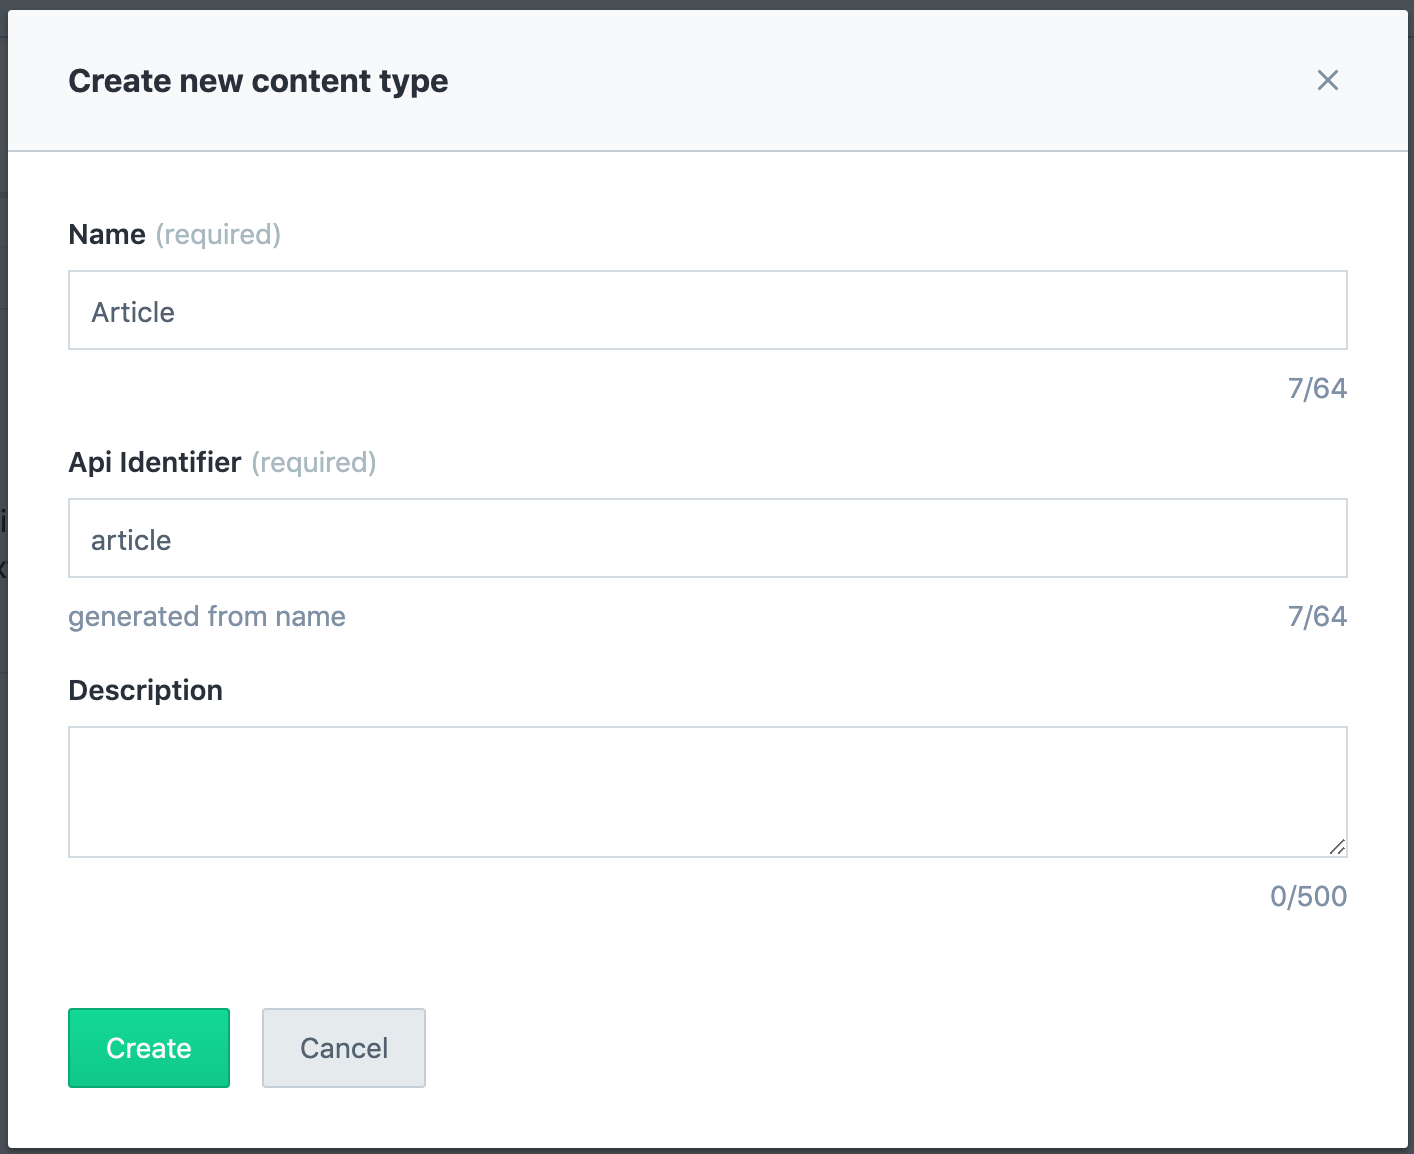
Note: When you create a content type, Contentful also creates its API ID which can later be used as a parameter in your code if you wish to make API requests. This is why the API ID is automatically generated, and is just the name of the content type in lower case. We won’t really use this here.
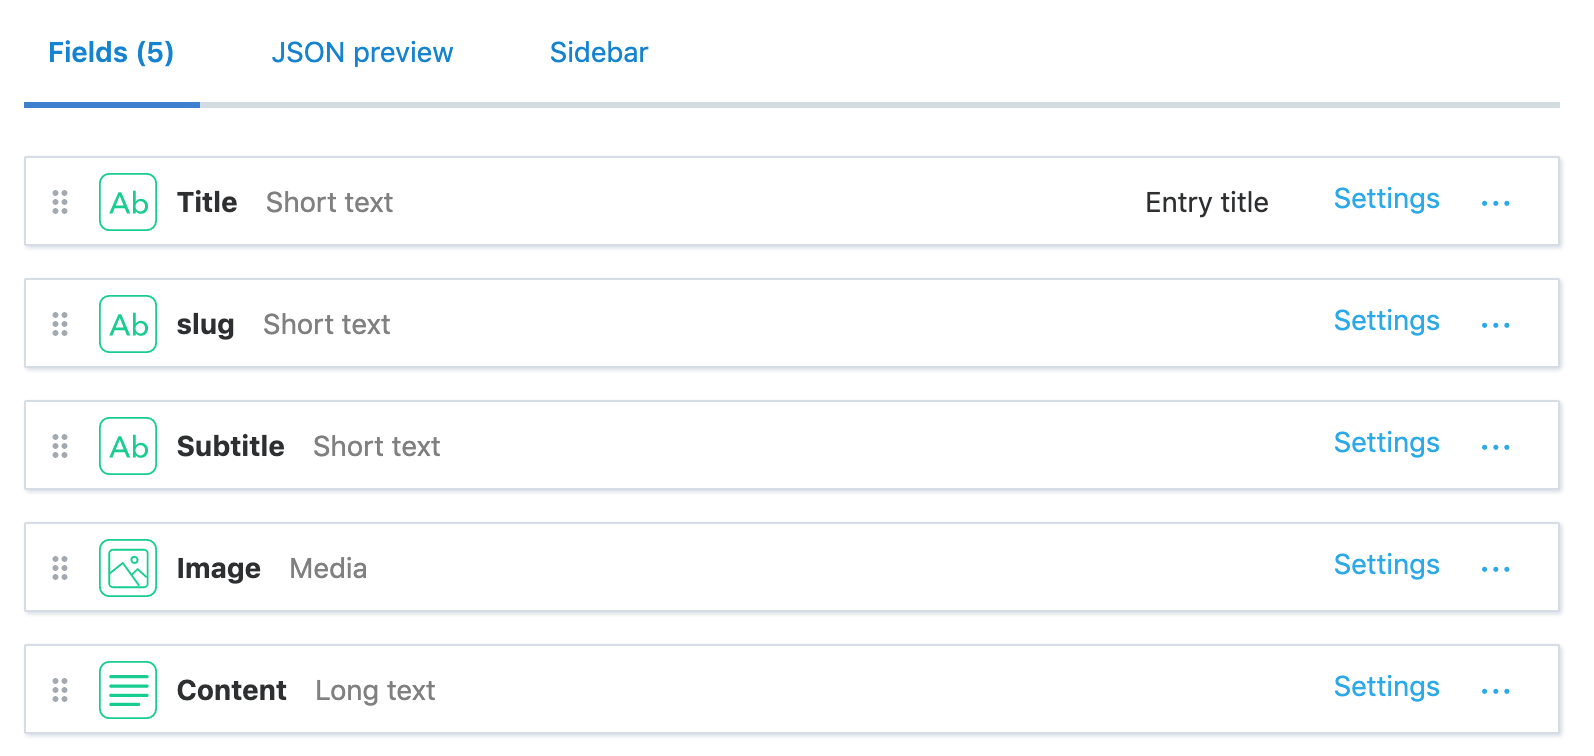
After having done that, Contentful will prompt you to add some fields to the model of your article.
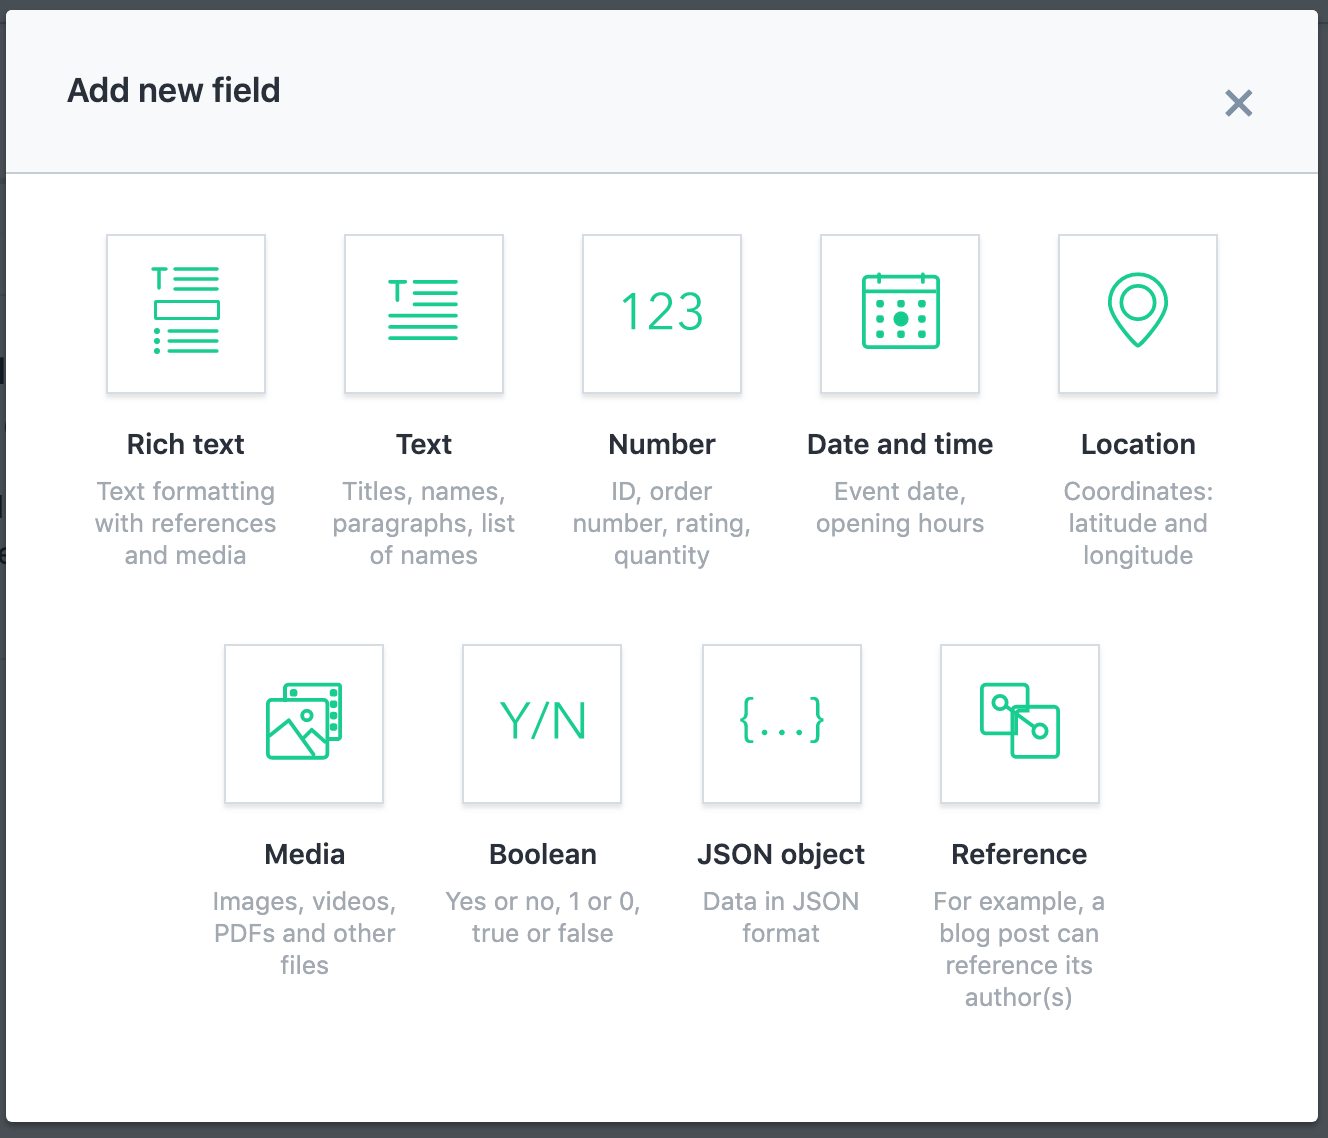
It’s really up to you how you want the structure of you article to be. Let’s say you article has the following:
- A title as a short text field
- A subtitle as a short text field
- A cover as a photo media field
- A content containing the content of the article as a rich text field or long text field.
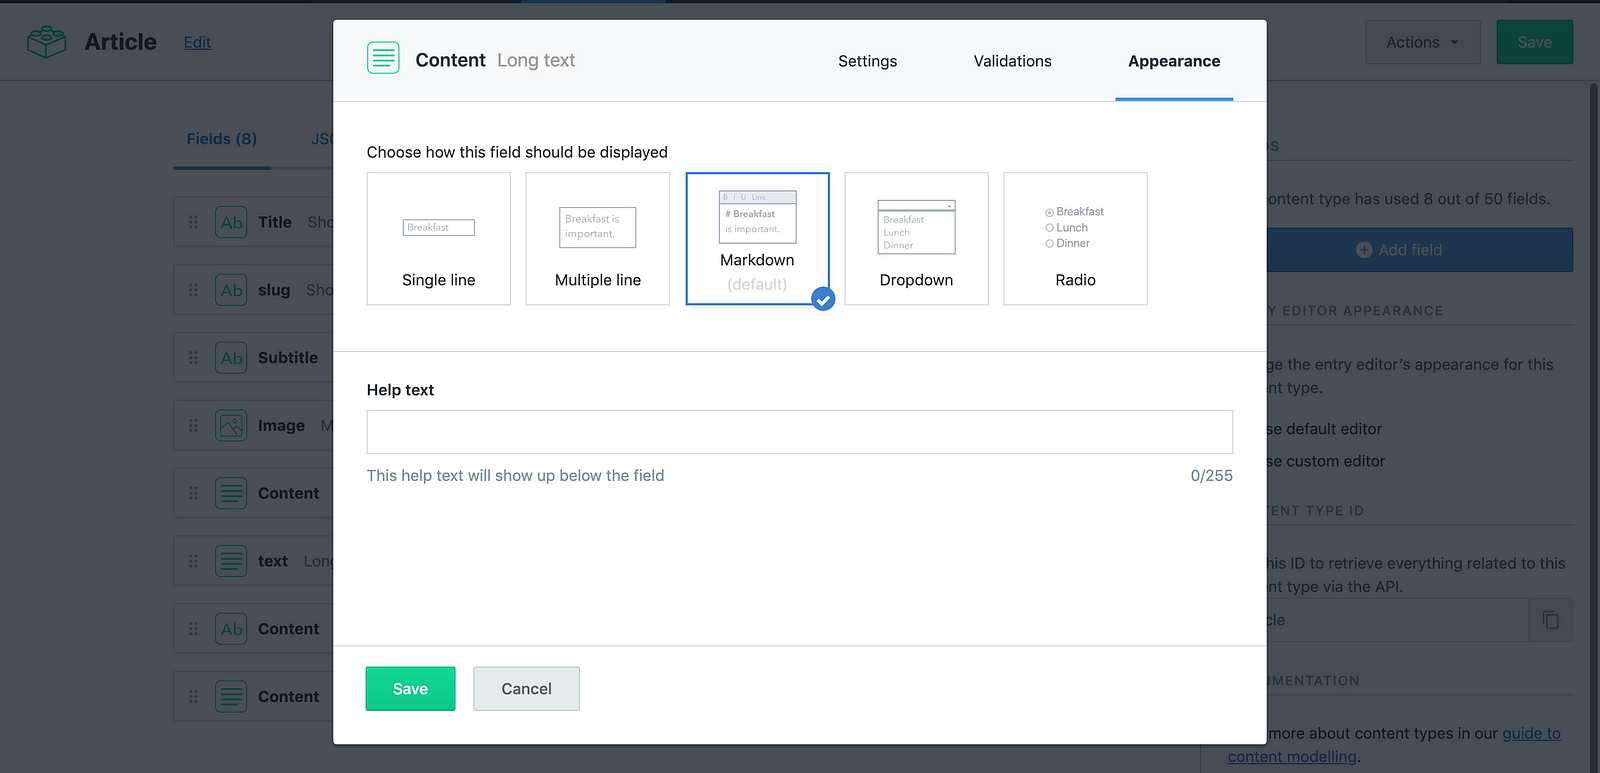
If you want the content to your article to support markdown, then the field of your content should be a long text field. Todo so, go to the Appearance tab in the settings of your content field and choose Markdown like so:
- A slug as a text field… Wait what’s this?
The slug text field will represent the url extension which directs you to the page of your article once you click on it from the Home page of your blog. It will allow you to access the article directly as such:
https://someurl.com/first-article
You’ll see when it’ll come handy in a bit.
As you can see, this is a pretty basic structure to your article, so if you want to know how to make a more complex model, you can read about it here!
Note: You start seeing here the advantages of using a CMS such as Contentful in our case. Model-driven content management ensures consistency since all of your articles will be based on one model. Another advantage is that it is easy for you to divide your app into components, just like you’re used to with React, but this time it’s easy since you don’t have to worry about passing props, state management… You save time and make it easy to understand and manage the structure your app.
Step #3: Create content
You can now go ahead and create your articles! Just fill in the data in the fields you created:
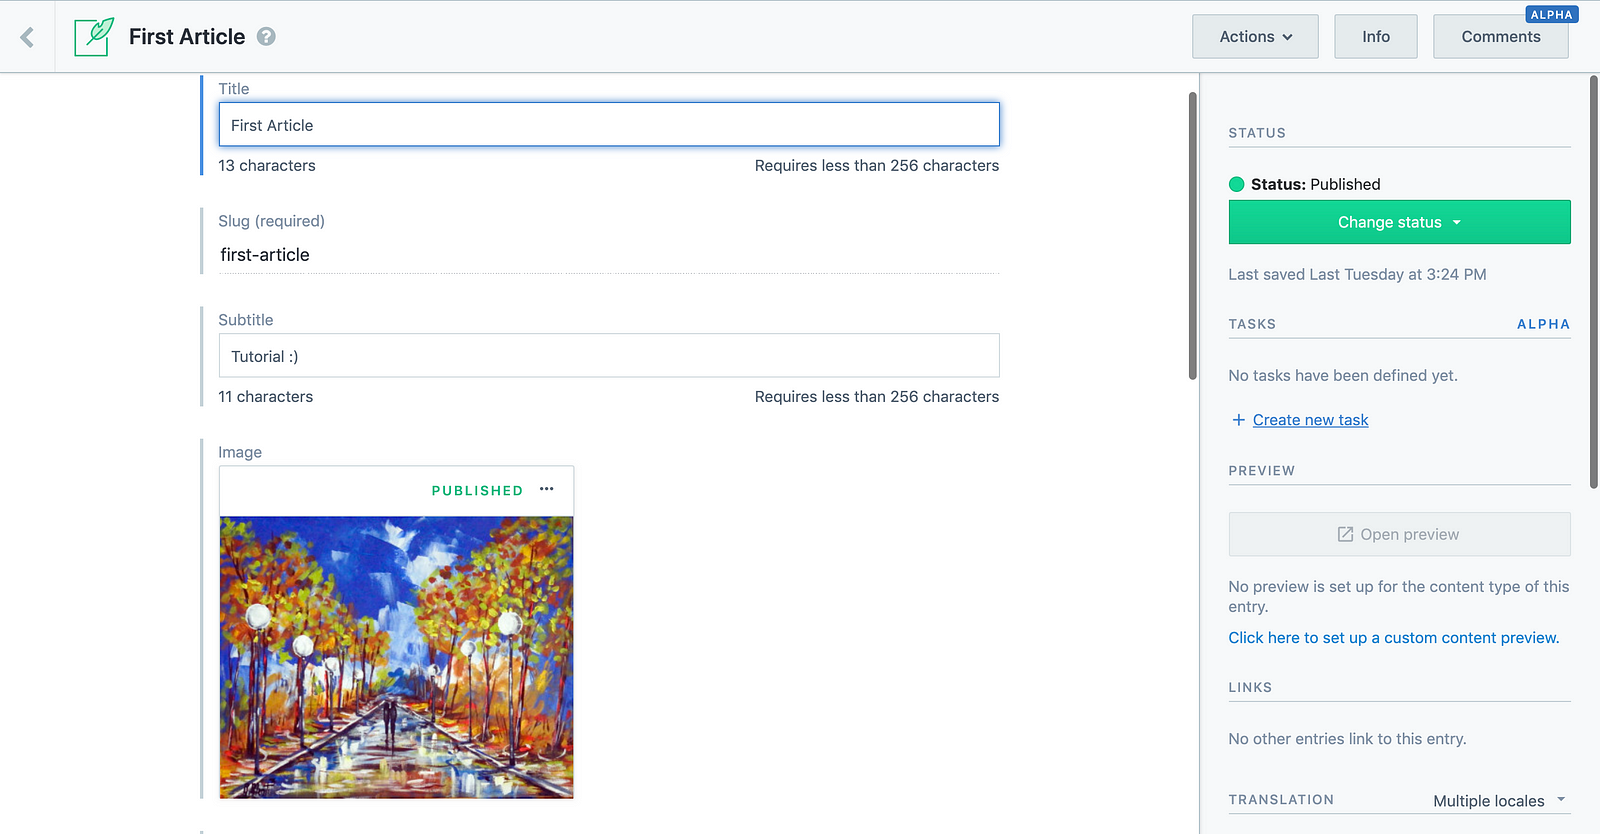
Note: You can notice here another advantage of using Contentful: you can save your article as a draft, then change the status of your article to published anytime.
When you edit the content of you article, style it as you like! Remember, we used a Long Text field that supports markdown, so you can even add embedded HTML.

Let’s save and publish our articles:

Step #4: Retrieve our API keys
Now that you’ve configured and set up your content, let’s get your API keys in Settings/API keys to use later on to display that content.
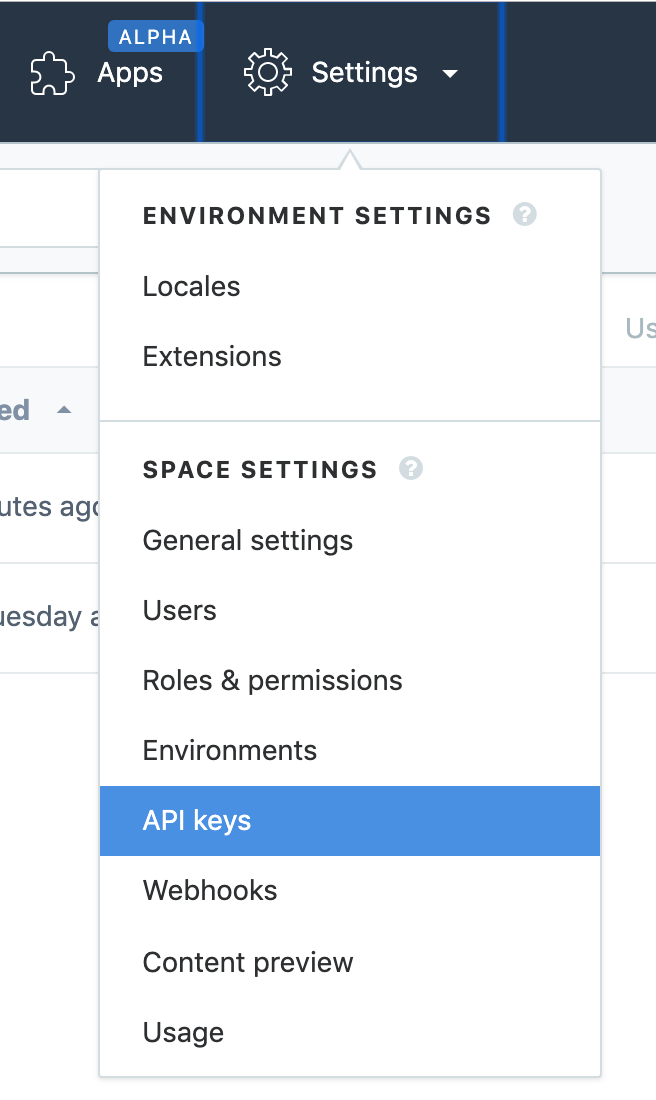
Contentful already creates a content delivery/preview token once you’ve set up your space.

Now you can go ahead and copy the Space ID and Content Delivery API access token. Save them somewhere because you’ll need them in the next part!
⚛️ Gatsby
Let’s now build the blog that will display the content you set up previously with Contentful. Essentially your blog will use the Space ID and API access token to get all the data from Contentful.
Step #1: Set up you gatsby blog
For this tutorial, we’ll use the use the Gatsby CLI to create a new site, specifying the blog starter.
gatsby new my-awesome-blog https://github.com/gatsbyjs/gatsby-starter-blog
You can use any kind of starter you want, but for the sake of this article you can use the blog one. Now go to your blog and run gatsby develop. You’ll see the following:
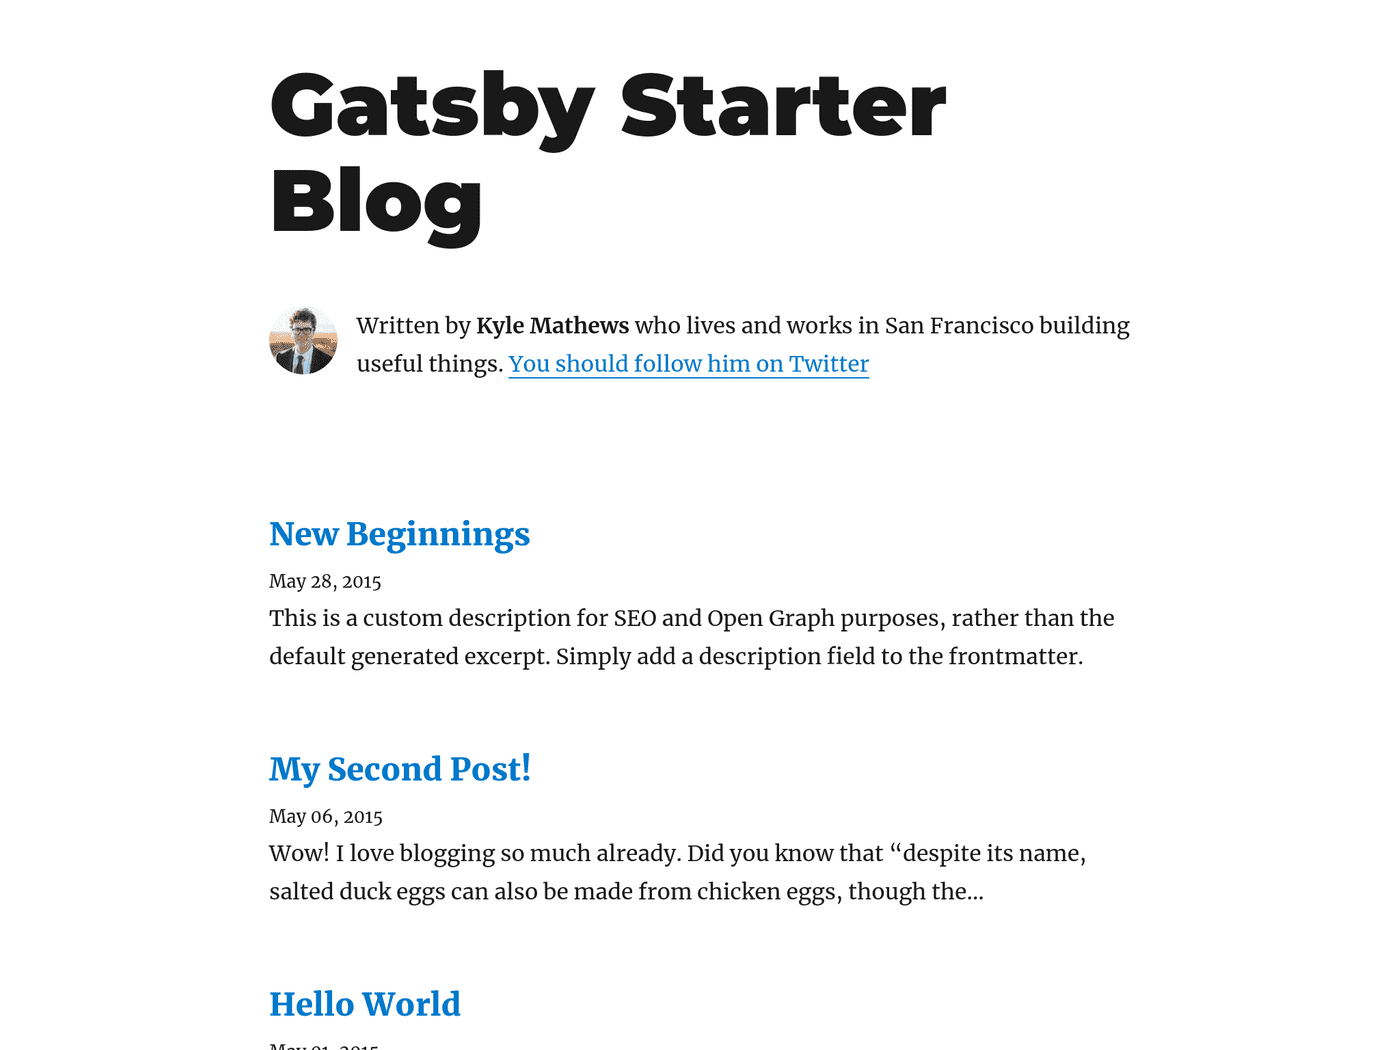
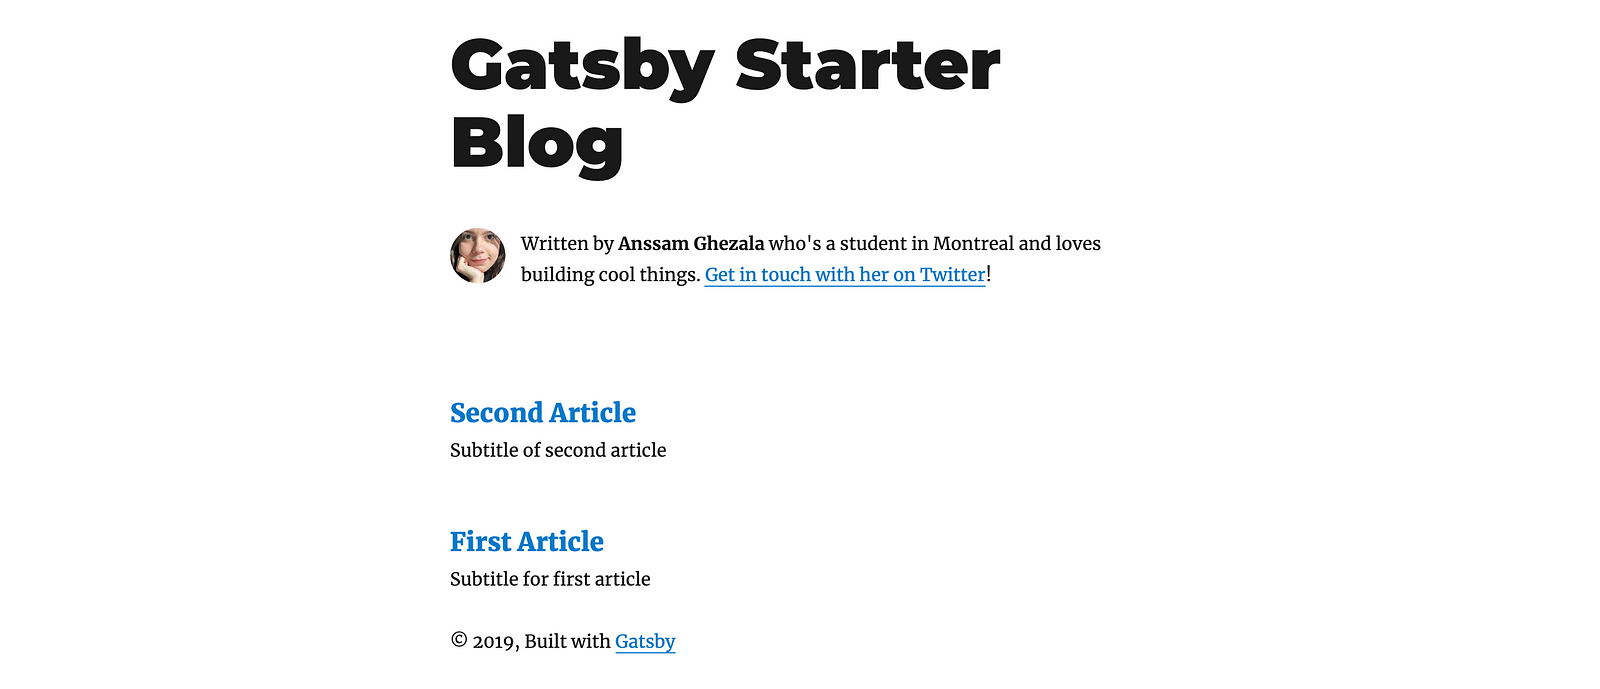
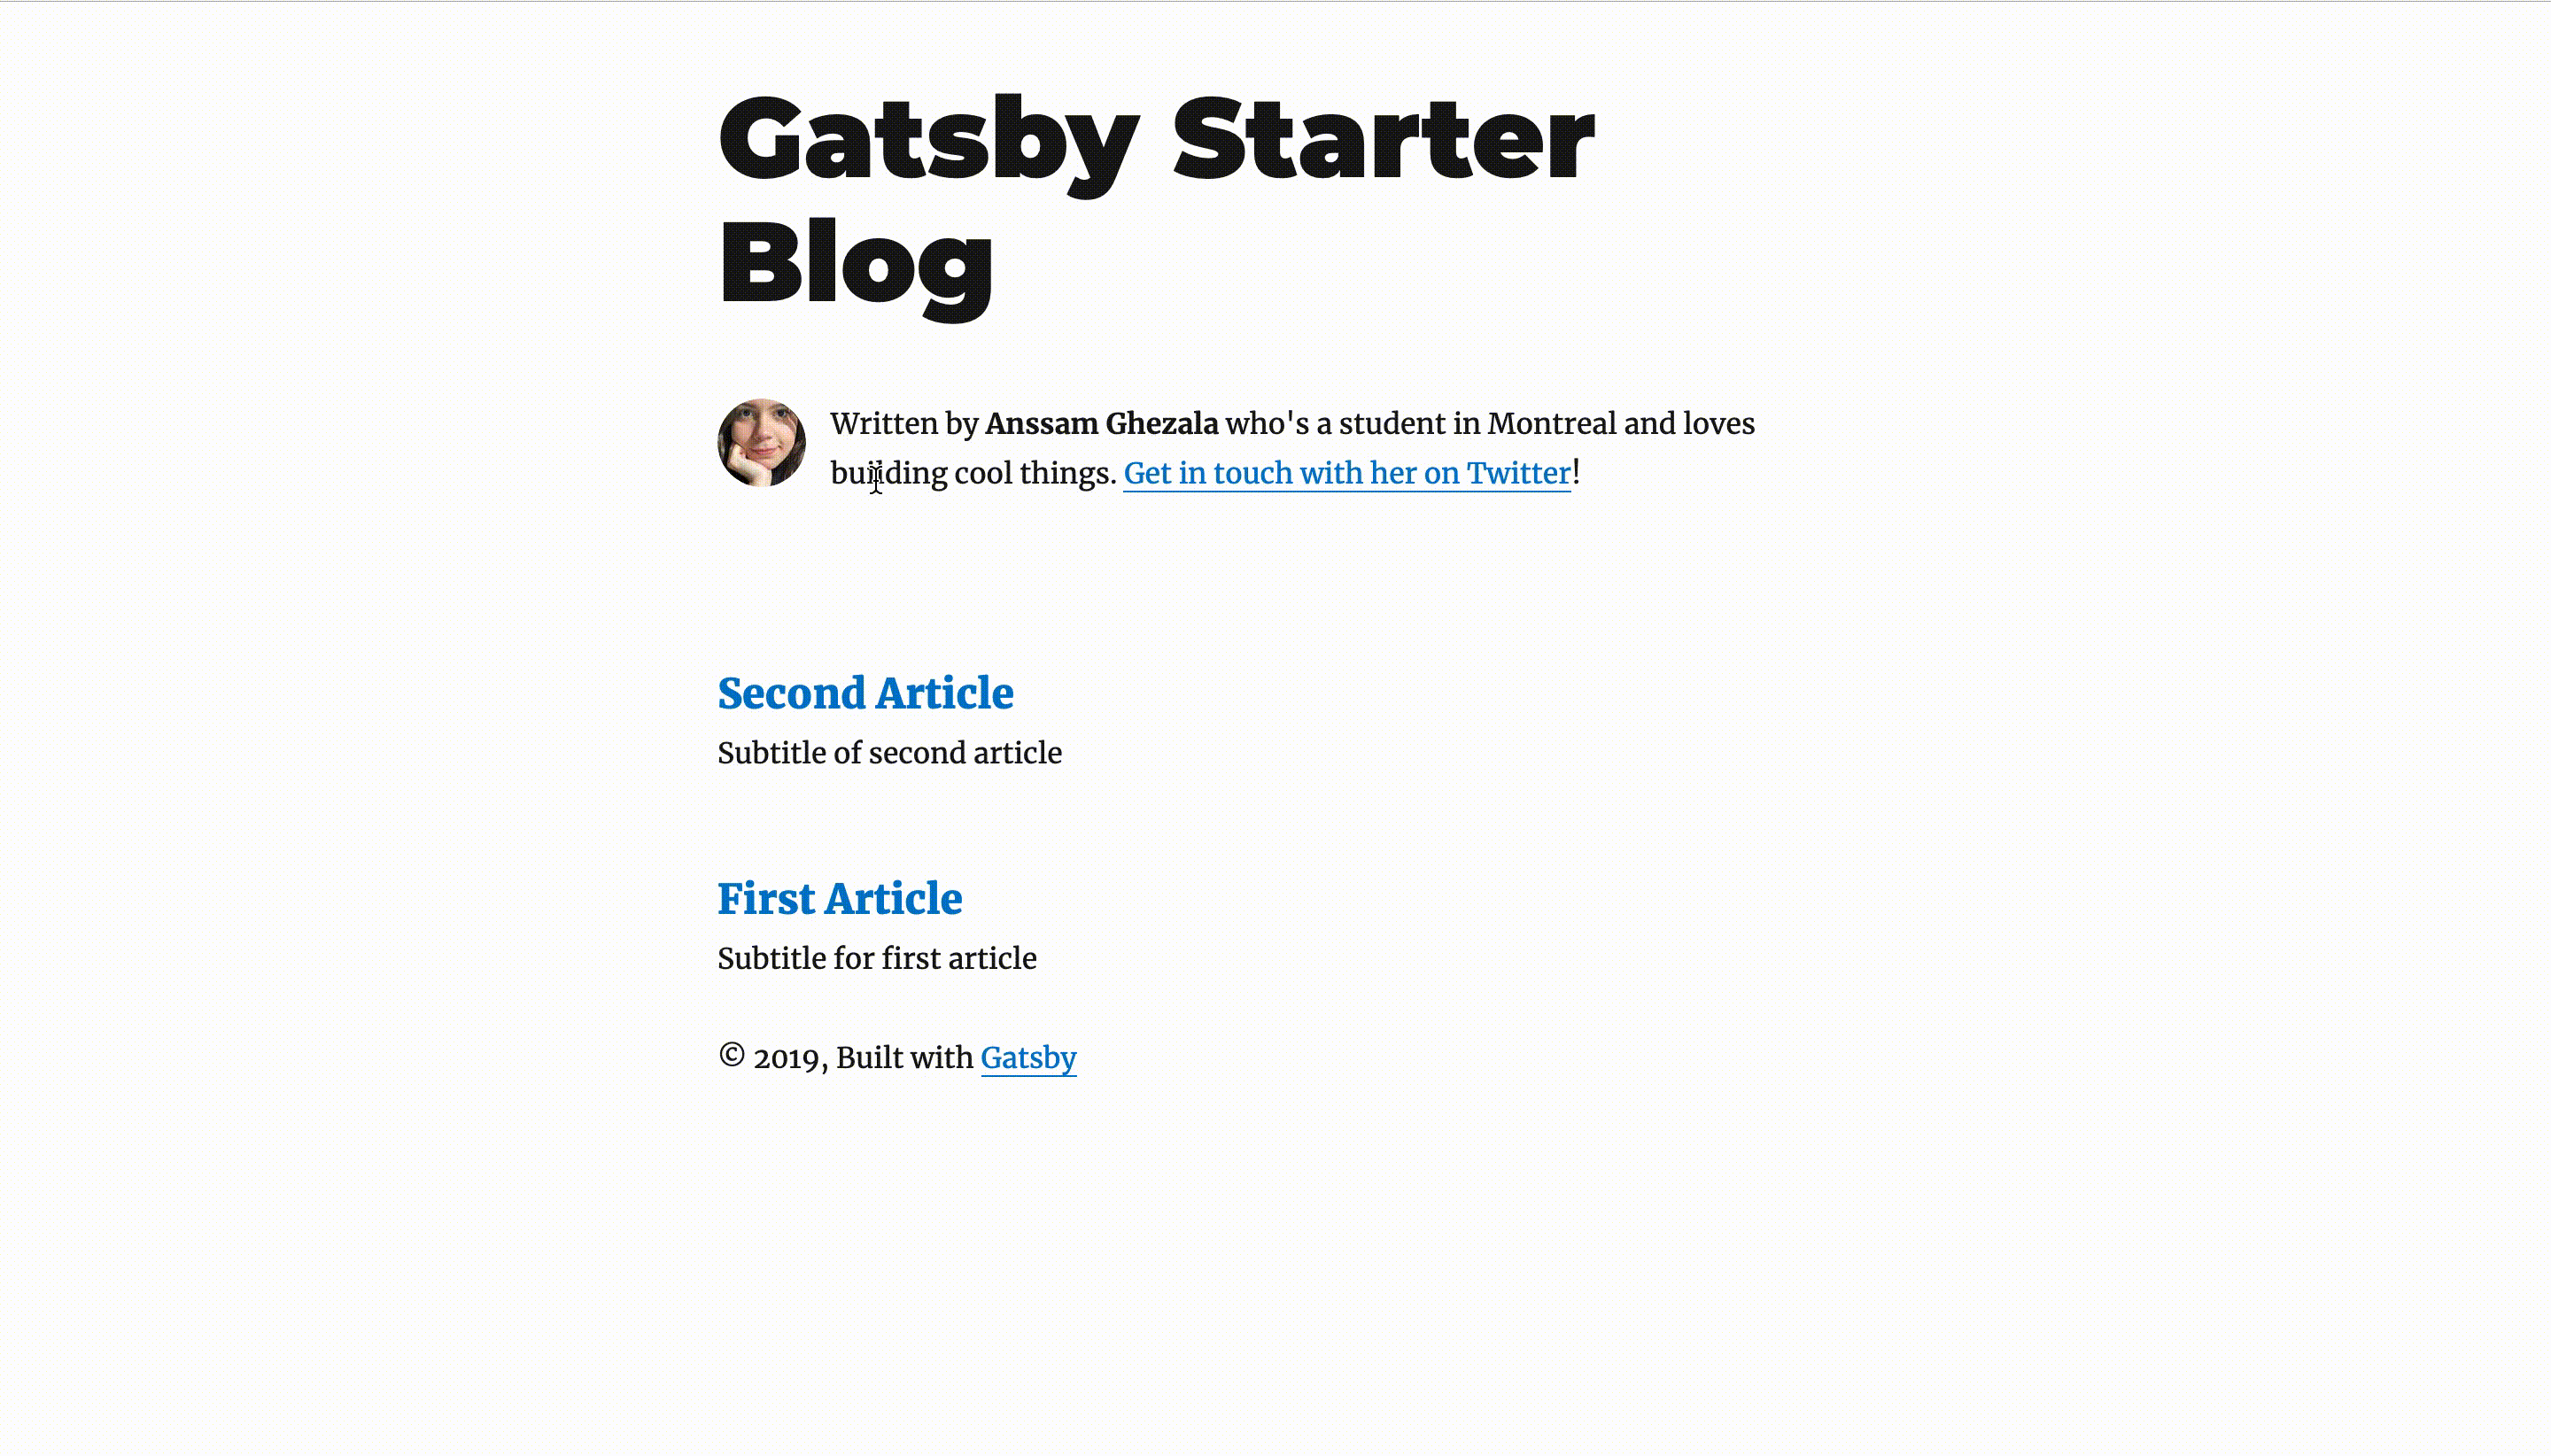
Cool, you have out site set up! But I imagine that you are not Kyle Mathews right? So let’s edit the author’s biography with your information.
Step #2: Understand GraphQL data queries
Let’s take a look at our gatsby-config.js file in the root of our directory. This file contains all the plugins that your blog supports, for instance gatsby-plugin-google-analytics that uses Google Analytics. You install a Nodejs package (NPM) to use in your blog as you would normally. However, if that package uses Gatsby’s API then you have to add it as a plugin in the plugins array in that file.
You’ll also notice a siteMetaData variable in the top of the file, outside of the plugins array.
siteMetadata: {

   title: `Gatsby Starter Blog`,

   author: `Kyle Mathews`,

   description: `A starter blog demonstrating what Gatsby can do.`,

   siteUrl: `https://gatsby-starter-blog-demo.netlify.com/`,

   social: {

     twitter: `kylemathews`,

   },

 },
This object contains data concerning your blog such as the title, author, description… What’s that?
When you want to reuse common pieces of data across the site (for example, your site title), you can store that data in siteMetadata — Gatsby Config API
This way you can store data it in one place then pull it wherever you need it. This means that if you change the title of your blog, you only need to do that here in you gatsby-config.js file and your info will get updated from wherever you are pulling it from. So go ahead and put yourself as the author, put your twitter and change the title as you like.
Cool, but how is the data fetched from siteMetaData? GraphQL is here for that!
Note: GraphQL lets you ask for the exact data you need. Queries look like JSON, which means that if you wish to extract the title from siteMetaData for instance, you simply use siteMetaData.title. The data is then queried from the components that use it!
You’ll notice in your src/components folder all the components of you app. The bio.js component represents the biography that you wish to change.
const Bio = () => {

 const data = useStaticQuery(graphql`

   query BioQuery {

     avatar: file(absolutePath: { regex: "/profile-pic.jpg/" }) {

       childImageSharp {

         fixed(width: 70, height: 50) {

           ...GatsbyImageSharpFixed

         }

       }

     }

     site {

       siteMetadata {

         author

         social {

           twitter

         }

       }

     }

   }

 `)

. . .

}
Wait what…?
Let’s break this down line by line. Once you get this, everything else will be much easier to understand.
- The first line just defines and initialises your Bio component
- Line 15 defines and initialises a data constant that essentially represents the data that you want to query. useStaticQuery is a React Hook which takes your GraphQL query and returns the requested data
- Line 16 defines your query named BioQuery using the query function
- Lines 17 is a bit more cumbersome. It defines an avatar data field, which basically points to a specific file containing the avatar of the author and specifies the width and height of the picture. Remember how I said that the queries are JSON objects? This means that if you want to pull the image from the data object, you simply have to do data.avatar.childImageSharp.fixed
Note: How does childImageSharp work ? using 3 plugins:
- gatsby-source-filesystem plugin allows you to query files with GraphQL
- gatsby-plugin-sharp powers the connections between Sharp and Gatsby Plugins
- gatsby-transformer-sharp allows you to create multiples images of the right sizes and resolutions with a query
- Lines 24 to 31 contain our siteMetadata object with the author and the twitter data.
All of this data is stored in your data constant. Scrolling down, you’ll notice how the data is being extracted and displayed to the site.
const { author, social } = data.site.siteMetadata

 return (

   <div

     style={{

       display: `flex`,

       marginBottom: rhythm(2.5),

     }}

   >

     <Image

       fixed={data.avatar.childImageSharp.fixed}

       alt={author}

       style={{

         marginRight: rhythm(1 / 2),

         marginBottom: 0,

         minWidth: 50,

         borderRadius: `100%`,

       }}

       imgStyle={{

         borderRadius: `50%`,

       }}

     />

     <p>

       Written by <strong>{author}</strong> who's a student in Montreal and

       loves building cool things.

       {` `}

       <a href={`https://twitter.com/${social.twitter}`}>

         Get in touch with her on Twitter

       </a>

       !

     </p>

   </div>

 )
Line 35 extracts the author and social from the query, which are used in lines 57 and 60. From lines 43 to 55, your have your Image component using the gatsby-image plugin which contains your avatar. Style it as you like!
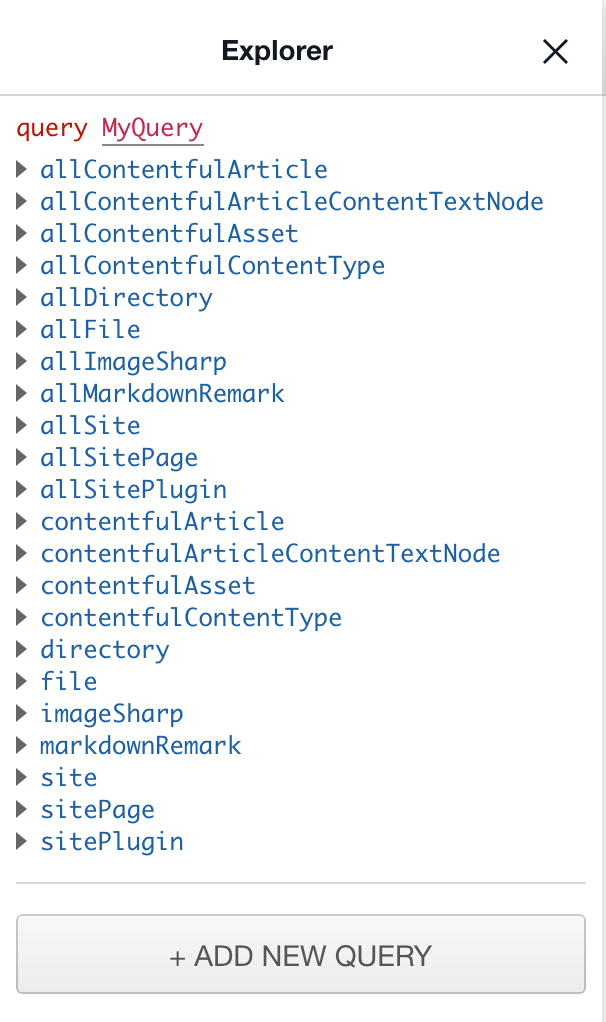
You can test and view your queries in your localhost:8000/__graphql after you’ve executed gatsby develop

On the right you’ll see the Explorer, which helps you navigate through possible queries you can make. This explorer helps you play around with your data until you have a final query you can copy-paste to extract the required data from Contentful.
…Phew! Now you have an idea on how you’ll use GraphQL to pull the content from Contentful. You’ll basically make a query to fetch the data, like you did above with the title of the blog, the avatar and the author’s name, then just display the requested data.
Step #3: Connecting Contentful to Gatsby
Now that you’ve hopefully understood the data flow in our blog, let’s actually connect our Contentful space to our blog.
You first need to install the gatsby-source-contentful plugin.
npm install gatsby-source-contentful
Just like any other plugin, you need to add this one to our plugins array in gatsby-config.js, with our Space ID and API access token that you copied from Contentful.
plugins: [

   {

     resolve: `gatsby-source-contentful`,

     options: {

       spaceId: `YOUR-SPACE-ID`,

       accessToken: `YOUR-ACCESS-TOKEN`,

     },

   },

. . .

]
Now run gatsby develop and go to localhost:8000/__graphql. You’ll notice something different on the Explorer.
Notice the additions the allContentfulArticle, allContentfulArticleContentTextNode, contentfulArticle… additions. This means that you’ve successfully connected your Contentful space to your blog, and you can even take a look at the data that can be queried!
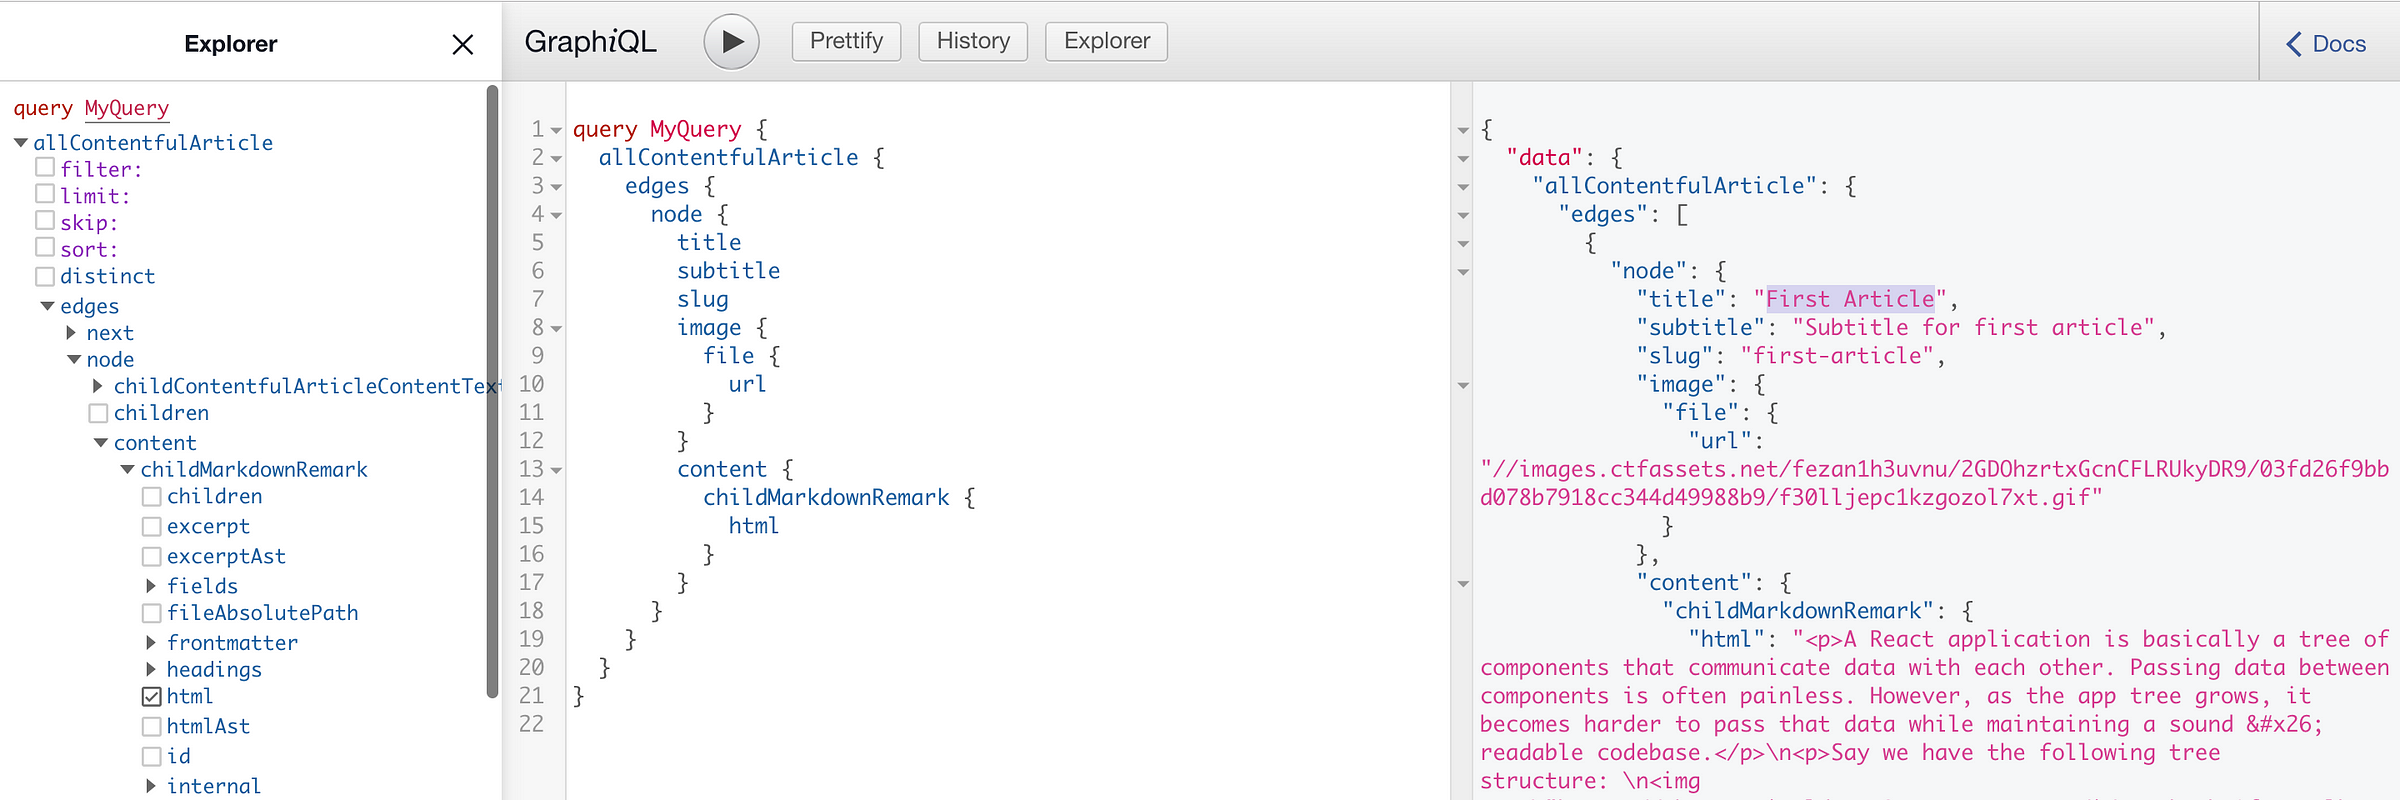
You can see the title of each article we added, like the first one titled “First Article”, the subtitle, the content of article converted to html, and even the url of the cover picture!
Now let’s query that data from the code base 🔥
Step #4: Query your content!
First things first, go to your gatsby-node.js file. This is the file in which you are configuring how to navigate from one article to another in your blog.
Reminder: to navigate to a specific article, you used the slug field as the url extension pointing to that article as such: https://someurl.com/first-article
So let’s query the slug of our articles. First, edit the query that we made in the result constant to the following:
const result = await graphql(

   `

     {

       allContentfulArticle {

         edges {

           node {

             slug

           }

         }

       }

     }

   `

)Note: allContentfulArticle.edges is an array of nodes. Each node contains an article that you created.
Then use the slug from the result constant to configure the path to each article page:
- Change your posts constant to point to the allContentfulArticle.edges instead of allMarkdownRemark.edges to point to the array of your articles.
- Then change the path and slug to the slug of each article with post.node.slug.
// Create blog posts pages.

 const posts = result.data.allContentfulArticle.edges


 posts.forEach((post, index) => {

   const previous = index === posts.length - 1 ? null : posts[index + 1].node

   const next = index === 0 ? null : posts[index - 1].node


   createPage({

     path: post.node.slug,

     component: blogPost,

     context: {

       slug: post.node.slug,

       previous,

       next,

     },

   })

 })
Cool, now if you do https://yourblog.com/first-article it will direct you to the article with first-article as slug as in the article titled “First Article”. Don’t try it now! You still have a couple more things to set up
Now go to the src/pages/index.js file. The file represents how each article is displayed in the home page. Remember, you have the article’s title and its subtitle.
If you scroll down through the file, you notice which query is being made to get the title and description of the article.
export const pageQuery = graphql`

 query {

   site {

     siteMetadata {

       title

     }

   }

   allMarkdownRemark(sort: { fields: [frontmatter___date], order: DESC }) {

     edges {

       node {

         excerpt

         fields {

           slug

         }

         frontmatter {

           date(formatString: "MMMM DD, YYYY")

           title

           description

         }

       }

     }

   }

 }

`
As you have guessed, we need to modify that query.
Note: You can leave the site title from the siteMetaData object since it’s properly queried to display the site title. Your only concern is how to get the title and subtitle of your articled from Contentful.
We need to query the following data:
- The title of each article
- The subtitle which will act as the description of each article
- The slug so that once we click on the article’s title, we’ll be directed to each article.
This is represented by the following query:
export const pageQuery = graphql`

 query {

   site {

     siteMetadata {

       title

     }

   }

   allContentfulArticle {

     edges {

       node {

         slug

         title

         subtitle

       }

     }

   }

 }

`
Then simply call that data within your BlogIndex component from above, just like you did with siteMetaData.title before.
- Change your posts constant to point to the array of articles:
const posts = data.allContentfulArticle.edges
Your posts constant now points to the array of articles you’ve created.
- Pull the title and subtitle from each article:
     {posts.map(({ node }) => {

         const title = node.frontmatter.title || node.fields.slug

         return (

           <article key={node.fields.slug}>

             <header>

               <h3

                 style={{

                   marginBottom: rhythm(1 / 4),

                 }}

               >

                 <Link style={{ boxShadow: `none` }} to={node.fields.slug}>

                   {title}

                 </Link>

               </h3>

               <small>{node.frontmatter.date}</small>

             </header>

             <section>

               <p

                 dangerouslySetInnerHTML={{

                   __html: node.frontmatter.description || node.excerpt,

                 }}

               />

             </section>

           </article>

         )

       })}
By doing posts.map, you are going through the articles array and display each article. As you can notice, to extract the title of each article, you have node.formatter.title || node.fields.slug. This is obviously wrong as you know simply have to do node.title to extract the title of an article. So let’s change that, and make sure that you are properly getting the slug of each article using node.slug and the subtitle using node.subtitle.
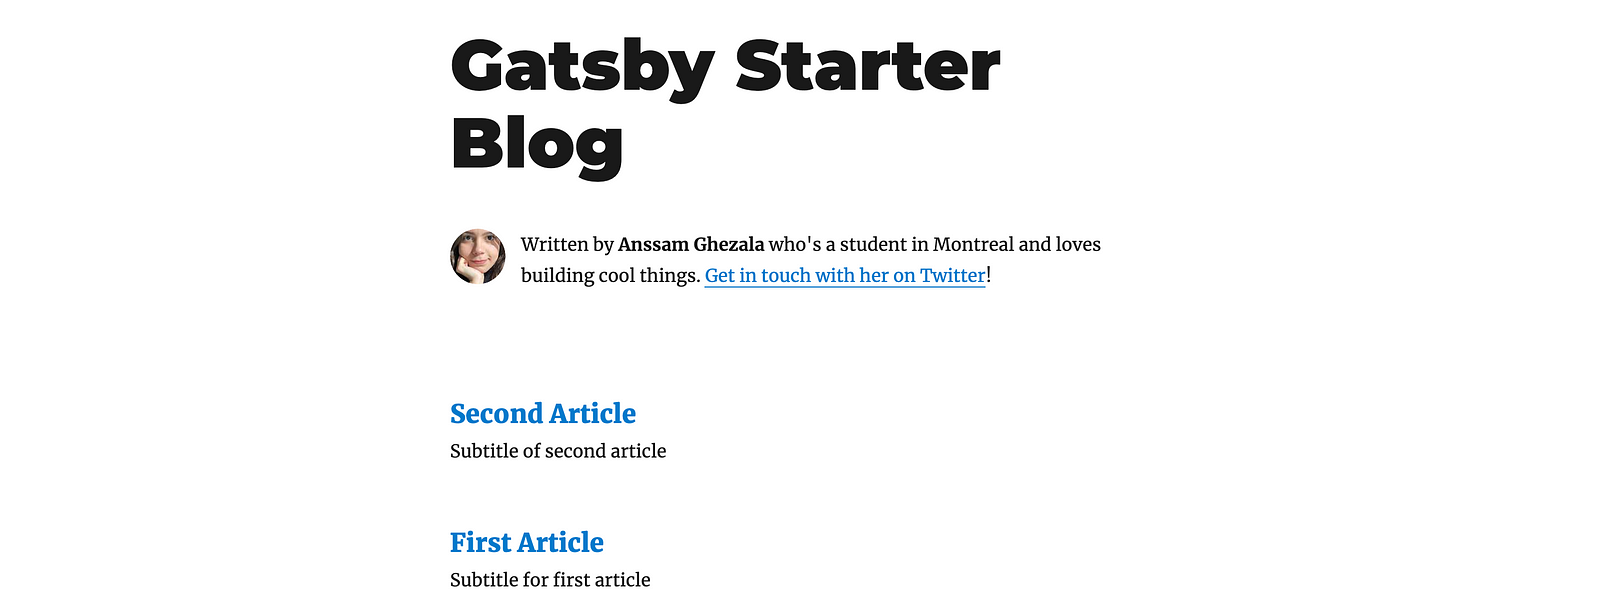
If we run gatsby develop, you can see your changed bio with your two articles!
Cool right? …Yeah but your web site breaks down if you click on any of them 😓 This is normal, since we have not yet configured how to display the content of each article.
Let’s do that, in your src/templates/blog-post.js. This file represents how each article’s content is displayed, as in, what you see when you click on an article to read it. Let’s look at how the data is being queried in this file:
export const pageQuery = graphql`

 query BlogPostBySlug($slug: String!) {

   site {

     siteMetadata {

       title

       author

     }

   }

   markdownRemark(fields: { slug: { eq: $slug } }) {

     id

     excerpt(pruneLength: 160)

     html

     frontmatter {

       title

       date(formatString: "MMMM DD, YYYY")

       description

     }

   }

 }

 `
This is obviously not how we query your data. Let’s change that by first making a list of what we need:
- The title of the article
- The subtitle of the article
- The image url of the cover photo of the article
- The content of the article
You might be thinking that our query will look like this:
However, you’ll see that this query returns the title, subtitle, image and content of all of the articles in the edges array, as in all of our articles. This is not what you want; you want the data of one specific article.
How do you target a specific article in our query?
You know that each article is distinguished by its slug. So you can target a specific article using the slug by only requesting the data of the article matching the slug you provide to the request. To do so, you can pass the slug as a parameter to the query as such:
export const pageQuery = graphql`

 query BlogPostBySlug($slug: String!) {

   site {

     siteMetadata {

       title

       author

     }

   }

   contentfulArticle(slug: { eq: $slug }) {

     title

     subtitle

     image {

       file {

         url

       }

     }

     content {

       childMarkdownRemark {

         html

       }

     }

   }

 }

`
Now you just have to fetch the data from the query properly in your component!
In the render method, change the post constant from
const post = this.props.data.markdownRemark
to the following:
const post = this.props.data.contentfulArticle
You also have to make sure that the article’s title is being pointed to by post.title and not by post.formater.title. Don’t forget to remove the <p/> element that contains the date of the article, since you didn’t add any date to our article. For the content, make sure that you are pointing to it by doing post.content.childMarkdownRemark.html, and use previous.slug and next.slug to get the slug of the previous and next article.
Now let’s add the cover image of our article. Again, you can guess how we can do that by looking at our query: we’ll simply take the url of the image by doing post.image.file.url and add it in an <img/> html element as such:
<img

   src={post.image.file.url}

   alt="Cover photo"

   style={{

      marginRight: rhythm(1 / 2),

      marginBottom: 0,

      minWidth: 50,

   }}

/>
And you’re done configuring the content of each article! 🎉
Let’s look at how all of this looks like by running gatsby develop.
Not that hard, right?
✨ Putting your site live
There are many ways for you to deploy your app. It’s up to you which tool you want to use, for the sake of this tutorial let’s show 2 possible ways: using Netlify or Zeit.
Netlify
If your project is already in a github repository, every push that you make will trigger a deploy on Netlify. If not, you can just drag and drop it in your home page on Netlify:

Zeit
- Install Now CLI:
npm i -g now
- Then, deploy your app with a single command:
now
You can configure the deployment to be done every time you push to your remote git repository using Zeit, by adding it as a project as an existing GitHub project:

Conclusion
Now you can go to Contentful and:
- Add as many articles as you want to your blog
- Save drafts to work on later
- Delete the articles you’re embarrassed about
All of with 0 lines of code! Deploy again and voilà! 🎉
Note: Why do I have to deploy again to view the changes to my articles? That’s because Gatsby runs everything including your GraphQL queries during build time. So you need to deploy to trigger another build to update the information of your blog
You can also
- Modify the content models of your website, for instance by adding a date to the article model
- Add more content models to your website, such as a “courses” section with lessons instead of articles.
- Delete any model you want
Notice: I hope this article was helpful, or that you gained something from it! My brothers and I are learning more about React and publish articles every month. Follow me on twitter @anssam_ghezala to get in touch! 🙂