
With emerging cloud technologies (i.e. Amplify, Azure functions) it is now easier than ever to build production-ready, robust, scalable modern web applications. Developers can implement Authentication, APIs, data layers, machine learning, chatbots, even AR scenes more easily than ever by taking advantage of these new serverless cloud technologies. In this practical guide I will walk you through building your very first full stack serverless application with React and AWS Amplify.
In this article I will walk you through some of the key concepts of AWS Amplify and React while building a sample application similar to Reddit or hacker news.
We will cover the following topics.
- Configuring AWS Amplify 🛠️
- Adding a Serverless API to React App 🧱
- User Authentication with Cognito 👩🚀
- GraphQL queries 🔍
The full source code for the completed project can be found at this link
Configuring AWS Amplify
Prerequisites:
Before continuing make sure you have the following configured.
- AWS account (Free Tier)
- Node.js 10.x or higher installed in your pc
- Npm 6.9.0. or higher
- Git installed in your pc
First of all we need to install the `amplify cli`. We can do this by running the following command.
npm install -g @aws-amplify/cli
After the installation is done we can configure amplify by running the following command
amplify configure
It will ask you to sign in to AWS and once you sign in it will prompt you with the instruction to create an IAM user.
***Note: IAM stands for (Identity Access Management). You can learn more about it in the following link***
You will see something similar to below in your terminal.
Specify the AWS Region?
region:  # Type Your preferred region (for me I choose ca-central)
Specify the username of the new IAM user:
user name:  # User name for Amplify IAM user
Complete the user creation using the AWS console (Y/n)
Select your preferred options. Amplify will the open up a browser tab and you have to log in to your AWS console in the browser. Then it will ask you to create a user. Make sure you create the user with administrative privileges.
**Follow this short video link if you are not sure**
Once the user is created save the accessKeyId and the secretAccessKey in a secure location. Amplify will ask you to provide these values in the terminal. When you see a user input prompt in the command line enter these values.
And that’s it. You are now all set up with Amplify.
Creating a new react app
Now that we are all set up with Amplify, let’s go ahead and create a new react application.
npx create-react-app serverless-blog
cd serverless-blog
npm start
Alright, we are now ready to add a serverless back-end to our react application.
Adding a Serverless API to React
Adding a serverless API is very simple with amplify. All we have to do is run the following command and the `amplify cli` will walk us through the process of API creation.
In the root of our react app we have to run the following command
amplify add api
Amplify CLI now will prompt us with some questions.
Please select from one of the below mentioned services: GraphQL # select GraphQL
Provide API name: serverlessblog  # choose a name for your api
Amplify gives us options to choose REST or GraphQL. For this project we will be choosing GraphQL.
Moving into the next question it will ask you what type of authorization would we like.
Choose the default authorization type for the API
For this option choose `Amazon Cognito User Pool`. We will choose this option because in our app we want the users to have the ability to signup, login and logout. We will also only allow signed up users to be able to create posts.
Next we will see couple more questions. We can choose all the default options for these questions.
Do you want to use the default authentication and security configuration? # Select Default
How do you want users to be able to sign in? # Select Username
Do you want to configure advanced settings? # Select No
Do you want to configure advanced settings for the GraphQL API # Select No
Do you have an annotated GraphQL schema? # Select No
Do you want a guided schema creation? # Select Yes
Finally it will ask you how would you describe your project? For this option select one to many
What best describes your project: One-to-many relationship
(e.g., “Blogs” with “Posts” and “Comments”)
Then the API will be generated. We will see that a folder called `Amplify` has been generated. Locate the `amplify/backend/api/schema.graphql` file. This is our schema for the database. Let’s take a look inside this file.
type Post @model @auth(
    rules: [
      {allow: owner, ownerField: "owner", operations: [create, update, delete]},
    ]
) {
  id: ID!
  title: String!
  content: String!
  owner: String
  comments: [Comment] @connection(keyName: "byPost", fields: ["id"])
}

type Comment @model @key(name: "byPost", fields: ["postID", "content"]) {
  id: ID!
  postID: ID!
  post: Post @connection(fields: ["postID"])
  content: String!
}
We have two models defined above, a Post model and a Comment model. A model represents a table in our database. By default, we are using DynamoDB from Amazon. You can login to AWS console in the browser and take a look at the DynamoDB tables. For our Post model we have mandatory fields id , title and content . The ! the symbol represents a mandatory fields. Similarly Comment model also has couple mandatory fields.
Now, the Post model has a @connection key defined in the comments field. This represents a foreign key join. The foreign key is joined to the id field of the Comment model by a key name byPost . If we look at the Comment model we can see a @key key that is doing the same. This join creates a has_many relationship between the two models. Therefore our posts have many comments. If you are familiar with relational databases you probably know this concept.
Notice, that we have another keyword @auth. This key ensures ownership. If we look at the rules associated with this key we will see that we are only allowing an owner (an authenticated user) to create, update, and delete a record. It will also prevent a user from deleting a post created by some else.
Alright, now let’s push our code to AWS cloud with the following command
Amplify push
Amplify CLI will prompt you with an option to choose code generation language. Choose Javascript. This will generate some code for us. We will be using this generated code for graphql queries and mutations.
You can find the code for the project up to this point in the following link
👉 https://github.com/Shadid12/serverless-blog/tree/01-initial-setup
Let’s Create a Home Page 🏠
We would like to have a home page with all the latest posts listed. So let’s go to our src/App.js and create a new `Home` React component.
// src/App.js

import React from 'react';
import Home from './components/Home'

function App() {
  return (
    <Home />
  );
}

export default App;
We can create a new directory called component and create a new file Home.js for our Home component.
// src/components/Home.js

import React from 'react';

function Home() {
  const posts = [
      {
          id: 'id-1',
          title: 'dummy title',
          content: 'dummy content'
      },
      {
        id: 'id-2',
        title: 'dummy title 2',
        content: 'dummy content 2'
    }
  ];


  return (
    <div >
      <ul>
          {posts.map(p => (
              <li>
                  <h3><a href="">{p.title}</a></h3>
                  <p>{p.content}</p>
              </li>
          ))}
      </ul>
    </div>
  );
}

export default Home;
We created some hardcoded values for posts. We will replace this with an API call later on.
User Authentication with Cognito
Let’s dive into authentication. First of all we need to install a couple of npm packages.
npm i aws-amplify-react aws-amplify --save
These two packages makes it really easy to add user authentication with react. First of all, we need to configure Amplify back end with react. Let’s open up src/index.js file and add the following code.
import React from 'react';
import ReactDOM from 'react-dom';
import App from './App';
import Amplify from 'aws-amplify';
import aws_export from './aws-exports';

Amplify.configure(aws_export);

ReactDOM.render(
  <React.StrictMode>
    <App />
  </React.StrictMode>,
  document.getElementById('root')
);
We are doing couple things here. First of all, we are importing aws_export. This file was generated through amplify code generator. This file contains our project metadata. Make sure to always gitignore this file as it contains sensitive data. We then import Amplify instance and call the configure method with aws_export as parameter.
Next we will go to our home component and we will import a higher-order component called `withAuthenticator` from `aws-amplify-react` package. All we have to do it to wrap our Home component with this higher-order component to make it authentication protected.
import React from 'react';
import { withAuthenticator } from 'aws-amplify-react';

function Home() {
  const posts = [
      {
          id: 'id-1',
          title: 'dummy title',
          content: 'dummy content'
      },
      {
        id: 'id-2',
        title: 'dummy title 2',
        content: 'dummy content 2'
    }
  ];


  return (
    <div >
      <ul>
          {posts.map(p => (
              <li>
                  <h3><a href="">{p.title}</a></h3>
                  <p>{p.content}</p>
              </li>
          ))}
      </ul>
    </div>
  );
}

export default withAuthenticator(Home );
That’s pretty much does the trick. Simple and easy. Now if we go to our app we should see a login screen. We are only able to view the Home component when we are logged in.
Now that is neat ✨✨. Amplify even created an authentication verification process for us. First-time users will receive an email confirmation to verify their account.
GraphQL queries
Classic CRUD
Pretty much every web application has the basic CRUD (Create, Read, Update, Delete) functionality. In our app we’ll have this functionality as well. A user will be able to create, read, update, and delete posts and comments.
Creating a Post
When our user is logged in he/she should see a link to create a new post and when user clicks the click it should take him/her to a new page with a form. Then the user submits the form and a new post is created. To achieve this we need to be able to route to different links. We’ll be using the react-router-dom package to do the routing.
Let’s install this package and bring it in our project.
npm i react-router-dom --save
Now, in our App.js file we can modify our code to route into different URLs.
import React from 'react';
import Home from './components/Home';
import Post from './components/Post';
import {
  BrowserRouter as Router,
  Switch,
  Route,
  Link
} from "react-router-dom";

function App() {
  return (
    <Router>
      <div>
        <ul>
            <li>
              <Link to="/">Home</Link>
            </li>
            <li>
              <Link to="/posts/new">New Post</Link>
            </li>
         </ul>

          <Switch>
            <Route exact path="/">
              <Home />
            </Route>
            <Route path="/posts/new">
              <Post />
            </Route>
          </Switch>
      </div>
    </Router>
  );
}

export default App;
As you can see in the code above we created a list of navigation links. The links correspond to different react components. When we switch to a different link that component is mounted. The Home component is rendered in the root URL and Post component will render in the /posts/new link. We haven’t created the post component yet so let’s create that component.
import React from 'react';

function Post() {
    const [title, setTile] = React.useState();
    const [content, setContent] = React.useState();

    const handleSubmit = event => {
        event.preventDefault();
    }

    return (
      <div>
        <form onSubmit={handleSubmit}>
            <div>
            <label>
                Title:
                <input type="text" value={title} onChange={
                    (e) => setTile(e.target.value)
                } />
            </label>
            </div>
            <div>
            <label>
                Content:
                <textarea type="text" value={content} onChange={
                    (e) => setContent(e.target.value)
                } />
            </label>
            </div>
            <input type="submit" value="Submit" />
        </form>
      </div>
    );
}

export default Post;
This is a very basic react component where we have a form and we have two hooks that are changing the state of the component based on user input. When the user submits the form we call the handleSubmit function. We will make our API call in this function. So let’s implement that.
If we navigate to the `src/graphql/mutations.js` we will see that amplify has already generated some code for us. In this file, we have a function called createPost. We have to import this function in our component and execute the mutation. Here’s the code to do that.
import React from 'react';
import { API, graphqlOperation } from 'aws-amplify';
import { createPost } from '../graphql/mutations';

function Post() {
    const [title, setTitle] = React.useState();
    const [content, setContent] = React.useState();

    const handleSubmit = async event => {
        event.preventDefault();
        try {
             let input = {
               title,
               content
            }
             let newPost = await API.graphql(graphqlOperation(createPost, {input}));
             setTitle('');
             setContent('');
             console.log('new post created ->>', newPost)
            }catch (error) {
            console.log(error)
        }
    }

    return (
      <div>
        <form onSubmit={handleSubmit}>
            <div>
            <label>
                Title:
                <input type="text" value={title} onChange={
                    (e) => setTitle(e.target.value)
                } />
            </label>
            </div>
            <div>
            <label>
                Content:
                <textarea type="text" value={content} onChange={
                    (e) => setContent(e.target.value)
                } />
            </label>
            </div>
            <input type="submit" value="Submit" />
        </form>
      </div>
    );
}

export default Post;
You can log in to AWS console in the browser and navigate to AppSync and select our application. Select queries from the menu.
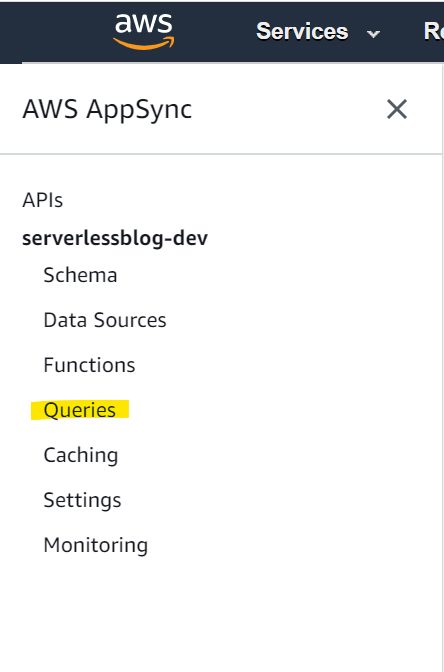
From here click on docs and you will be able to see a detailed docs about all the queries and mutations for our app. We can also verify what parameters are needed for a generated mutation function.
Listing all Posts
Let’s list all the posts on our home page now. If we go look at the `src/graphql/queries.js` file we will see a `listPosts` query function. We can call this function to list all the posts. Let’s call this function in our Home component on the component mount. This function will return all the posts from the database and we will be rendering them on our home page.
// Home.js

import React from 'react';
import { withAuthenticator } from 'aws-amplify-react';
import { API, graphqlOperation } from 'aws-amplify';
import { listPosts } from '../graphql/queries';

function Home() {
  const [posts, setPosts] = React.useState([])
  React.useEffect(() => {
    getPosts();
  }, []);

  const getPosts = async () => {
    try {
      let resp = await API.graphql(graphqlOperation(listPosts));
      console.log('===>>>>',resp);
      setPosts(resp.data.listPosts.items)
    } catch (error) {
      console.log('Something went wrong', error);
    }
  }

  return (
    <div >
      <ul>
          {posts.map(p => (
              <li>
                  <h4><a href="">{p.title}</a></h4>
                  <span>By {p.owner}</span>
                  <div>
                    <button>delete</button>
                    <button>Edit</button>
                  </div>
              </li>
          ))}
      </ul>
    </div>
  );
}

export default withAuthenticator(Home);
The code up to this point can be found in the following link
👉 https://github.com/Shadid12/serverless-blog/tree/03-create-read-update-delete
Deleting a Post
Let’s implement deleting a post now. We are already rendering a delete button for each posts. Now we will attach an action when the button is pressed. As you can guess there is a graphql mutation for deleting a post. All we have to do is call this mutation. Here’s the code implementation
import React from 'react';
import { withAuthenticator } from 'aws-amplify-react';
import { API, graphqlOperation } from 'aws-amplify';
import { listPosts } from '../graphql/queries';
import { deletePost } from '../graphql/mutations';
import {
  Link
} from "react-router-dom";

function Home() {
  const [posts, setPosts] = React.useState([])
  React.useEffect(() => {
    getPosts();
  }, []);

  const getPosts = async () => {
    try {
      let resp = await API.graphql(graphqlOperation(listPosts));
      console.log('===>>>>',resp);
      setPosts(resp.data.listPosts.items)
    } catch (error) {
      console.log('Something went wrong', error);
    }
  }

  const deleteSelected = async id => {
    try {
      let input = {
        id
      }
      let deleted  = await API.graphql(graphqlOperation(deletePost, {input}));
      let newPosts = posts.filter(p => p.id !== id);
      setPosts(newPosts);
      console.log('Post delete', deleted);
    } catch (error) {
      alert('Not Allowed', error);
    }
  }


  return (
    <div >
      <ul>
          {posts.map(p => (
              <li>
                  <h4><a href="">{p.title}</a></h4>
                  <span>By {p.owner}</span>
                  <div>
                  <button onClick={() => deleteSelected(p.id)}>delete</button>
                  <Link to={`/posts/edit/${p.id}`}>Edit</Link>
                  </div>
              </li>
          ))}
      </ul>
    </div>
  );
}

export default withAuthenticator(Home);
As you can see above we pass in the postId as a param in the function and call the deletePost mutation.
Update a Post
For Each post we have a update button. When user clicks on this button we should route to a update post route. Let’s create a new route in our App Component.
// App.js

<Switch>
   <Route exact path="/">
      <Home />
   </Route>
   <Route path="/posts/new">
      <Post />
   </Route>
   <Route path="/posts/edit/:id">
      <EditPost />
   </Route>
</Switch>
// App.js

<Switch>
   <Route exact path="/">
      <Home />
   </Route>
   <Route path="/posts/new">
      <Post />
   </Route>
   <Route path="/posts/edit/:id">
      <EditPost />
   </Route>
</Switch>
We will create a new component called `EditPost`. This component will get the `id` of a post from the URL and query that post in the database. After it retrieves a post it will let the user update its content. Once a user updates the input and hits the submit button it will make an update call to our API. Let’s implement this `EditPost` component.
import React from 'react';
import { API, graphqlOperation } from 'aws-amplify';
import { updatePost } from '../graphql/mutations';
import { getPost } from '../graphql/queries';
import { useParams } from "react-router-dom";

function EditPost() {
    let { id } = useParams();
    const [title, setTitle] = React.useState();
    const [content, setContent] = React.useState();

    React.useEffect(() => {
        queryPostById();
    }, [])

    const queryPostById = async () => {
        const resp = await API.graphql(graphqlOperation(getPost, { id }));
        console.log('--->>>>', resp)
        setTitle(resp.data.getPost.title);
        setContent(resp.data.getPost.content);
    }

    const handleSubmit = async event => {
        event.preventDefault();
        try {
            let input = {
                id,
                title,
                content
            }
            let newPost = await API.graphql(graphqlOperation(updatePost, {input}));
            setTitle('');
            setContent('');
            console.log('Post Updated ->>', newPost)
          } catch (error) {
            console.log(error)
        }
    }

    return (
      <div>
        <form onSubmit={handleSubmit}>
            <div>
            <label>
                Title:
                <input type="text" value={title} onChange={
                    (e) => setTitle(e.target.value)
                } />
            </label>
            </div>
            <div>
            <label>
                Content:
                <textarea type="text" value={content} onChange={
                    (e) => setContent(e.target.value)
                } />
            </label>
            </div>
            <input type="submit" value="Submit" />
        </form>
      </div>
    );
}

export default EditPost;
import React from 'react';
import { API, graphqlOperation } from 'aws-amplify';
import { updatePost } from '../graphql/mutations';
import { getPost } from '../graphql/queries';
import { useParams } from "react-router-dom";
function EditPost() {
let { id } = useParams();
const [title, setTitle] = React.useState();
const [content, setContent] = React.useState();
React.useEffect(() => {
queryPostById();
}, [])
const queryPostById = async () => {
const resp = await API.graphql(graphqlOperation(getPost, { id }));
console.log('--->>>>', resp)
setTitle(resp.data.getPost.title);
setContent(resp.data.getPost.content);
}
const handleSubmit = async event => {
event.preventDefault();
try {
let input = {
id,
title,
content
}
let newPost = await API.graphql(graphqlOperation(updatePost, {input}));
setTitle('');
setContent('');
console.log('Post Updated ->>', newPost)
} catch (error) {
console.log(error)
}
}
return (
<div>
<form onSubmit={handleSubmit}>
<div>
<label>
Title:
<input type="text" value={title} onChange={
(e) => setTitle(e.target.value)
} />
</label>
</div>
<div>
<label>
Content:
<textarea type="text" value={content} onChange={
(e) => setContent(e.target.value)
} />
</label>
</div>
<input type="submit" value="Submit" />
</form>
</div>
);
}
export default EditPost;This component is very similar to our post component. The only main difference is that on component load we fetch a post and populate the input with the post information. A user can update the content and title. When a user submits the form we call the update mutation from graphql.
We have to change one last thing in our `Home` component. We have to add in change the edit link so that it routes to the proper post.
return (
    <div >
      <ul>
          {posts.map(p => (
              <li>
                  <h4><a href="">{p.title}</a></h4>
                  <span>By {p.owner}</span>
                  <div>
                  <button onClick={() => deleteSelected(p.id)}>delete</button>
                  <Link to={`/posts/edit/${p.id}`}>Edit</Link>
                  </div>
              </li>
          ))}
      </ul>
    </div>
  )
Perfect, we are done with the update functionality.
You can find the source code up to this point in the following repository.
https://github.com/Shadid12/serverless-blog/tree/04-delete-view
Viewing a Post
Let’s see how we can get a detailed view of a particular post. When a user clicks on the post it should route to a detailed view where the user can see the post title, detail and comments associated with that post. This functionality is very similar to update functionality. Let’s start by creating a new route in the `App` component.
<Route path="/posts/:id">
    <ViewPost />
</Route>
Now let’s create the ViewPost component.
import React from 'react';
import { API, graphqlOperation } from 'aws-amplify';
import { getPost } from '../graphql/queries';
import { useParams } from "react-router-dom";

function ViewPost() {
    let { id } = useParams();
    const [post, setPost] = React.useState();

    React.useEffect(() => {
        queryPostById();
    }, [])

    const queryPostById = async () => {
        const resp = await API.graphql(graphqlOperation(getPost, { id }));
        console.log('--->>>>', resp)
        setPost(resp.data.getPost);
    }

    if(!post) {
        return <div>Loading....</div>
    }
    return (
      <div>
        <h1>{post.title}</h1>
        <div>
            <span>By <b>{post.owner}</b></span>
        </div>
        <p>{post.content}</p>
        <ul>
            {
                post.comments.items.map(com => (<li>{com.content}</li>))
            }
        </ul>
      </div>
    );
}

export default ViewPost;
As you can see above the view post component is querying the post by id from database and then it is displaying the content of the post.
Now in our home component we need to change the url like below.
return (
    <div >
      <ul>
          {posts.map(p => (
              <li>
                  <h4><Link to={`/posts/${p.id}`}>{p.title}</Link></h4>
                  <span>By {p.owner}</span>
                  <div>
                  <button onClick={() => deleteSelected(p.id)}>delete</button>
                  <Link to={`/posts/edit/${p.id}`}>Edit</Link>
                  </div>
              </li>
          ))}
      </ul>
    </div>
  );
And that’s it. We have implemented create, read and update and delete. As an exercise you can try to add comments to each post.
I hope the topics discussed in this article was helpful. The basic concepts we discussed should be enough to get you started with your own full-stack serverless applications. If you have any questions feel free to drop a comment. Until next time 😄