

Defenition: POS – “Point of Sale”. At the point of sale, the merchant calculates the amount owed by the customer, indicates that amount, may prepare an invoice for the customer (which may be a cash register printout), and indicates the options for the customer to make payment.
Setup ReCaptcha and define CORSPrevious article: Optimize App and Setup Deployment Workflow.
For the Frontend, we will use ReCaptcha protected form;
For backend, we will define CORS, which will be receiving requests only from the Frontend.
Setup ReCaptcha protected frontend
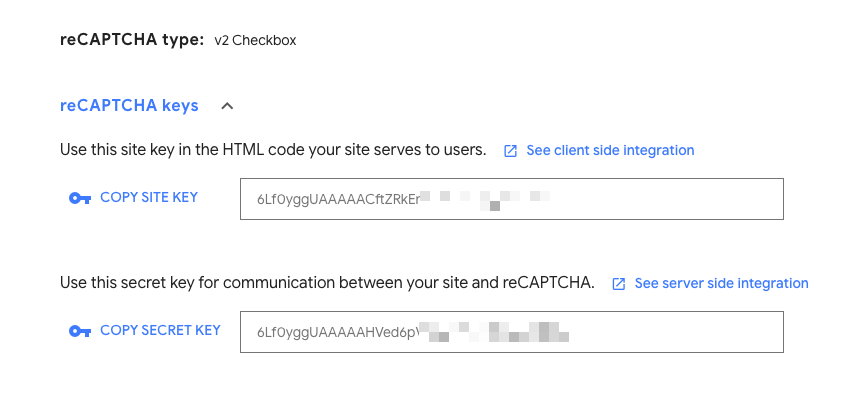
Step one: We will get Recaptcha key from Google
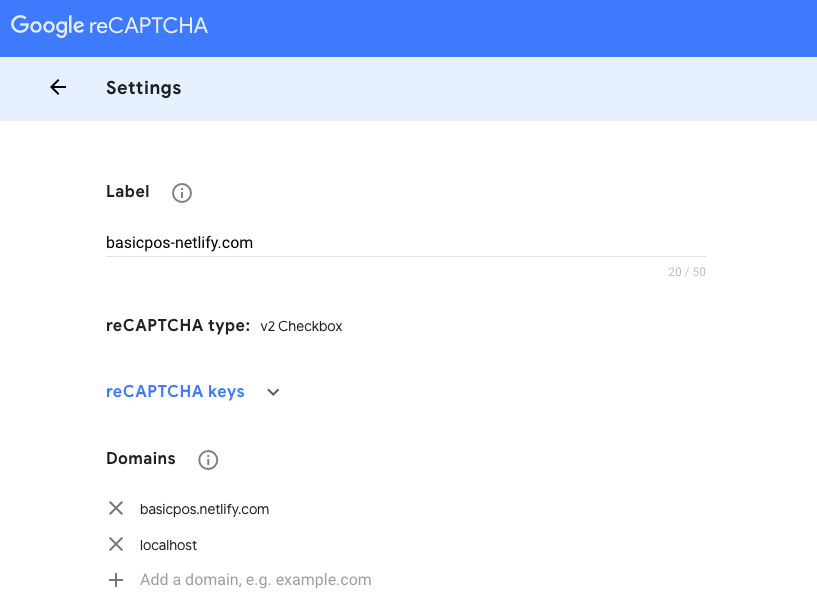
Step two: Add our whitelist domain, then choose localhost and Netlify, then grab Recaptcha key, and finally, set up on Netlify first
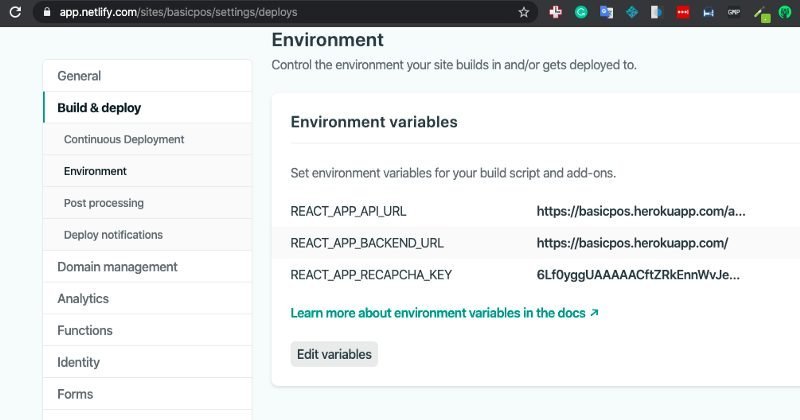
Step three: Setting up on Netlify. Go to Netlify dashboard and setup Recaptcha Key as an environment variable
Step four: Now come back to local and install React Captcha package
npm install react-recaptcha
Step five: Next step is to import Recaptcha
import Recaptcha from "react-recaptcha";
Step six: Add validation rule name Recaptcha as required
const LoginSchema = Yup.object().shape({
   username: Yup.string()
                .min(2, "username is Too Short!")
                .max(50, "username is Too Long!")
                .required("Username is Required"),
            recaptcha: Yup.string().required(),
            password: Yup.string().required("Password is required")
   });
Step seven: We will create a function for initializing Recaptcha
initilizeRecaptcha = async => {
const script = document.createElement("script");
script.src = "https://www.google.com/recaptcha/api.js";
script.async = true;
script.defer = true;
document.body.appendChild(script);
};
componentDidMount() {
this.initilizeRecaptcha();
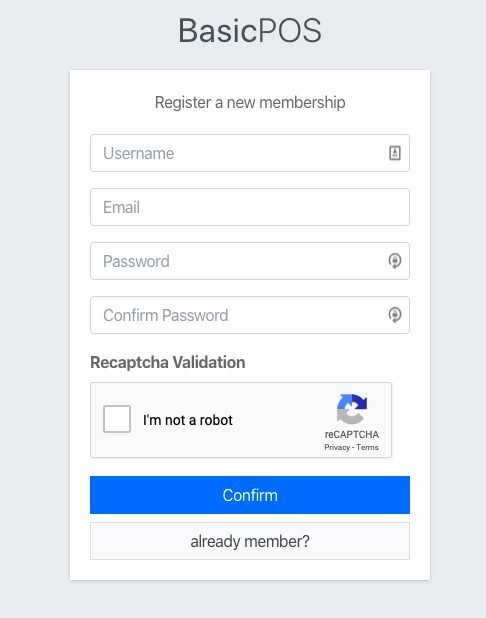
}Last step: Add <Recaptcha> component and a validation message
<div className="form-group">
<label>Recaptcha Validation</label>
<Recaptcha
sitekey={process.env.REACT_APP_RECAPCHA_KEY}
render="explicit"
theme="light"
verifyCallback={response => {
setFieldValue("recaptcha", response);
}}
onloadCallback={() => {
console.log("done loading!");
}}
/>
{errors.recaptcha && touched.recaptcha && <p>{errors.recaptcha}</p>}
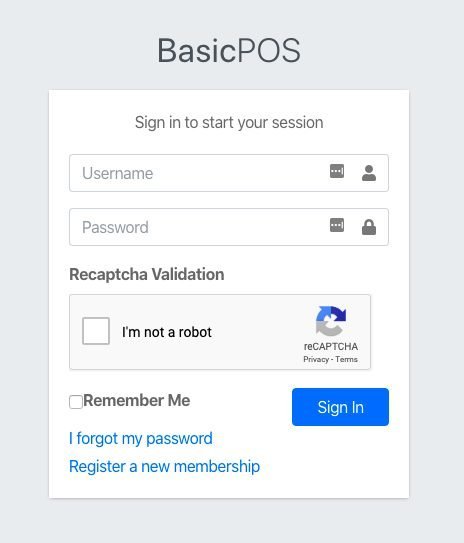
</div>Your final result should look like the image below
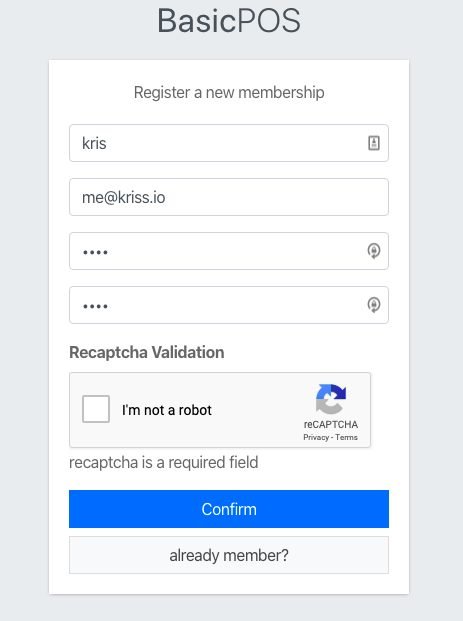
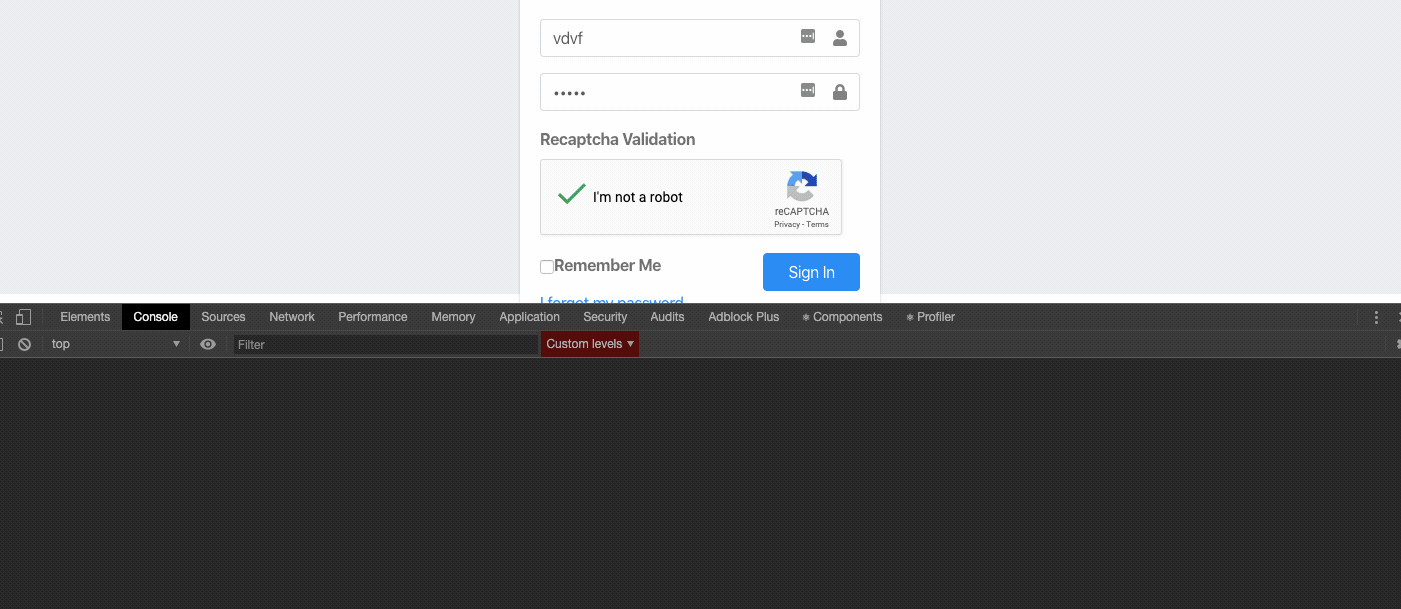
One more step: We’ll be adding register and forgot password form

You will be able to fill all input, but can’t submit without resolving the Recaptcha
The last thing is to push to GitHub which will also auto-deploy to Netlify
Setup CORS protected backend
Now we want to add whitelist IP or domain name to CORS option, open index.js on backend side then update CORS as seen in the image below;
var allowedOrigins = ['http://localhost:3000',
                      'https://basicpos.netlify.com/'];
app.use(cors({
  origin: function(origin, callback){
    // allow requests with no origin
    // (like mobile apps or curl requests)
    if(!origin) return callback(null, true);
    if(allowedOrigins.indexOf(origin) === -1){
      var msg = 'The CORS policy for this site does not ' +
                'allow access from the specified Origin.';
      return res.json({status:'error',msg});
    }
    return callback(null, true);
  }
}));
If an error occurs, try changing to another domain
Now push the updated code to Github. Finally, we can now protect our backend from unknown request
Conclusion
In this chapter, we have learned how to make our apps safe on the internet by setting up Recaptcha on React and CORS on Express. next chapter we will add redux that make our app are solid foundation one last thing your will find code for this chapter on this backend branch and frontend branch
Previous lessons:
Create Simple POS With React, Node and MongoDB #4: Optimize App and Setup Deployment Workflow
Create simple POS with React, Node and MongoDB #3: setup E-mail pipeline with add activate on SignUp
Create simple POS with React, Node and MongoDB #2: Auth state, Logout, Update Profile
Create a simple POS with React, Node and MongoDB #1: Register and Login with JWT