


Defenition: POS – “Point of Sale”. At the point of sale, the merchant calculates the amount owed by the customer, indicates that amount, may prepare an invoice for the customer (which may be a cash register printout), and indicates the options for the customer to make payment.
Previous article: Auth state, Logout, Update Profile
This is the third chapter of our series of developing a POS with React, Node, and MongoDB. In this chapter, we are going to set up an email service that can be used for multiple purposes such as sending daily revenue reports, notifications, and so on. As the first usage, we will set up sending account activation emails to newly registered users.
Activate Account
After a user successfully registering to the system, a notification will inform the user to activate the account through an activation link sent to the user’s email account. The activation link redirects the user to the login page after activating the user account. A newly registered user’s account will be frozen until the activation is completed.
Block Login
We have to add status and token fields to the user schema of the database to differentiate the user’s current account status.
const mongoose = require("mongoose");
const schema = mongoose.Schema({
  avatars: String,
  username: String,
  email: String,
  first_name: { type: String, default: "" },
  last_name: { type: String, default: "" },
  phone: { type: String, default: "" },
  address: { type: String, default: "" },
  password: String,
  status: { data: String, default: "not_activate" },
  activated_token: { type: String, default: "" },
  level: { type: String, default: "staff" },
  created: { type: Date, default: Date.now }
});

schema.index({ username: 1 }, { unique: true });
module.exports = mongoose.model("users", schema);
Register a new user to create a user record with the new user fields.
In the backend, update the login function to ensure that only the users who have activated the account can log in to the account. If the user status is not activated, logging in is denied.
if (bcrypt.compareSync(req.body.password, doc.password)) {
      if (doc.status != "not_activated") {
        const payload = {
          id: doc._id,
          level: doc.level,
          username: doc.username
        };

        let token = jwt.sign(payload);
        console.log(token);
        res.json({ result: "success", token, message: "Login successfully" });
      } else {
        return res.json({
          result: "error",
          message: "Your need to activate account first"
        });
      }
Here is the result.

Now, we will implement the activation process.
Set up Token using JWT
We use jsonwebtoken package to handle the creation and verification of the token, and SendGrid as the email provider.
First, we will set up SendGrid.
Sign into SendGrid and then select the option of API_KEY.

Create a new API key.

Install the sendgrid package to the project using yarn.
yarn add @sendgrid/mail
Import the package and add set the API key using the generated API key.
const sgMail = require("@sendgrid/mail");
sgMail.setApiKey("SG.EaHyDwHnQN6I4SXQKaNo6g.Mhpx");
Add the following code changes to the register route in your backend.
app.post("/register", async (req, res) => {
  try {
    req.body.password = await bcrypt.hash(req.body.password, 8);

    const { first_name, last_name, email } = req.body;
    const token = jsonwebtoken.sign(
      { first_name, last_name, email },
      "process.env.JWT_ACCOUNT_ACTIVATION",
      { expiresIn: "365d" }
    );
    const emailData = {
      from: "admin@basicpos.io",
      to: email,
      subject: `Account activation link`,
      html: `
          <h1>Please use the following link to activate your account</h1>
          <p>localhost:3000/activation/${token}</p>
          <hr />
          <p>This email may contain sensetive information</p>
          <p>and link will  expired in 60 minutes</p>
      `
    };
    req.body.activated_token = token;
    let user = await Users.create(req.body);
    sgMail
      .send(emailData)
      .then(sent => {
        // console.log('SIGNUP EMAIL SENT', sent)
        return res.json({
          result: "warning",
          message: `Email has been sent to ${email}. Follow the instruction to activate your account`
        });
      })
      .catch(err => {
        // console.log('SIGNUP EMAIL SENT ERROR', err)
        return res.json({
          result: "error",
          message: err.message
        });
      });
  } catch (err) {
    res.json({ result: "error", message: err.errmsg });
  }
});
Let’s review the changes made to the above route.
- Extract first_name, last_name and email from the request body.
- Generate a token from the user data. Here, the used JWT_ACCOUNT_ACTIVATION environment variable will be added to the project’s .env file in an upcoming tutorial. Adding any string as the secret for JWT generation is enough for now. Set up the expiration time of the token to 365 days.
- Set up the email body.
- Add the generated token to the body and also save it to the database.
- Finally, send the email.
Let’s try out registering into the system now.
Registering into the systemYou will see that the email has been sent to your email account.
Activated Account
Now, we will implement the activation route to activate the account through the sent activation link.
app.get("/activation/:token", async (req, res) => {
  let token = req.params.token;

  if (token) {
    jsonwebtoken.verify(token, "process.env.JWT_ACCOUNT_ACTIVATION", function(
      err,
      decoded
    ) {
      if (err) {
        console.log("JWT VERIFY IN ACCOUNT ACTIVATION ERROR", err);
        return res.redirect("http://localhost:3000/login/error");
      }
    });
    let updatedFields = {
      status: "active",
      activated_token: ""
    };
    let doc = await Users.findOneAndUpdate(
      { activated_token: token },
      updatedFields
    );
    return res.redirect("http://localhost:3000/login/success");
  }
});
Retrieve the token from the URL and use jsonwentoken to verify the token. If the token cannot be verified, redirect the user back to the login page.
If the token is successfully verified, update the user status and redirect to the login page with the status attached to an optional parameter named notify.
Update the login route to add the optional parameter.
<Route path ="/login/:notify?" component={Login} />Add Sweetalert to login.js to notify whether the activation was successful or not when the user is redirected to the login page.
componentDidMount() {
    if (localStorage.getItem("TOKEN_KEY") != null) {
      return this.props.history.push('/dashboard');
    }
    let notify = this.props.match.params["notify"]
    if(notify !== undefined){
      if(notify == 'error'){
        swal("Activation Fail please try again !", '', "error")
      }else if(notify == 'success'){
        swal("Activation Success your can login !", '', "success")
      }

    }
  }
When you click the activation URL from the email and try to log in, you will see an alert on the activation status.
Account activation successPassword Forgot and Password Reset
Next, we generate two new components to handle password reset and forgot password action.

Add the two new components to the Router
import Passwordreset from "./components/passwordreset";
import Passwordforgot from "./components/passwordforgot";
Activate the routes.
<Route path="/password-reset/:token" component={Passwordreset} />
<Route path="/password-forgot" component={Passwordforgot} />
Now, we will implement Passwordforgot feature which prompts the user email to continue the password resetting process.
We can reuse the code from the register page after some changes as you can see here.
import React, { Component } from "react";
import { Formik } from "formik";
import * as Yup from "yup";
import axios from "axios";
import swal from "sweetalert";
import { Link } from "react-router-dom";
const PasswordForgotSchema = Yup.object().shape({
  email: Yup.string()
    .email("Invalid email")
    .required("Email is Required")
});

class Passwordforgot extends Component {
  constructor(props) {
    super(props);

    this.state = {
      error_message: null,
    };
  }

  submitForm = async formData => {
    await axios
      .post("http://localhost:8080/password/reset", formData)
      .then(res => {
        console.log(res.data.result);
        if (res.data.result === "success") {
          swal("Success!", res.data.message, "success")
        } else if (res.data.result === "error") {
          swal("Error!", res.data.message, "error");
        }
      })
      .catch(error => {
        console.log(error);
        swal("Error!", "Unexpected error", "error");
      });
  };
  showForm = ({
    values,
    errors,
    touched,
    handleChange,
    handleSubmit,
    onSubmit,
    isSubmitting,
    setFieldValue
  }) => {
    return (
      <form role="form" onSubmit={handleSubmit}>
        <div className="card-body">
          <div className="form-group  has-feedback">
            <label htmlFor="email">Email address</label>
            <input
              onChange={handleChange}
              value={values.email}
              type="email"
              className={
                errors.email && touched.email
                  ? "form-control is-invalid"
                  : "form-control"
              }
              id="email"
              placeholder="Enter email"
            />
            {errors.email && touched.email ? (
              <small id="passwordHelp" class="text-danger">
                {errors.email}
              </small>
            ) : null}
          </div>
        </div>

        <div class="row">
          <div class="col-12">
            <button
              type="submit"
              disable={isSubmitting}
              class="btn btn-primary btn-block"
            >
              Request new password
            </button>
          </div>
        </div>
      </form>
    );
  };

  render() {
    return (
      <div className="login-page">
        <div className="login-box">
          <div className="login-logo">
            <a href="#">
              <b>Basic</b>POS
            </a>
          </div>
          {/* /.login-logo */}
          <div className="card">
            <div className="card-body login-card-body">
              <p className="login-box-msg">
                You forgot your password? Here you can easily retrieve a new
                password.
              </p>
              <Formik
                initialValues={{
                  username: ""
                }}
                onSubmit={(values, { setSubmitting }) => {
                  this.submitForm(values, this.props.history);
                  setSubmitting(false);
                }}
                validationSchema={PasswordForgotSchema}
              >
                {/* {this.showForm()}            */}
                {props => this.showForm(props)}
              </Formik>
              <Link to="/login">Login</Link>
              <p className="mb-0">
                <Link to="/register">Register a new membership</Link>
              </p>
            </div>
            {/* /.login-card-body */}
          </div>
        </div>
      </div>
    );
  }
}

export default Passwordforgot;
The resulting page looks like this.

Now, we have to implement the backend functions to send emails when the user wants to reset the password.
Add a new field to the user schema to store the reset token.
const schema = mongoose.Schema({
  avatars: String,
  username: String,
  email: String,
  first_name: { type: String, default: "" },
  last_name: { type: String, default: "" },
  phone: { type: String, default: "" },
  address: { type: String, default: "" },
  password: String,
  status: { type: String, default: "not_activated" },
  activated_token: { type: String, default: "" },
  resetPasswordToken: { type: String, default: "" },
  level: { type: String, default: "staff" },
  created: { type: Date, default: Date.now }
});
Implement the new password reset function.
app.post("/password/reset", async (req, res) => {
let expired_time = "60m";
const { email } = req.body;
Users.findOne({ email }, (err, user) => {
if (err || !user) {
return res.json({
result: "error",
message: "User with that email does not exist"
});
}
const token = jsonwebtoken.sign(
{ _id: user._id, name: user.first_name },
"process.env.JWT_RESET_PASSWORD",
{
expiresIn: expired_time
}
);
const emailData = {
from: "admin@basicpos.io",
to: email,
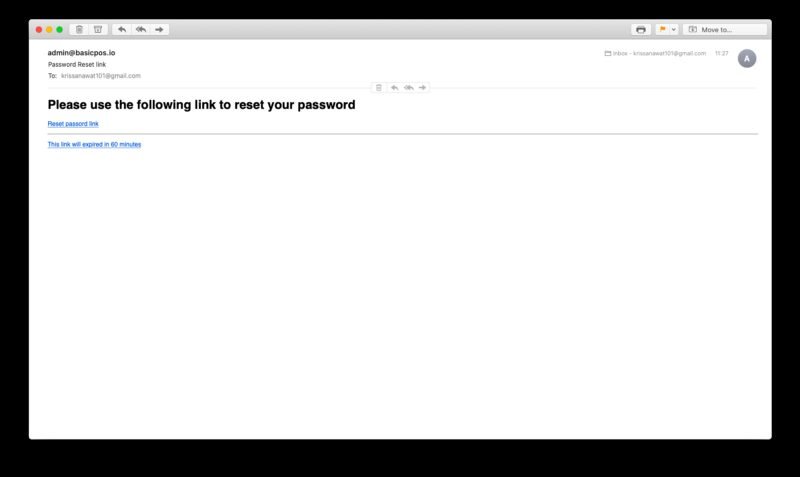
subject: `Password Reset link`,
html: `
<h1>Please use the following link to reset your password</h1>
<a href="http://localhost:3000/password-reset/${token}">Reset passord link</p>
<hr />
<p>This link will expired in 60 minutes</p>
`
};
user.updateOne({ resetPasswordToken: token }, (err, success) => {
if (err) {
console.log("RESET PASSWORD LINK ERROR", err);
return res.status(400).json({
result: "error",
message: "Database connection error on user password forgot request"
});
} else {
sgMail
.send(emailData)
.then(response => {
return res.json({
result: "success",
message: `Email has been sent to ${email}. Follow the instruction to activate your account`
});
})
.catch(err => {
return res.json({ result: "error", message: err.message });
});
}
});
});
});- Find the user by the submitted email.
- Generate a token from the user data.
- Attach the token to the email body and add some content with password reset information.
- Add the token to the database and send the email. Send an alert to inform that an email was sent to the user.
You can see the sent email in your inbox.

Now, we will implement the page for setting a new password.
http://localhost:3000/password/reset/token
We can reuse the code from the Passwordforgot page with some minor changes.
Retrieve the token from the URL and add it to the form as a hidden input named resetPasswordToken. Change the axios request to a put request.
import React, { Component } from "react";
import { Formik } from "formik";
import * as Yup from "yup";
import axios from "axios";
import swal from "sweetalert";
const PasswordresetSchema = Yup.object().shape({
  password: Yup.string().required("New Password is required"),
  confirm_password: Yup.string().oneOf(
    [Yup.ref("password"), null],
    "Both password need to be the same"
  )
});

class Passwordreset extends Component {
  constructor(props) {
    super(props);

    this.state = {
      response: {},
      error_message: null,
    };
  }

  submitForm = async (values, history,token) => {

    await axios
      .put("http://localhost:8080/password/reset?token=" + token, values)
      .then(res => {
        if (res.data.result === "success") {
          swal("Success!", res.data.message, "success")
          .then(value => {
            history.push("/login");
          });
        } else if (res.data.result === "error") {
          swal("Error!", res.data.message, "error");
        }
      })
      .catch(error => {
        console.log(error);
        swal("Error!", "Unexpected error", "error");
      });
  };
  showForm = ({
    values,
    errors,
    touched,
    handleChange,
    handleSubmit,
    onSubmit,
    isSubmitting,
    setFieldValue
  }) => {
    return (
      <form role="form" onSubmit={handleSubmit}>
        <div className="card-body">
          <div className="form-group  has-feedback">
            <label htmlFor="password">Password:</label>
            <input
              name="password"
              onChange={handleChange}
              value={values.password}
              type="password"
              className={
                errors.password && touched.password
                  ? "form-control is-invalid"
                  : "form-control"
              }
              id="password"
              placeholder="Enter new password"
            />
            {errors.password && touched.password ? (
              <small id="passwordHelp" class="text-danger">
                {errors.password}
              </small>
            ) : null}
          </div>
          <div className="form-group  has-feedback">
            <label htmlFor="password">Confirm Password:</label>

            <input
              onChange={handleChange}
              value={values.confirm_password}
              type="password"
              className={
                errors.confirm_password && touched.confirm_password
                  ? "form-control is-invalid"
                  : "form-control"
              }
              id="confirm_password"
              name="confirm_password  "
              placeholder="Enter password again"
            />
            {errors.confirm_password && touched.confirm_password ? (
              <small id="passwordHelp" class="text-danger">
                {errors.confirm_password}
              </small>
            ) : null}
          </div>
        </div>

        <div class="row">
          <div class="col-12">
            <button
              type="submit"
              disabled={isSubmitting}
              class="btn btn-primary btn-block"
            >
              Save new password
            </button>
          </div>
        </div>
      </form>
    );
  };

  render() {
    return (
      <div className="login-page">
        <div className="login-box">
          <div className="login-logo">
            <a href="#">
              <b>Basic</b>POS
            </a>
          </div>
          {/* /.login-logo */}
          <div className="card">
            <div className="card-body login-card-body">
              <p className="login-box-msg">
                You are only one step a way from your new password, recover your
                password now.
              </p>
              <Formik
                initialValues={{
                  password: ""
                }}
                onSubmit={(values, { setSubmitting}) => {
                  this.submitForm(values, this.props.history);
                  setSubmitting(false);
                }}
                 validationSchema={PasswordresetSchema}
              >
                {/* {this.showForm()}            */}
                {props => this.showForm(props)}
              </Formik>
              <p className="mb-0">
                 <Link to="/login">Login</Link>
              </p>
              <p className="mb-0">
                <Link to="/register">Register a new membership</Link>
              </p>
            </div>
            {/* /.login-card-body */}
          </div>
        </div>
      </div>
    );
  }
}

export default Passwordreset;
Password reset page now looks like this.

Now, implement the backend function for resetting the password as follows.
app.put("/password/reset", async (req, res) => {
   const { password } = req.body;
  let resetPasswordToken = req.query.token;
  if (resetPasswordToken) {
    jsonwebtoken.verify(
      resetPasswordToken,
      "process.env.JWT_RESET_PASSWORD",
      function(err, decoded) {
        if (err) {
          return res.json({
            result: "error",
            message: "Expired link. Try again"
          });
        }
      }
    );
    let encrypt_pass = await bcrypt.hash(password, 8);
    let updatedFields = {
      password: encrypt_pass,
      resetPasswordToken: ""
    };

    await Users.findOneAndUpdate(
      { resetPasswordToken: resetPasswordToken },
      updatedFields
    ).then(responses => {
      return res.json({
        result: "success",
        message: "Password update succesfully your can try login again"
      });
    });
  } else {
    return res.json({
      result: "error",
      message: "No Found Token"
    });
  }
});
This is what we did inside the above function.
- Take the resetPasswordToken from the query string and the password from the request body.
- Verify the token is using jsonwebtoken.
- Encrypt the password before saving it to the database.
- If the token is verified, update the user password and send a message back to the frontend.
The password resetting process will result in this.
Conclusion
Today we completed the final step of user management in our application. As the next step, we will improve our application architecture and add redux to the project. We will also restructure the backend to follow the best coding practices. and here GitHub repo for this chapter
Previous lessons:
Create a Simple POS with React, Node and MongoDB #0: Initial Setup Frontend and Backend
Create a simple POS with React, Node and MongoDB #1: Register and Login with JWT
Create simple POS with React, Node and MongoDB #2: Auth state, Logout, Update Profile