

Defenition: POS – “Point of Sale”. At the point of sale, the merchant calculates the amount owed by the customer, indicates that amount, may prepare an invoice for the customer (which may be a cash register printout), and indicates the options for the customer to make payment.
Today, we begin our new series of tutorials in which we create a simple POS [point of sale] using React.js, Node.js, Express.js, and MongoDB. In this first chapter, we will learn how to set up the frontend with React and AdminLTE version 3. Also, we will learn how to establish a connection between Node.js and MongoDB.
Table of Contents
- Requirements
- Installing create-react-app
- Installing an extension to help generate React components and convert HTML to JSX
- Add AdminLTE
- Create the header, sidebar, and footer components.
- Install Node.js package
- Set up MongoDB cloud
Requirements
- Node.js version
10.x.xor above installed - VSCode
- Yarn
Installing the React Project
Open the terminal on VSCode and install create-react-app using yarn,
yarn global add create-react-app
or npx.
npx create-react-app my-app
We can now create the initial project boilerplate using the following command.
create-react-app basicpos
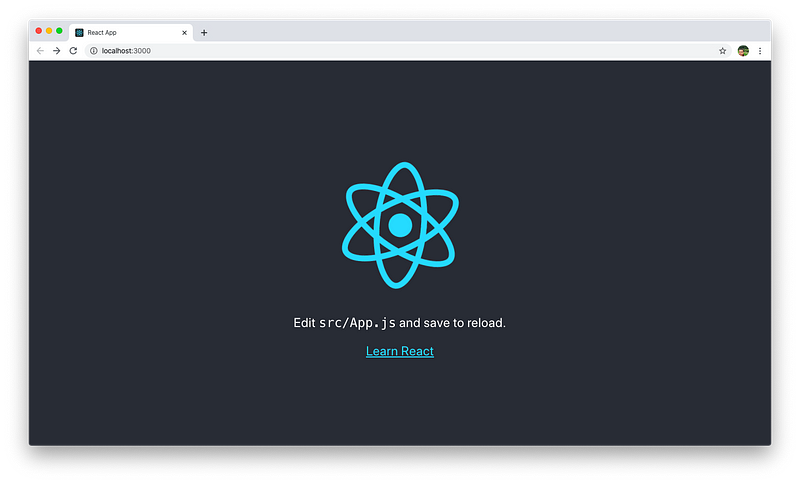
Now, open the project with Vscode and run yarn start
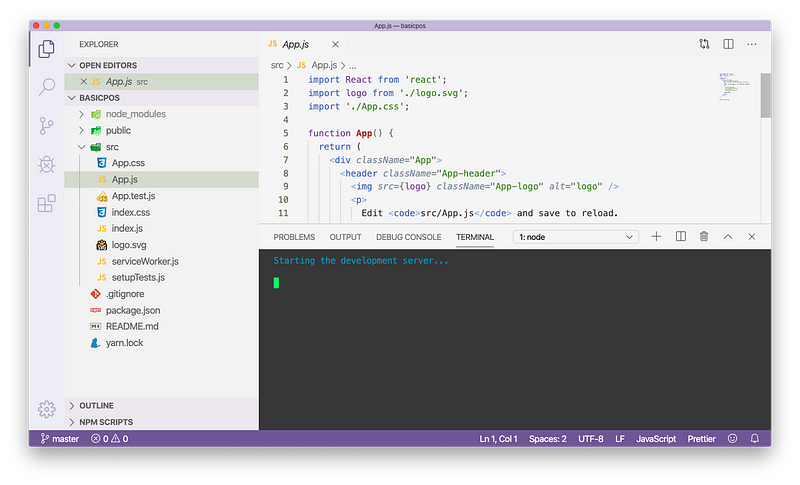
Our project is now running on port 3000. You can go to the browser and check whether the connection has been established.
Generate React Components
First, we will install a package that helps us in generating the React component folder.
npm install --save-dev create-react-component-folder
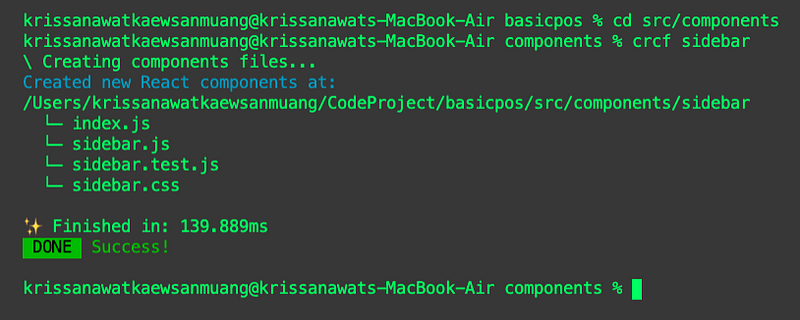
Navigate to the components directory from your terminal using the command cd src/components and type crcf <component-name> to create a new React component. First, we will create the sidebar.
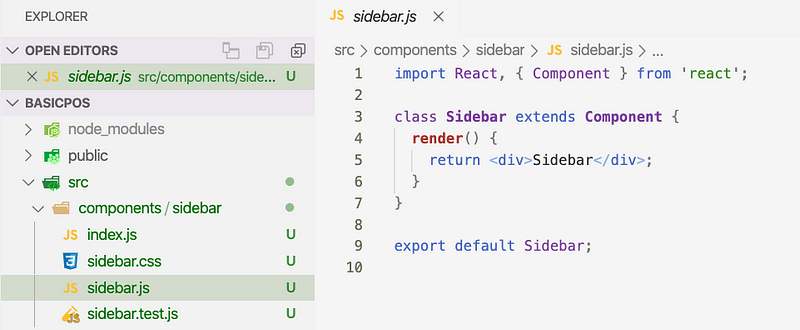
Now you will find the sidebar boilerplate inside the sidebar.js file.
Add AdminLTE
Now we need to add AdminLTE to our project. There are many ways to accomplish this task. We will use the manual method so that we have the freedom to copy only the library that we want.
First, download the AdminLTE version 3 from Github.
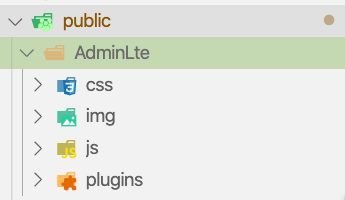
From the downloaded project folder, choose the dist and plugins directories.

Move them to the public folder inside our React project. You can add the plugins directory along with all the folders inside the dist directory to a new AdminLite folder.
Next, add the following CSS and javascript code snippets to the index.html file.
<link rel="stylesheet" href="plugins/fontawesome-free/css/all.min.css" />
    <!-- Ionicons -->
    <link
      rel="stylesheet"
      href="https://code.ionicframework.com/ionicons/2.0.1/css/ionicons.min.css"
    />
    <!-- Theme style -->
    <link rel="stylesheet" href="AdminLTE/css/adminlte.min.css" />
    <!-- Google Font: Source Sans Pro -->
    <link
      href="https://fonts.googleapis.com/css?family=Source+Sans+Pro:300,400,400i,700"
      rel="stylesheet"
    />
Scroll to the bottom of the file and add JQuery and other javascript dependencies just before the closing body tag (</body>).
<!-- jQuery -->
    <script src="AdminLTE/plugins/jquery/jquery.min.js"></script>
    <!-- Bootstrap 4 -->
    <script src="AdminLTE/plugins/bootstrap/js/bootstrap.bundle.min.js"></script>
    <!-- AdminLTE App -->
    <script src="AdminLTE/js/adminlte.min.js"></script>
We have completed the initial set up of the index.html file.
Convert HTML to JSX
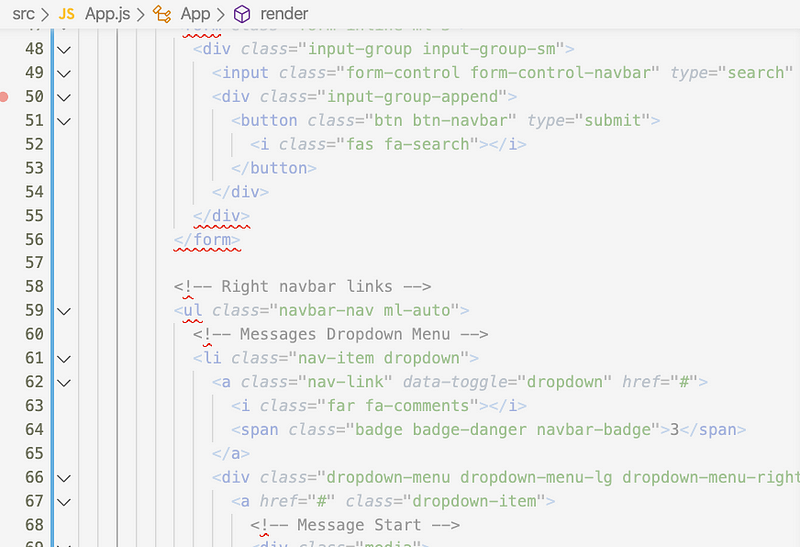
Open the App.js file and copy the example HTML code from the AdminLTE project and paste it inside the render function. You can find the example code here
Pasting HTML code inside a React file generates an error because React complies with JSX, not HTML.
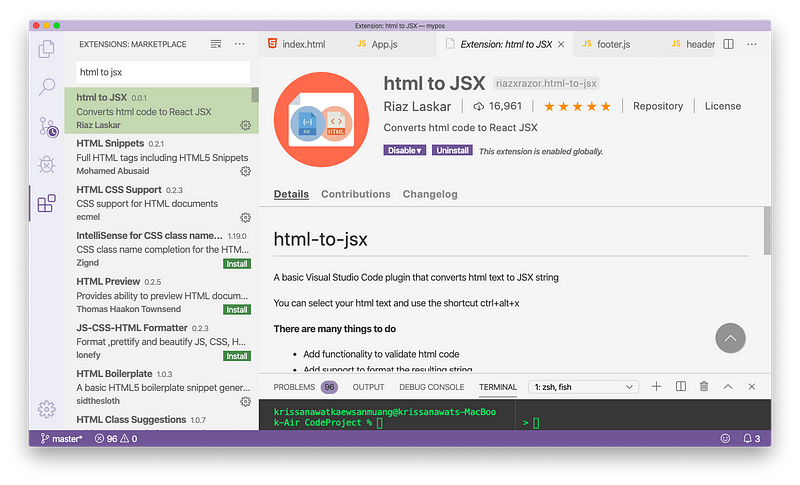
The quickest solution to this problem is adding this VSCode extension named HTML to JSX.
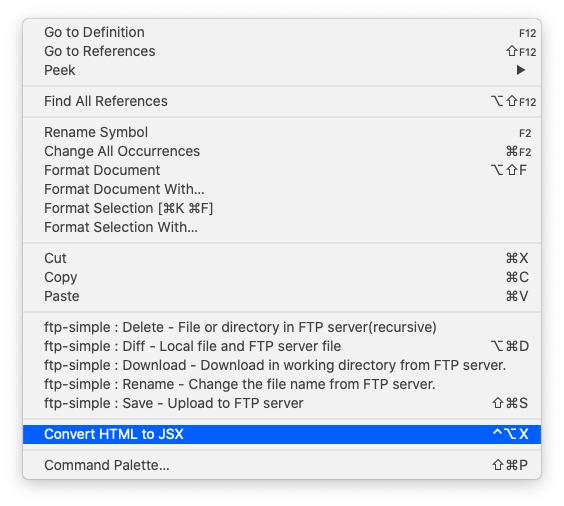
After installing the extension, highlight the HTML code you need to convert to JSX and right-click and select the “convert HTML to JSX” option.
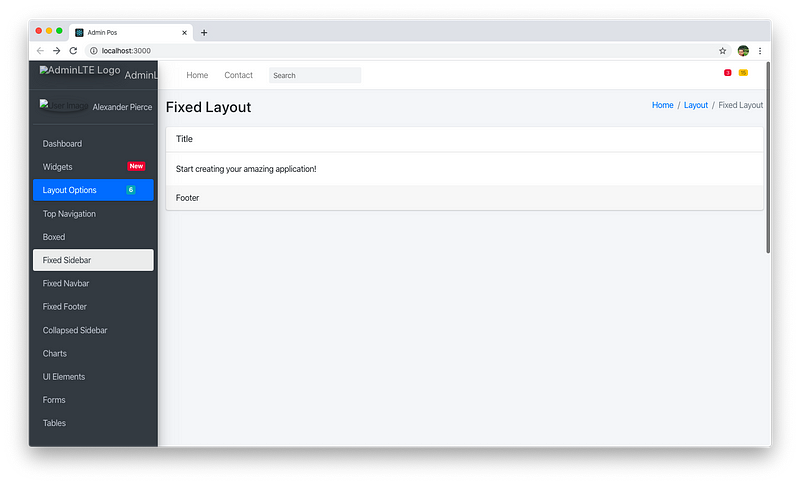
Now, when visiting our web app, we can see the following result.
Create Header, Sidebar, and Footer Components
As the next step, we will create a separate header, sidebar, and footer components.
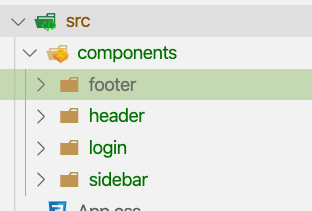
Import the header, sidebar, and footer components from the component folder and assemble them to create a single component inside the App.js file.
import React, { Component } from "react";
import Header from "./components/header"
import Sidebar from "./components/sidebar"
import Footer from "./components/footer"
export default class App extends Component {
  render() {
    return (
      <>
       <Header/>
       <Sidebar/>
       <Footer/>
      </>
    );
  }
}
Change the Screen with React-router-dom
To enable navigation from one page to another, we need to add the react-router-dom package.
You can install the package using yarn or npm.
yarn add react-router-dom
Import the necessary classes inside the App.js file.
import {
BrowserRouter as Router,
Route,
Redirect,
Switch
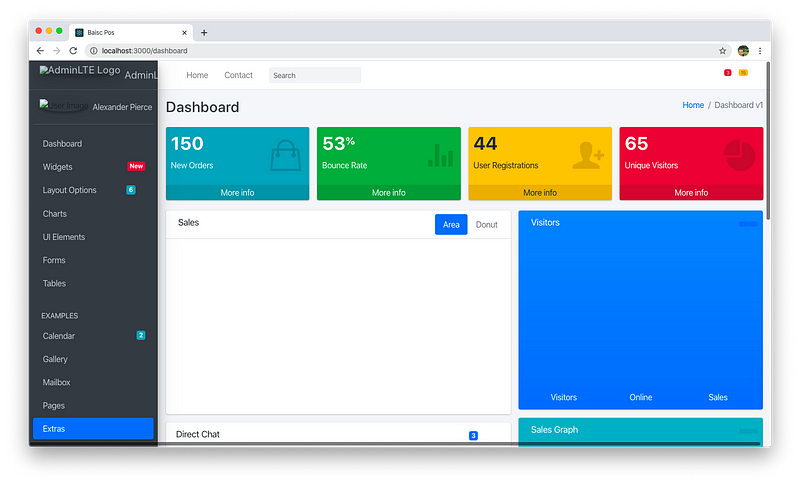
} from "react-router-dom";We will now create a new page to show how the navigation works. Create a new component named “Dashboard”. Use the code from the main content section of this page to create the component. Paste the code and convert it from HTML to JSX as we did before. Now import the component inside the App.js file.
We will wrap the dashboard component inside the Route class from react-router-dom. You can see how to do this in the following code snippet.
import React, { Component } from "react";
import Header from "./components/header";
import Sidebar from "./components/sidebar";
import Footer from "./components/footer";
import Dashboard from "./components/dashboard";
import { BrowserRouter as Router, Switch, Route, Link } from "react-router-dom";
export default class App extends Component {
  render() {
    return (
      <Router>
        <Switch>
          <div>
            <Header />
            <Sidebar />
            <Route path="/dashboard" component={Dashboard} />
            <Footer />
          </div>
        </Switch>
      </Router>
    );
  }
}
Now, when we type the URI for the dashboard, we will be directed to the dashboard component page.
With this, we have finished our work in the frontend of our app.
Install Node.js Package
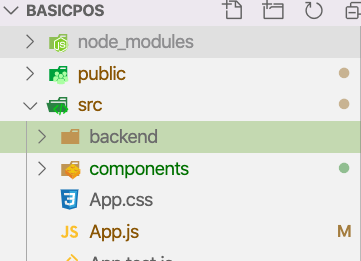
First, we have to create a new folder for the backend files. We create a new folder named backend inside our React project folder as shown below.
Now, type npm init in your terminal to initialize the project.
We have to install the required packages for the server using the following command.
npm i express body-parser cors
We use express to implement server features, body-parser to parse parameters sent by the frontend, and cors to allow requests coming from another server or a different port of the same server.
Inside the index.js file, add the code for running the main server.
const express = require("express");
const app = express();
const bodyParser = require("body-parser");
const cors = require("cors");
app.use(cors());
app.use(bodyParser.urlencoded({ extended: false }));
app.use(bodyParser.json());
app.get("/", function(req, res, next) {
  return res.send("Hello Nodejs");
});
const port = 8080;
app.listen(port, () => {
  console.log("Server is running... on port " + port);
});
We import the previously installed packages. First, create an express object and then pass body-parser and cors packages to this object.
We create a new route for initial testing and start the server on port 8080.
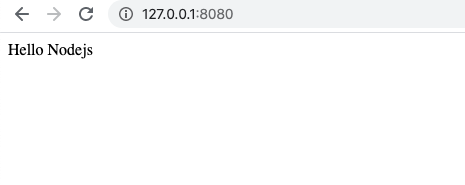
If you can reach the above route without any complications, our server set up has been successfully completed.
Set up MongoDB Locally and on Cloud
First, we will set up MongoDB on the local computer. You can follow the instructions from the official document but if you are looking for Administrative tools, you can try Studio 3T
Now we will set up MongoDB on the cloud for development purposes because it is faster than using a local MongoDB database.
Since the registration process is quite simple, we will not walk you through it. However, you have to create a new cluster after registration.

Choose region close to your location to experience decreased latency.
Create a free tier cluster after selecting a region with FREE TIER AVAILABLE and choosing the M0 cluster.
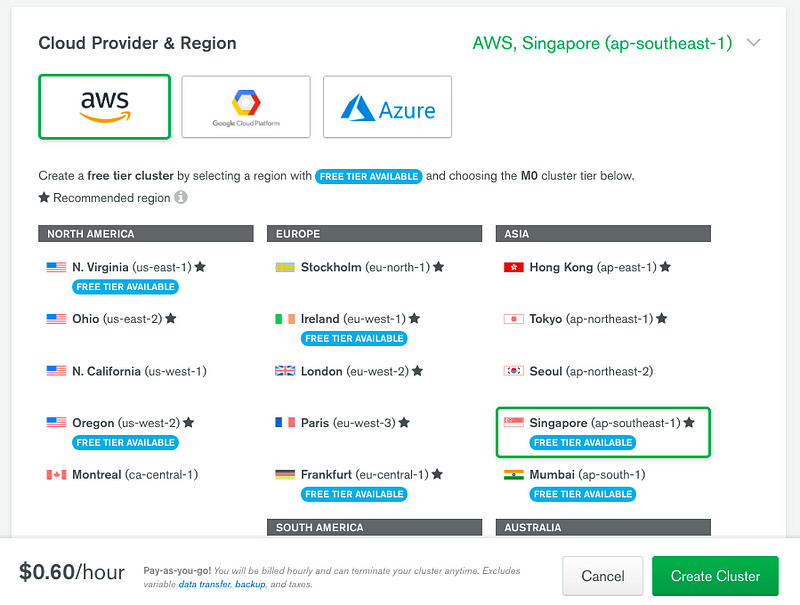
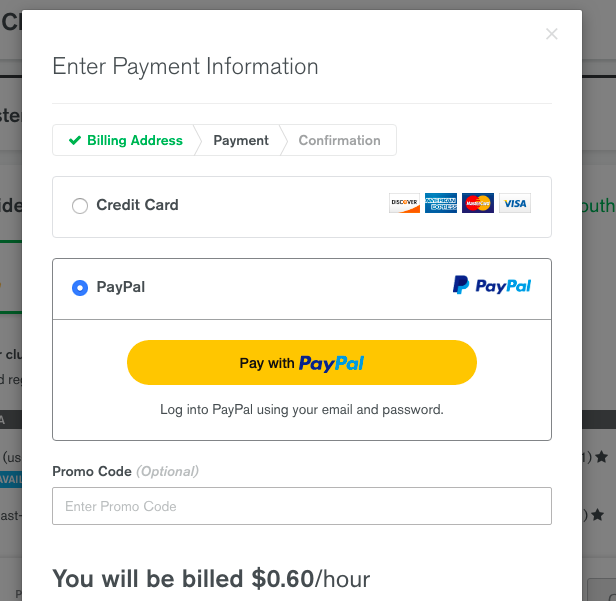
Even though it is a free tier, we need to add a payment method.
After adding the payment method, you can create a new cluster

Now select “connect to the cluster” option and connect to the application.
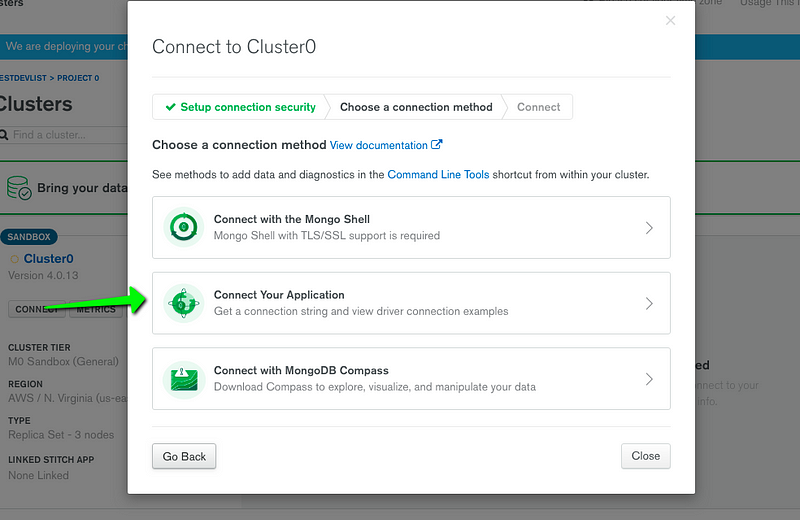
Here, we get a connection string that can be used in Node.
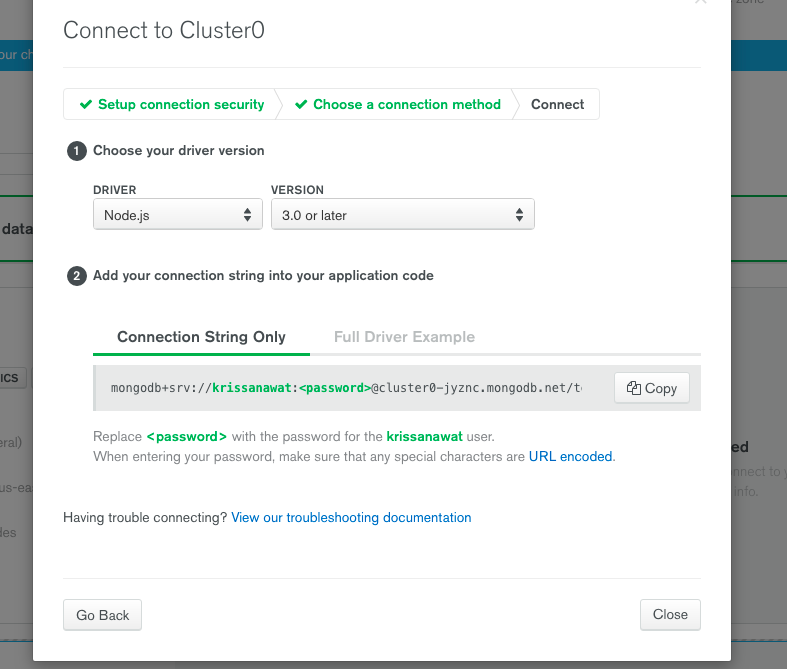
Come back to our project and install the mongoose package for managing database connection and database schema.
yarn add mongoose
Create a file named db.js and import the mongoose package. Pass the connection string to the connect method to establish a database connection. Then, create functions that will be called during different database events.
var mongoose = require( 'mongoose' );

mongoose.connect('mongodb+srv://username:[email protected]/test?retryWrites=true&w=majority', {useNewUrlParser: true})

mongoose.connection.on('connected', function () {
  console.log('Mongoose default connection open');
});

mongoose.connection.on('error',function (err) {
  console.log('Mongoose default connection error: ' + err);
});

mongoose.connection.on('disconnected', function () {
  console.log('Mongoose default connection disconnected');
});

process.on('SIGINT', function() {
  mongoose.connection.close(function () {
    console.log('Mongoose default connection disconnected through app termination');
    process.exit(0);
  });
});
Include the db.js file inside app.js using the following code.
require
("./db");Now, the initial set up of our POS app is completed.
Conclusion
In this first chapter, we learned how to create a new react project and integrate adminLTE.We used react-router-dom to handle navigation inside our app. Finally, we learned how to set up the backend using Node and MongoDB. We will continue the development of our app by adding the user authentication process in the next chapter. You can get the full code of this application from Github.