Defenition: POS – “Point of Sale”. At the point of sale, the merchant calculates the amount owed by the customer, indicates that amount, may prepare an invoice for the customer (which may be a cash register printout), and indicates the options for the customer to make payment.
In the previous part of this tutorial series, we learned how to install the redux configuration into our project. We also got an insight on how to integrate redux to our login component. This tutorial part serves as a continuation of the previous tutorial.
In this tutorial part, we are going to integrate the redux to Register and Forget password component.
Register Component
First, we are going to start with the Register component. The process is the same as that in the Login component. We are going to configure, constants, and reducers into the Register component.
In index.js, we define states for register fetching, success, failed as shown in the code snippet below:
//Forgot password
export const FORGOT_FETCHING = "FORGOT_FETCHING"
export const FORGOT_SUCCESS = "FORGOT_SUCCESS";
export const FORGOT_FAILED = "FORGOT_FAILED";
Then, we create a new redux action named register.action.js and the imports as follows:
import {
  REGISTER_FETCHING,
  REGISTER_FAILED,
  REGISTER_SUCCESS,
  server,
} from "../constants";
import swal from "sweetalert";
import { httpClient } from "./../utils/HttpClient";
Next, we are going to create the functions that handle the state changes based on the type of register as shown in the code snippet below:
export const setRegisterStateToFetching = () => ({
  type: REGISTER_FETCHING,
});
export const setRegisterStateToFailed = () => ({
  type: REGISTER_FAILED,
});
export const setRegisterStateToSuccess = (payload) => ({
  type: REGISTER_SUCCESS,
  payload,
});
Now, we go to the register function register in the Register component and attach the dispatch function in order to capture the events. The coding implementation of the function is shown in the code snippet below:
export const register = (values, history) => {
  return async (dispatch) => {
    dispatch(setRegisterStateToFetching());
    const response = await httpClient.post(
      process.env.REACT_APP_API_URL + "register",
      values
    );
    if (response.data.result == "success") {
      dispatch(setRegisterStateToSuccess(response.data));
      swal("Success!", response.data.message, "warning").then((value) => {
        history.push("/login");
      });
    } else if (response.data.result === "error") {
        dispatch(setRegisterStateToFailed())
    swal("Error!", response.data.message, "error");
    }
  };
};
Now, we are going to create the reducer for the register component.
For reducer, we need to create a new file name register.reducer.js. Then, we need to import new state constants and define the initial state as shown in the code snippet below:
import {
  REGISTER_FETCHING,
  REGISTER_FAILED,
  REGISTER_SUCCESS,
} from "../constants";
const initialState = {
  isFetching: false,
  isError: false,
  result: null,
};
The next step is to create a function that will set the value of states based on the register type. The coding implementation of the required function is provided in the code snippet below:
export default (state = initialState, { type, payload }) => {
  switch (type) {
    case REGISTER_FETCHING:
      return { ...state, isFetching: true, isError: false, result: null };
    case REGISTER_FAILED:
      return { ...state, isFetching: false, isError: true, result: null };
    case REGISTER_SUCCESS:
      return { ...state, isFetching: false, isError: false, result: payload };
    default:
      return state;
  }
};
Now in order to activate new reducer, we need to add the reducer file to index file as shown in the code snippet below:
import { combineReducers } from "redux";
import loginReducer from "./login.reducer";
import registerReducer from "./register.reducer";
export default combineReducers({
  loginReducer,
  registerReducer,
});
Now, it is time to add the reducer to the register component. The process is the same as that in login component in which we change the class component to functional component.
In component/register.js file, we need to import actions and react-redux plugin as shown in the code snippet below:
import * as registerActions from "./../../actions/register.action";
import { useSelector, useDispatch } from "react-redux";
Then, we need to change the class component to the functional component and initialize the dispatch function as shown in the code snippet below:
export default (props) => {
  const dispatch = useDispatch();
Now, in order to use the register function, we replace the old function with register action that we imported from actions. We integrate the dispatch function with register action as a parameter as shown in the code snippet below:
              onSubmit={(values, { setSubmitting }) => {
                dispatch(registerActions.register(values, props.history));
                setSubmitting(false);
              }}
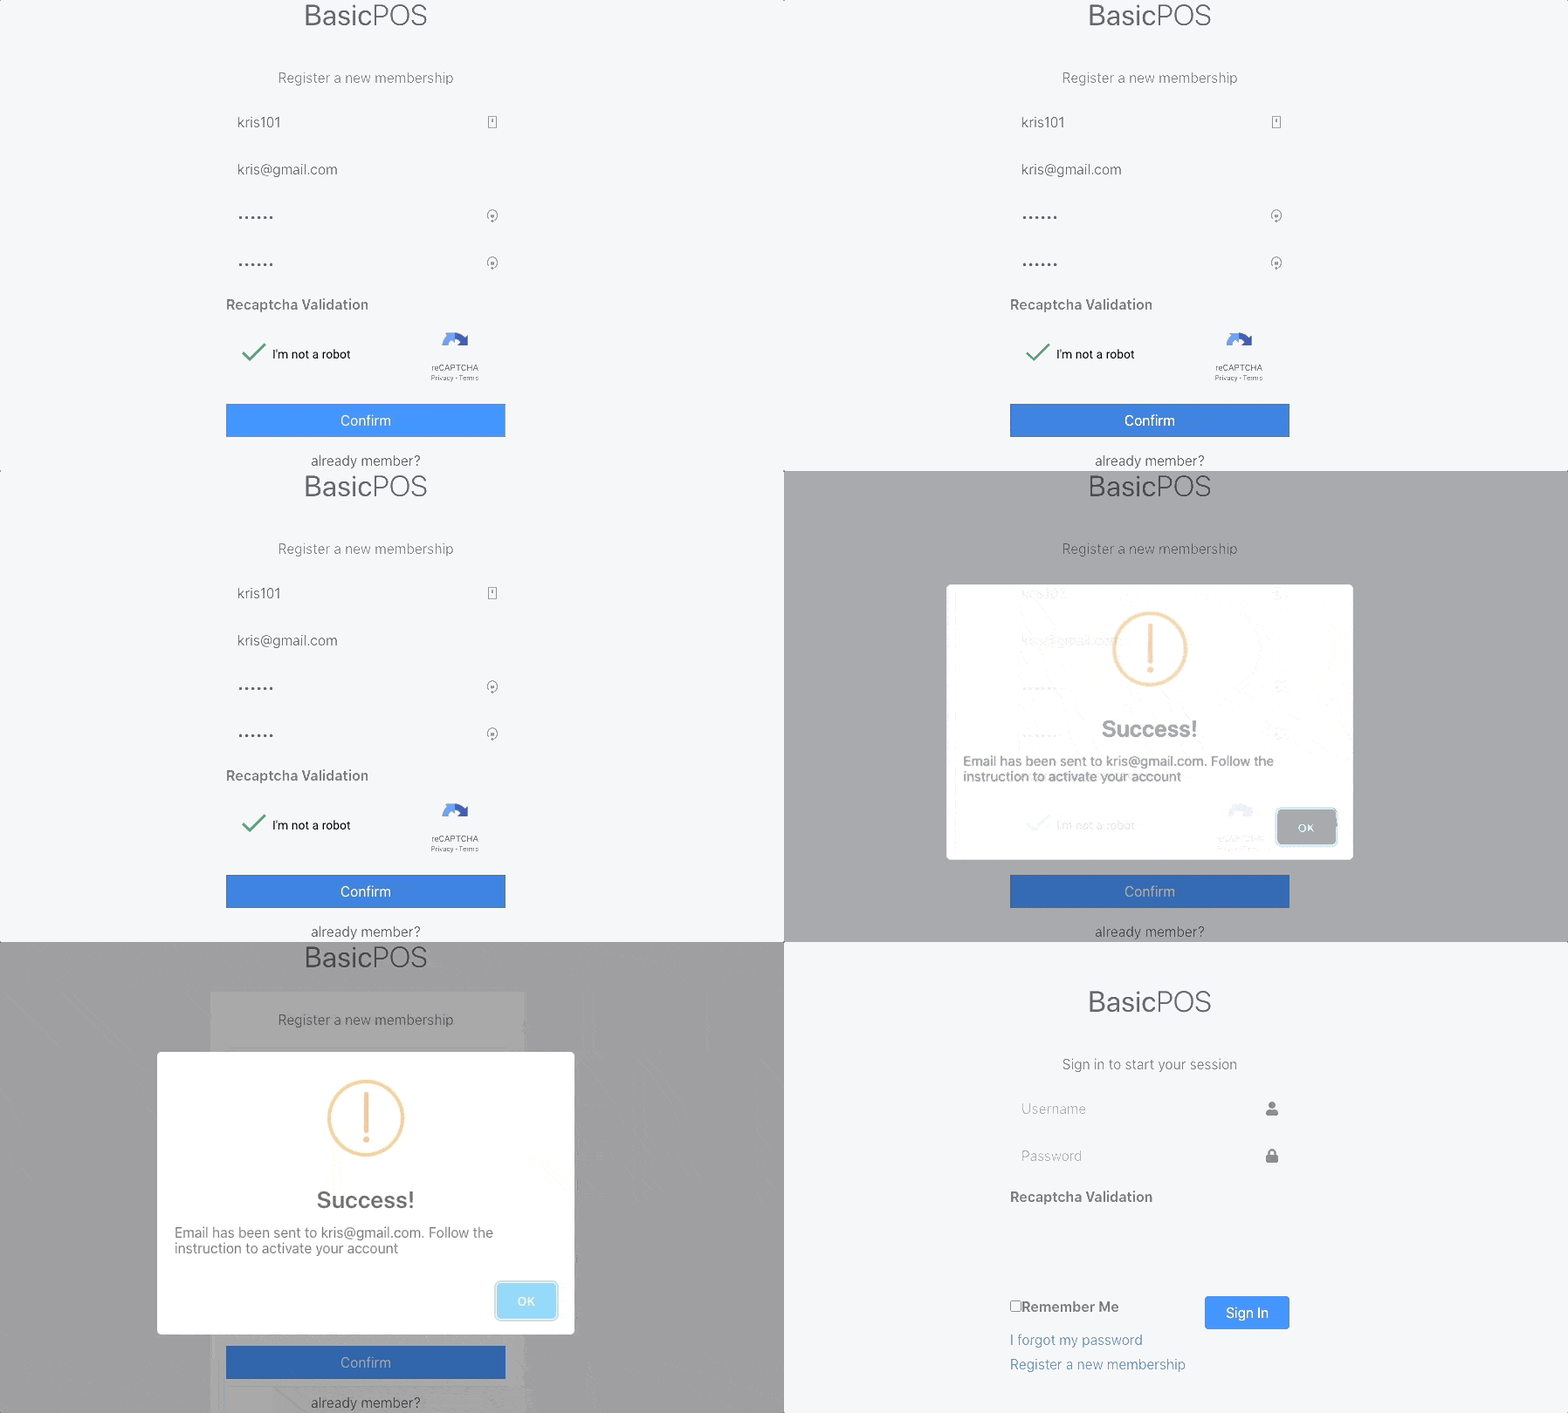
Hence, we have successfully completed the integration of redux functionality in the Register component of our POS system project.
Thus, we can check out the test result in the simulation below:

As our redux integration in the Register component is complete, We move on to our Forgot password component.
Forgot Password Component
In this part, we are going to integrate the redux mechanism to the forgot and reset password component. The process to similar to that of the register component that we completed above.
Just as in Register component, we define the state constants first as shown in the code snippet below:
//Forgot password
export const FORGOT_FETCHING = "FORGOT_FETCHING";
export const FORGOT_SUCCESS = "FORGOT_SUCCESS";
export const FORGOT_FAILED = "FORGOT_FAILED";
Then, we need to create a new action called forgotpassword action and make the necessary imports. We also need to define the functions that handle state changes. Lastly, we need to define the resetpassword function with dispatch function as shown in the code snippet below:
import { FORGOT_FETCHING, FORGOT_SUCCESS, FORGOT_FAILED } from "../constants";
import swal from "sweetalert";
import { httpClient } from "./../utils/HttpClient";
export const setForgotStateToFetching = () => ({
  type: FORGOT_FETCHING,
});
export const setForgotStateToFailed = () => ({
  type: FORGOT_SUCCESS,
});
export const setForgotStateToSuccess = (payload) => ({
  type: FORGOT_FAILED,
  payload,
});
export const resetpassword = (values, history, token) => {
  return async (dispatch) => {
    dispatch(setForgotStateToFetching());
    const response = await httpClient.put(
      process.env.REACT_APP_API_URL + "password/reset?token=" + token,
      values
    );
    if (response.data.result === "success") {
      dispatch(setForgotStateToSuccess(response.data));
      swal("Success!", response.data.message, "success").then((value) => {
        history.push("/login");
      });
    } else if (response.data.result === "error") {
      dispatch(setForgotStateToFailed());
      swal("Error!", response.data.message, "error");
    }
  };
};
Now, it is time to add the reducer to the Forgot Password component. First, we need to import new state constants and define the initial state.
Then, we need to create a function that will set the value of states based on forgot state types. The coding implementation of the required function is provided in the code snippet below:
import { FORGOT_FETCHING, FORGOT_SUCCESS, FORGOT_FAILED } from "../constants";
const initialState = {
  isFetching: false,
  isError: false,
  result: null,
};
export default (state = initialState, { type, payload }) => {
  switch (type) {
    case FORGOT_FETCHING:
      return { ...state, isFetching: true, isError: false, result: null };
    case FORGOT_FAILED:
      return { ...state, isFetching: false, isError: true, result: null };
    case FORGOT_SUCCESS:
      return { ...state, isFetching: false, isError: false, result: payload };
    default:
      return state;
  }
};
Now, we integrate the forgot password reducer in the index file by importing it as shown in the code snippet below:
import { combineReducers } from "redux";
import loginReducer from "./login.reducer";
import registerReducer from "./register.reducer";
import forgotpasswordReducer from "./forgotpassword.reducer";
export default combineReducers({
  loginReducer,
  registerReducer,
  forgotpasswordReducer
});
Then, we need to go to the Forgot password component and modify it to import actions and react-redux:
import * as passwordForgotAction from "./../../actions/forgotpassword.action";
import { useDispatch } from "react-redux";
Then, we need to change the class component to the functional component and then initialize the dispatch function as shown in the code snippet below:
export default (props) => {
  const dispatch = useDispatch();
Next, we need to replace the old submit form code with action using dispatch function as shown in the code snippet below:
onSubmit={(values, { setSubmitting }) => {
   dispatch(passwordForgotAction.forgotpassword(values, props.history));
                setSubmitting(false);
        }}
   validationSchema={PasswordForgotSchema}
>
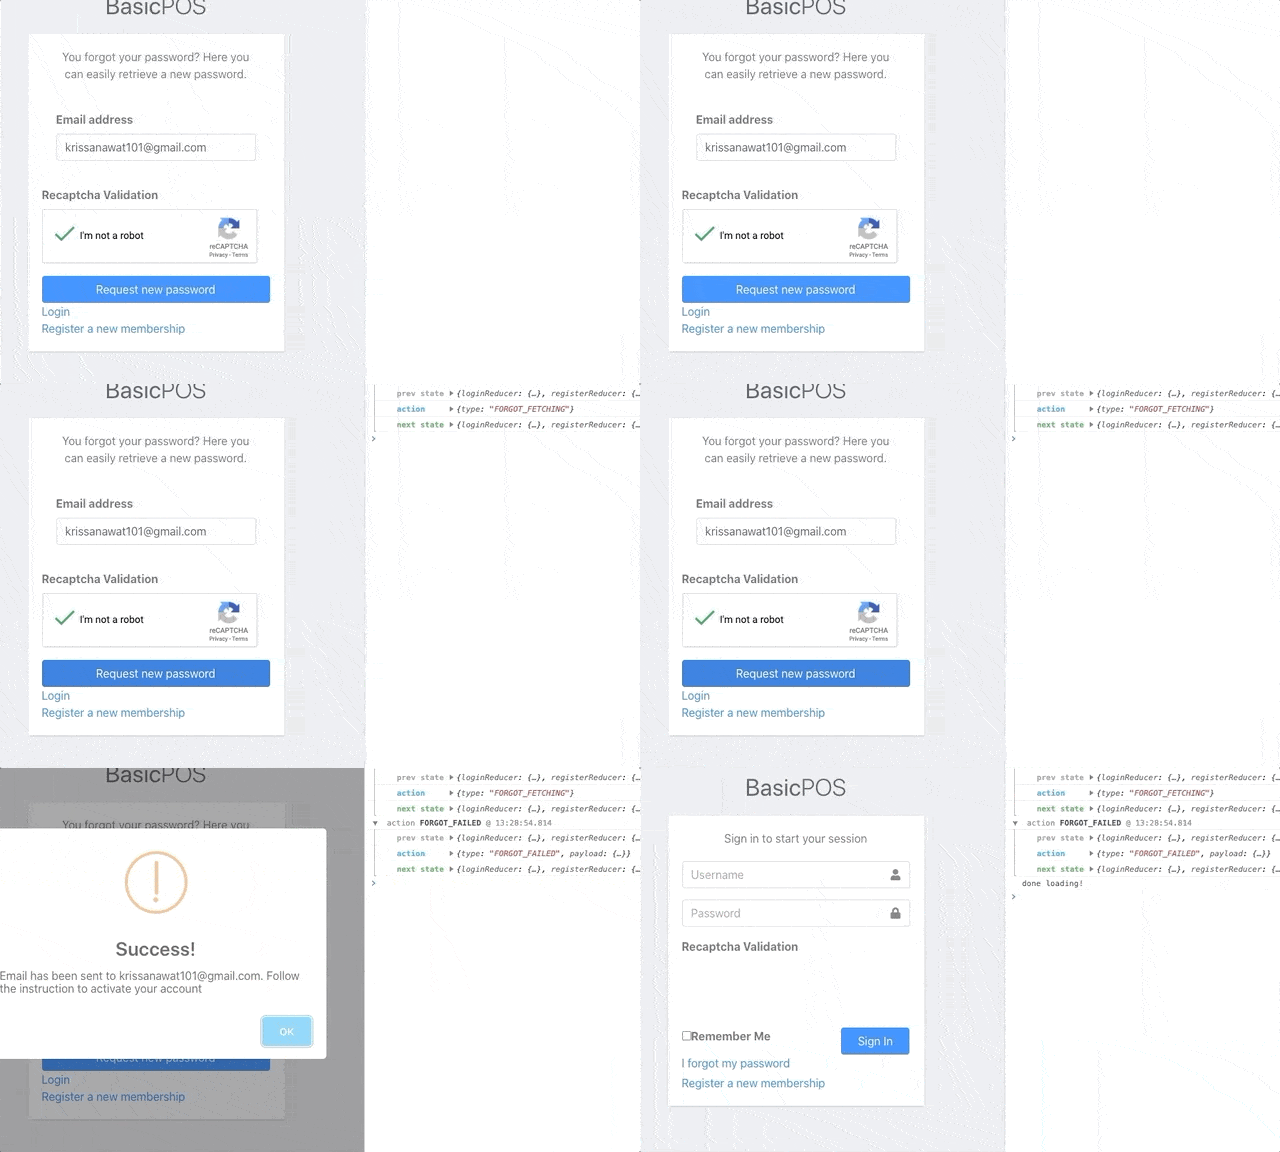
Hence, we will get the result as shown in the simulation below:

Reset password component
Now in the Reset password component that appears after the Forgot password action, we will apply the same process.
First, we create a new state constant
//Reset password
export const RESET_FETCHING = "RESET_FETCHING";
export const RESET_SUCCESS = "RESET_SUCCESS";
export const RESET_FAILED = "RESET_FAILED";
Second, we are going to create the action file and implement state handler function and resetpassword function as shown in the code snippet below:
import { RESET_FETCHING, RESET_SUCCESS, RESET_FAILED } from "../constants";
import swal from "sweetalert";
import { httpClient } from "./../utils/HttpClient";

export const setResetStateToFetching = () => ({
  type: RESET_FETCHING,
});

export const setResetStateToFailed = () => ({
  type: RESET_SUCCESS,
});

export const setResetStateToSuccess = (payload) => ({
  type: RESET_FAILED,
  payload,
});

export const resetpassword = (values, history, token) => {
  return async (dispatch) => {
    dispatch(setResetStateToFetching());
    const response = await httpClient.put(
      process.env.REACT_APP_API_URL + "password/reset?token=" + token,
      values
    );
    if (response.data.result === "success") {
      dispatch(setResetStateToSuccess(response.data));
      swal("Success!", response.data.message, "success").then((value) => {
        history.push("/login");
      });
    } else if (response.data.result === "error") {
      dispatch(setResetStateToFailed());
      swal("Error!", response.data.message, "error");
    }
  };
};
Then, we need to create a new reducer file and make the following coding implementations:
import { RESET_FETCHING, RESET_SUCCESS, RESET_FAILED } from "../constants";

const initialState = {
  isFetching: false,
  isError: false,
  result: null,
};

export default (state = initialState, { type, payload }) => {
  switch (type) {
    case RESET_FETCHING:
      return { ...state, isFetching: true, isError: false, result: null };
    case RESET_FAILED:
      return { ...state, isFetching: false, isError: true, result: null };
    case RESET_SUCCESS:
      return { ...state, isFetching: false, isError: false, result: payload };
    default:
      return state;
  }
};
Lastly, we need to modify the password reset component the same as the password forgot. First, we need to import react-redux dependency and actions as well.
import * as passwordReset from "./../../actions/resetpassword.action";
import { useDispatch } from "react-redux";
Then, we convert the component to the functional component and initialize dispatch function:
export default (props) => {
  const dispatch = useDispatch();
Then, we replace the old submit form code with the new action configuration with dispatch function as shown in the code snippet below:
onSubmit={(values, { setSubmitting }) => {
                dispatch(
                  passwordReset.resetpassword(
                    values,
                    props.history,
                    props.match.params["token"]
                  )
                );
        setSubmitting(true);
}}
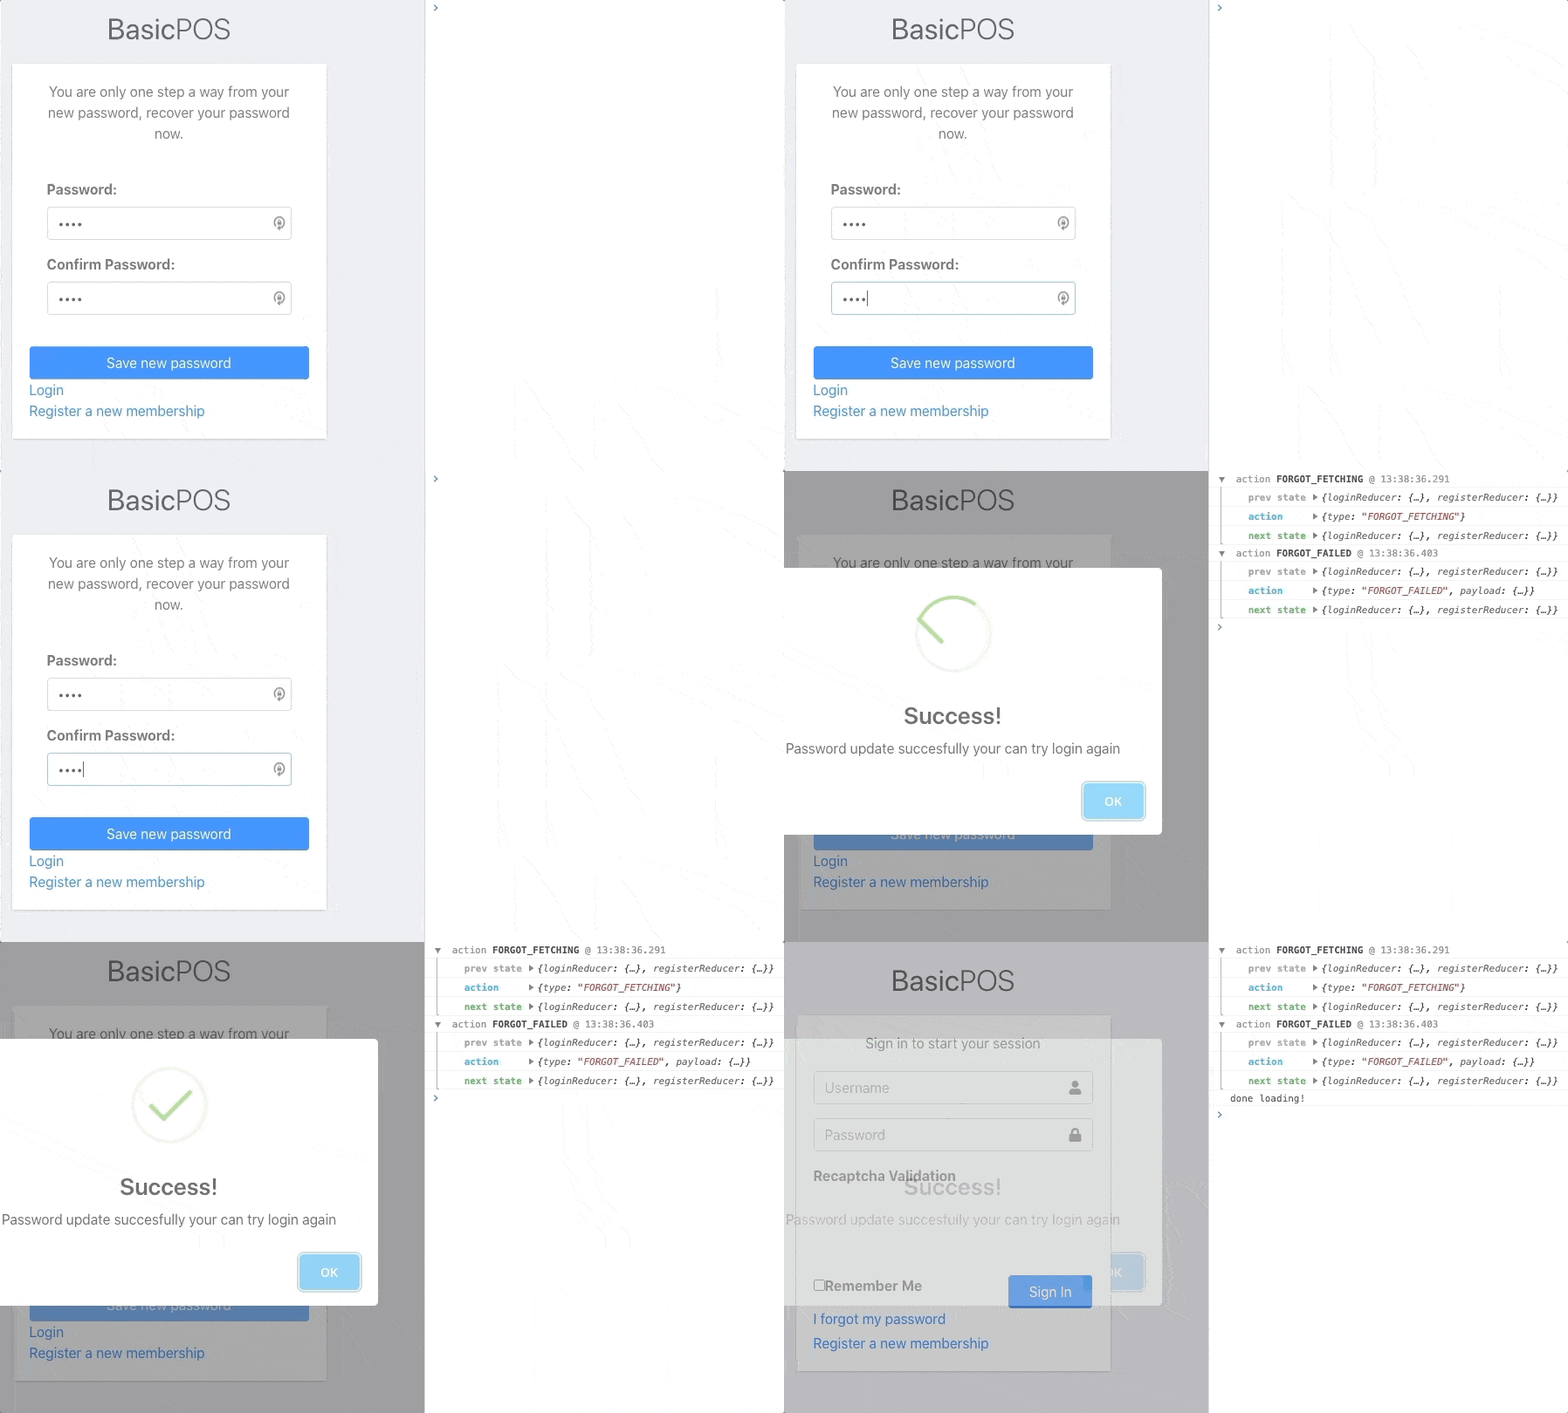
Hence, the result of the password reset test is shown in the simulation below:

Finally, we have successfully completed the integration of the redux mechanism in both the Forgot Password and Reset Password component.
Conclusion
In this chapter, we learned how to integrate redux to Register, Forgot, and Reset password components. The process was the same as of that in the login component which we did in the previous chapter. Implementing the redux mechanism in different components will infuse deep knowledge and use the case of redux.
In the next chapter, we will learn how to implement CRUD operation with redux by using crud POS machine data.
Nonetheless, you can try out the live demo as well as get the code for this chapter in Github.

