Working with Jotai as your next state management in React
Introduction
Data is critical to the operation of a React application, so it is necessary to maintain track of it as well as pass it properly through components in a React application. Prop drilling allows data to be passed from a parent component to a child component and has thus been widely utilized in the development of React apps. However, as the complexity of a React application grows and there are several child components from a parent component, data flow becomes cumbersome and less scalable. This issue prompted the introduction of state management into building applications. Despite being efficient and scalable, most common state management needed additional boilerplate code on setup. As a developer who is continually looking for efficient and user-friendly options, I came across Jotai, a minimalistic state management tool that can be used in constructing scalable react applications. In this tutorial, I will walk you through the Jotai library as well as teach you how to utilize Jotai to build a simple application.
Jotai
Jotai is a state management library that follows the “atomic” state pattern introduced by the Recoil Library. In Jotai, data is stored an independent state known as an atom which is merely an object that holds values. Jotai uses atoms to replace the local state variables in React components. This object is then supplied to Jotai’s useAtom() hook, allowing your components to consume and update the value it currently stores.
// import atoms and useAtom from jotai library
import { atom, useAtom } from "jotai";

const age = atom(10);


// obtain getter and setter methods from atom using useAtom() hook
const [readOnlyAge, setAge] = useAtom(ageAtom);


// read value of an atom
console.log(readOnlyAge) // 10


// update the value of an atom
setAge(20)
console.log(readOnlyAge) // 20
Building an Application Using Jotai
In this article, we will illustrate the power of Jotai by utilizing it to build a simple task application. This application simply creates, updates, and deletes tasks. With this application, we will showcase how to create atoms as global states and update atoms.
Installation
first and foremost, create a react application using Vite. Navigate to your terminal and type the following commands:
for yarn
yarn create vite
for npm
npm create vite@latest
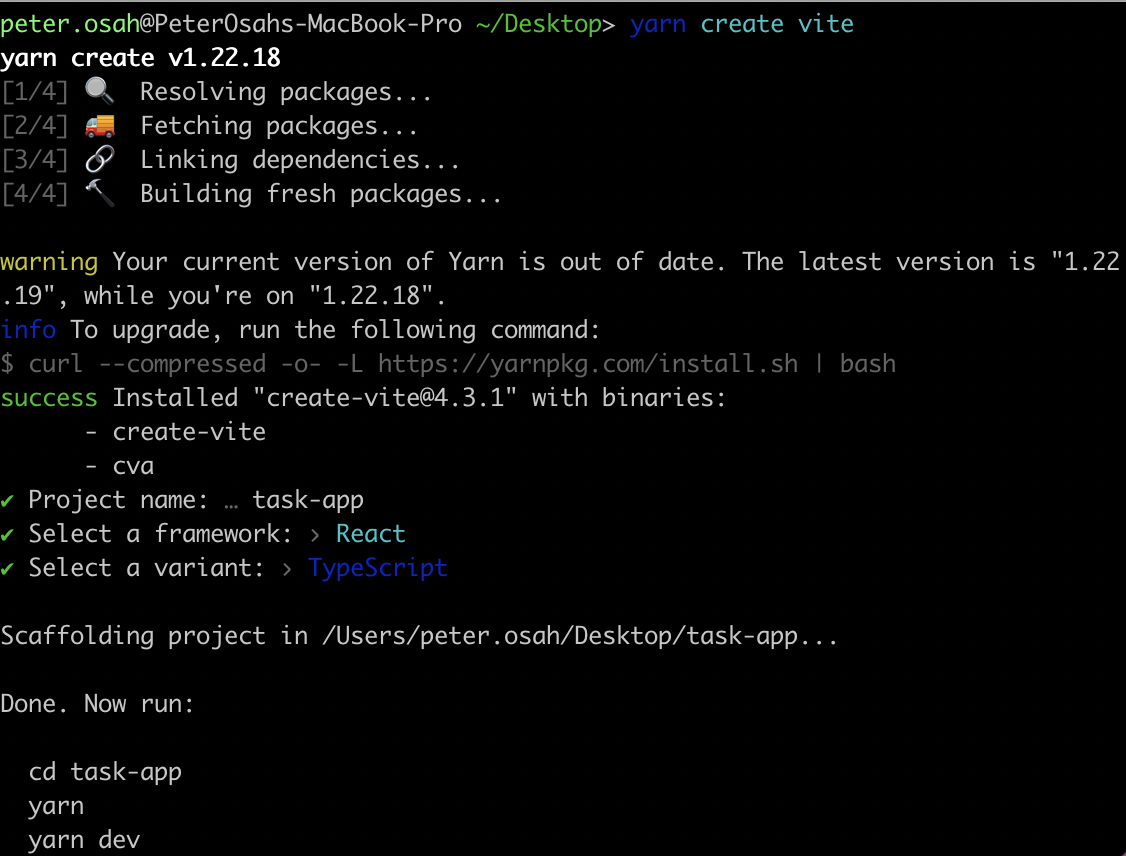
After installation, open the application using your code editor of choice, then run the commands shown on the terminal after installation.
Create Global atom for the Application
Before creating an atom, we will wrap the application with Jotai’s provider component. The provider components work like a regular context provider which aids in passing down values through the application’s component tree. This ensures that the atoms are accessible throughout the application. In order to use the provider, we will import the provider from Jotai into the entry file(main. tsx) of our application as shown below:
// main.tsx
import { Provider } from 'jotai';
next, I will then wrap the application with the provider as shown below:
// main.tsx
import React from 'react'
import ReactDOM from 'react-dom/client'
import App from './App'
import './index.css'
// Jotai provider
import { Provider } from 'jotai';

ReactDOM.createRoot(document.getElementById('root') as HTMLElement).render(
  <React.StrictMode>
    <Provider>
      <App />
    </Provider>
  </React.StrictMode>,
)
After adding the provider, we will create a centralized atom that will hold the task data of the application. create a store folder on the src directory of the application. and add a file called taskStore.ts to that folder. add the code below to the file.
import { atom } from "jotai";

export interface singleTask {
    id: string;
    title: string;
    description: string;
    completed: boolean;
}

export interface TaskAtomInterface {
    tasks: singleTask[]
}

const taskAtom = atom<TaskAtomInterface>({
    tasks: JSON.parse(localStorage.getItem('j-tasks') as string) || []
})

export default taskAtom
The code above simply shows a taskAtom created which comprises an object with a tasks property. the tasks property will hold the task data of the entire application. we also added interfaces that specify the properties that would be contained in a single task.
List Tasks
We will create a component that lista all tasks. To do this create a file called AllTasks.tsx in the Task folder under the components folder under the src directory of the project. In doing this, add the code below to the file.
import React from "react";
import FloatingButton from "../FloatingButton";
import { useAtom } from "jotai";
import taskAtom from "../../store/taskStore";
import { Link } from "react-router-dom";

const AllTasks = () => {
  const [tasks, setTasks] = useAtom(taskAtom)

  return (
    <div className="App">
      <div className="-my-2">
        {tasks.tasks
          .map((curr, idx) => {
            return (
              <div className="py-2" key={curr.id}>
                <div className="card md:mx-auto px-0 md:px-0 w-full md:w-9/12">
                  <div className="py-2">
                    <div className="flex items-center justify-between px-2 py-4">
                      <div>
                        <h5 className="w-full break-word">
                          { curr.title }
                        </h5>
                      </div>

                      <div className="flex justify-between">
                        <button className="inline-block px-2 py-4 text-[#D60000] border-radius">
                          Delete
                        </button>
                        <Link
                          to={"/edit/" + curr.id}
                          className="inline-block px-2 py-4 text-[#515151] border-radius"
                        >
                          Edit
                        </Link>
                        <Link
                          to={"/view/" + curr.id}
                          className="inline-block px-2 py-4 text-[#0e9f64] border-radius"
                        >
                          View
                        </Link>
                      </div>
                    </div>
                  </div>
                </div>
              </div>
            );
          })}

        {
          tasks.tasks && tasks.tasks.length === 0 ? (
            <div className="mx-auto md:w-9/12">
              <h1 className="card flex items-center justify-center h-screen">
                No Tasks Added
              </h1>
            </div>
          ):(
            null
          )
        }
      </div>
      <FloatingButton />
    </div>
  );
};

export default AllTasks;
From the code above:
- we import the global taskAtom from the taskStore.ts file and supply it to the useAtom() hook in order to obtain the tasks value and a setter function that can update the value of the tasks.
- On getting the value of the tasks, we display them on the component by mapping through the tasks in the array. In our case, we haven’t included a task so the tasks will be an empty array and will only display a “No Tasks Added” text.
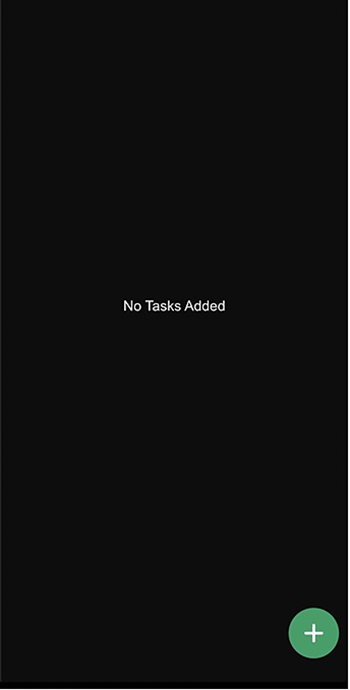
We also included a floating button which when clicked, will route the user to a page that creates a task.
Create Task
We will create a component that allows a user to create a task. To do this create a file called createTask.tsx in the Task folder under the components folder under the src directory of the project. In doing this, add the code below to the file.
import { useAtom } from "jotai";
import React, { useState } from "react";
import taskAtom, { singleTask } from "../../store/taskStore";
import { useNavigate } from "react-router-dom";
import { v4 as uuidv4 } from 'uuid';

const CreateTask = () => {
  const navigate = useNavigate();
  const [tasks, setTasks] = useAtom(taskAtom)
  const [task, setSingleTask] = useState<singleTask>({
    id: uuidv4(),
    title: '',
    description: '',
    completed: false
  })

  const onChange = (type: any, value: any)=> {
    switch(type){
      case "title":
        setSingleTask({...task, title: value})
        break;
      case "description":
        setSingleTask({...task, description: value})
        break;
      default:
        break
    }
  }

  const submitTask = ()=> {
    let allTasks: singleTask[] = tasks.tasks || [];
    allTasks = [...allTasks, task];
    setTasks({ ...tasks, tasks: allTasks});
    localStorage.setItem('j-tasks', JSON.stringify(allTasks));
    navigate('/')
  };

  return (
    <div>
      <div className="md:mx-auto px-6 md:px-0 mt-10 md:w-9/12">
        <h1 className="my-4 text-center">Create Task</h1>

        <form onSubmit={submitTask}>
          <div className="mt-8">
            <label className="text-white mb-2"> Title </label>
            <input
              type="text"
              className="edge-input"
              placeholder="" required
              onChange={(e)=> onChange("title", e.target.value)}
            />
          </div>

          <div className="mt-8">
            <label className="text-white mb-2">
              {" "}
              Add your Task description{" "}
            </label>
            <textarea
              className="edge-input"
              required
              onChange={(e)=> onChange("description", e.target.value)}
            ></textarea>
          </div>

          <div className="flex justify-end mt-8">
            <button
              type="submit"
              className="px-4 py-4 bg-[#0e9f64] c-white border-radius"
            >
              Create Task
            </button>
          </div>
        </form>
      </div>
    </div>
  );
};

export default CreateTask;
In the code above:
- We imported our global taskAtom to the CreateTask component and supplied it to the useAtom() hook.
- we created an onChange function that handles the addition of values to the form in the component.
- We created a submitTask function which is invoked on the submission of a task. this function also appends the tasks and updates the global tasksAtom with the newly inserted task. It also persists the tasks to localStorage and routes the user back to the page that shows all tasks.

Edit Task
We will create a component that allows a user to edit an existing task. To do this create a file called editTask.tsx in the Task folder under the components folder under the src directory of the project. In doing this, add the code below to the file.
import { useAtom } from "jotai";
import React, { useEffect, useState } from "react";
import taskAtom, { singleTask } from "../../store/taskStore";
import { useNavigate, useParams } from "react-router-dom";

const EditTask = () => {
  const navigate = useNavigate();
  const [tasks, setTasks] = useAtom(taskAtom)
  const [task, setSingleTask] = useState<singleTask>({
    id: '',
    title: '',
    description: '',
    completed: false
  })
  const { id } = useParams();


  const onChange = (type: any, value: any)=> {
    switch(type){
      case "title":
        setSingleTask({...task, title: value})
        break;
      case "description":
        setSingleTask({...task, description: value})
        break;
      default:
        break
    }
  }

  const editTask = ()=> {
    let tasks: any[] = JSON.parse(localStorage.getItem('j-tasks') as string) || [];
    const taskIndex = tasks.findIndex((curr)=> curr?.id === id);
    taskIndex > -1 && (tasks[taskIndex] = task);
    setTasks({...tasks, tasks})
    localStorage.setItem('j-tasks', JSON.stringify(tasks));
    navigate('/')
  };

  useEffect(() => {
    const task = tasks.tasks.find((curr)=> curr?.id === id);
    task && setSingleTask(task);
  }, [id, tasks.tasks])


  return (
    <div>
      <div className="md:mx-auto px-6 md:px-0 mt-10 md:w-9/12">
        <h1 className="my-4 text-center">Edit Task</h1>

        <form className="" onSubmit={editTask}>
          <div className="mt-8">
            <label className="text-white mb-2"> Title </label>
            <input
              type="text"
              className="edge-input"
              placeholder=""
              value={task.title}
              required
              onChange={(e)=> onChange("title", e.target.value)}
            />
          </div>

          <div className="mt-8">
            <label className="text-white mb-2">
              Add your note description
            </label>
            <textarea
              className="edge-input"
              data-provide="markdown"
              required
              value={task.description}
              onChange={(e)=> onChange("description", e.target.value)}
            ></textarea>
          </div>

          <div className="flex justify-end mt-8">
            <button
              type="submit"
              className="px-4 py-4 bg-[#0e9f64] c-white border-radius"
            >
              Edit Task
            </button>
          </div>
        </form>
      </div>
    </div>
  );
};

export default EditTask;
In the code above:
- We imported our global taskAtom to the EditTask component and supplied it to the useAtom() hook.
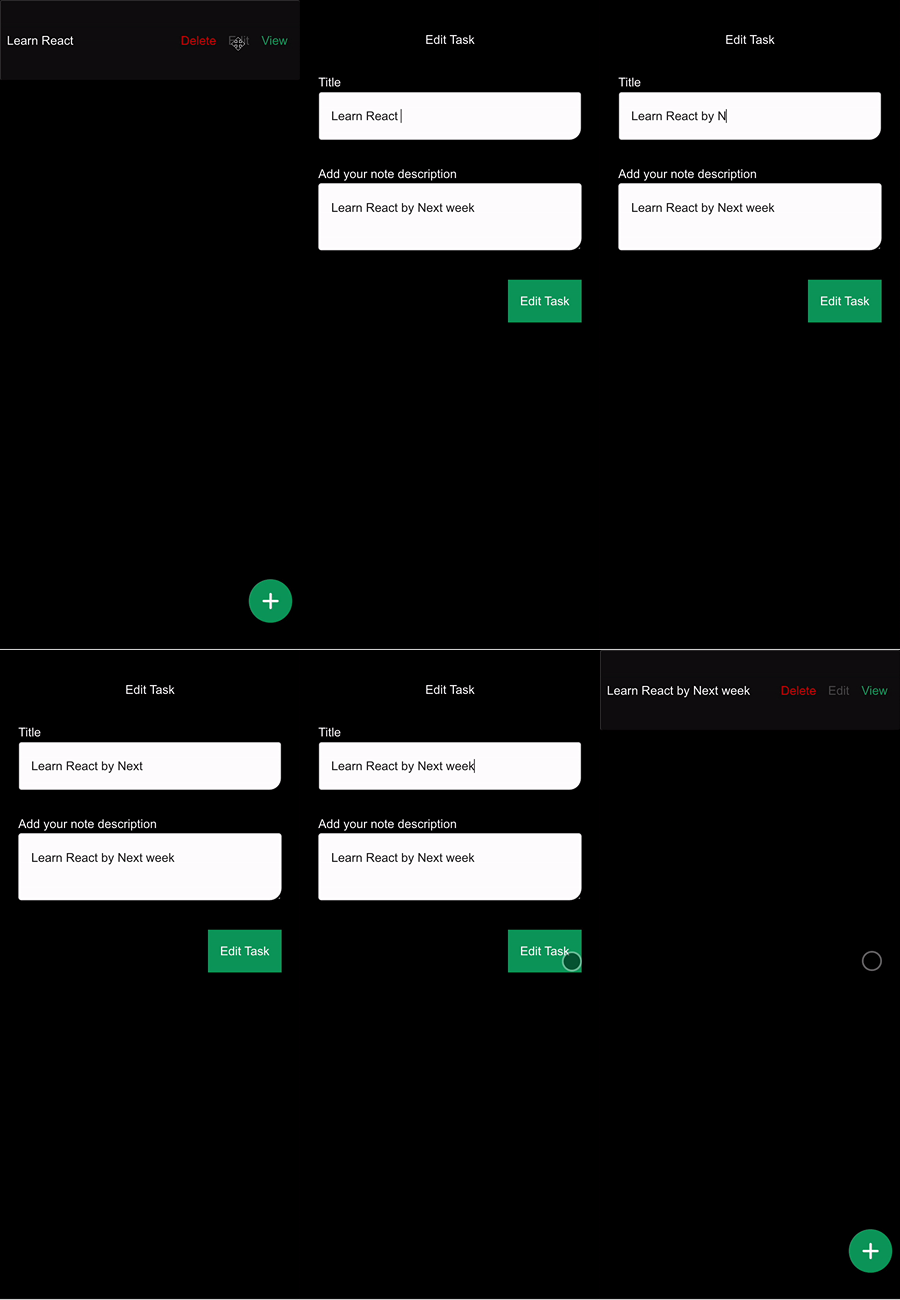
- On the useEffect hook, we find the specific task to edit using its id which was passed through the route.
- We created an onChange function that handles the addition of values to the form in the component.
- We created an editTask function which is invoked on the editing of a task. this function also appends the tasks and updates the global tasksAtom with the new edited task. It also persists the tasks to localStorage and routes the user back to the page that shows all tasks.
View Task
We will create a component that allows a user to view a task. To do this create a file called viewTask.tsx in the Task folder under the components folder under the src directory of the project. after creating the file, add the code below to the file.
import { useAtom } from "jotai";
import React, { useEffect, useState } from "react";
import taskAtom, { singleTask } from "../../store/taskStore";
import { useParams } from "react-router-dom";

const ViewTask = () => {
  const [tasks, setTasks] = useAtom(taskAtom)
  const [task, setSingleTask] = useState<singleTask>({
    id: '',
    title: '',
    description: '',
    completed: false
  })
  const { id } = useParams();

  useEffect(() => {
    const task = tasks.tasks.find((curr)=> curr?.id === id);
    task && setSingleTask(task);
  }, [id, tasks.tasks])

  return (
    <div>
      <div className="md:mx-auto px-6 md:px-0 mt-10 md:w-9/12">
        <h1 className="my-4 text-center">View Task</h1>

        <form className="">
          <div className="mt-8">
            <label className="text-white mb-2"> Title </label>
            <input
              type="text"
              className="edge-input"
              placeholder=""
              value={task.title}
            />
          </div>

          <div className="mt-8">
            <label className="text-white mb-2">
              Add your note description
            </label>
            <textarea
              className="edge-input"
              data-provide="markdown"
              required
              value={task.description}
            ></textarea>
          </div>
        </form>
      </div>
    </div>
  );
};

export default ViewTask;
In the code above:
- We imported our global taskAtom to the ViewTask component and supplied it to the useAtom() hook.
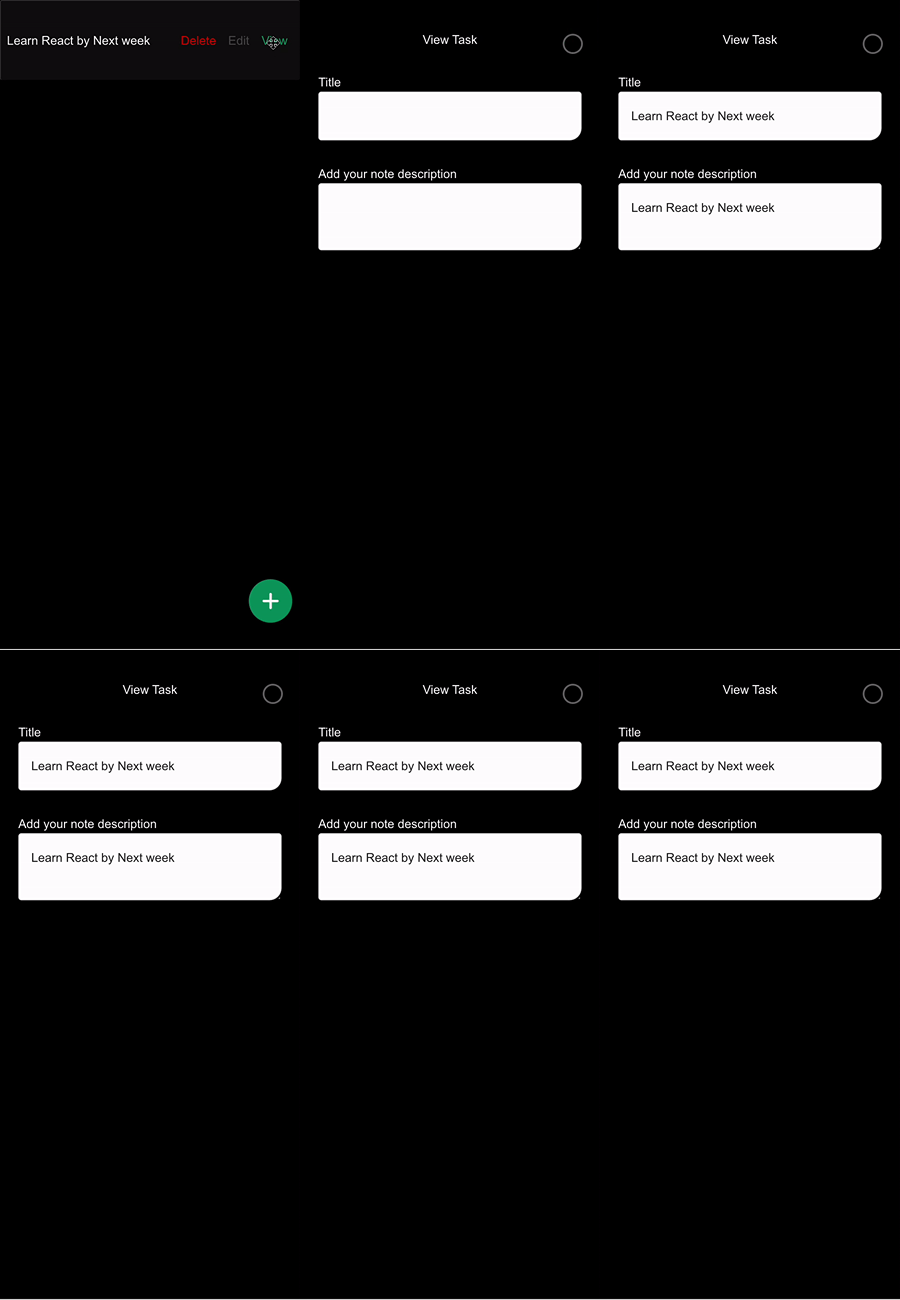
- On the useEffect hook, we find the specific task we want to view using its id which was passed through the route.
Delete Task
We will implement the deletion of a task. This will be done on the AllTasks.tsx component which renders all tasks. update the file with the code below:
import React from "react";
import FloatingButton from "../FloatingButton";
import { useAtom } from "jotai";
import taskAtom from "../../store/taskStore";
import { Link } from "react-router-dom";

const AllTasks = () => {
  const [tasks, setTasks] = useAtom(taskAtom)

  const deleteTask = (id: string)=> {
    try {
      const newTasks = tasks.tasks.filter((curr)=> curr.id !== id);
      setTasks({ ...tasks, tasks: newTasks});
      localStorage.setItem('j-tasks', JSON.stringify(newTasks));
      alert('task deleted');
    }catch(err: any) {
      alert(`unable to delete task ${err}`);
    };
  }

  return (
    <div className="App">
      <div className="-my-2">
        {tasks.tasks
          .map((curr, idx) => {
            return (
              <div className="py-2" key={curr.id}>
                <div className="card md:mx-auto px-0 md:px-0 w-full md:w-9/12">
                  <div className="py-2">
                    <div className="flex items-center justify-between px-2 py-4">
                      <div>
                        <h5 className="w-full break-word">
                          { curr.title }
                        </h5>
                      </div>

                      <div className="flex justify-between">
                        <button onClick={()=> deleteTask(curr.id)} className="inline-block px-2 py-4 text-[#D60000] border-radius">
                          Delete
                        </button>
                        <Link
                          to={"/edit/" + curr.id}
                          className="inline-block px-2 py-4 text-[#515151] border-radius"
                        >
                          Edit
                        </Link>
                        <Link
                          to={"/view/" + curr.id}
                          className="inline-block px-2 py-4 text-[#0e9f64] border-radius"
                        >
                          View
                        </Link>
                      </div>
                    </div>
                  </div>
                </div>
              </div>
            );
          })}

        {
          tasks.tasks && tasks.tasks.length === 0 ? (
            <div className="mx-auto md:w-9/12">
              <h1 className="card flex items-center justify-center h-screen">
                No Tasks Added
              </h1>
            </div>
          ):(
            null
          )
        }
      </div>
      <FloatingButton />
    </div>
  );
};

export default AllTasks;
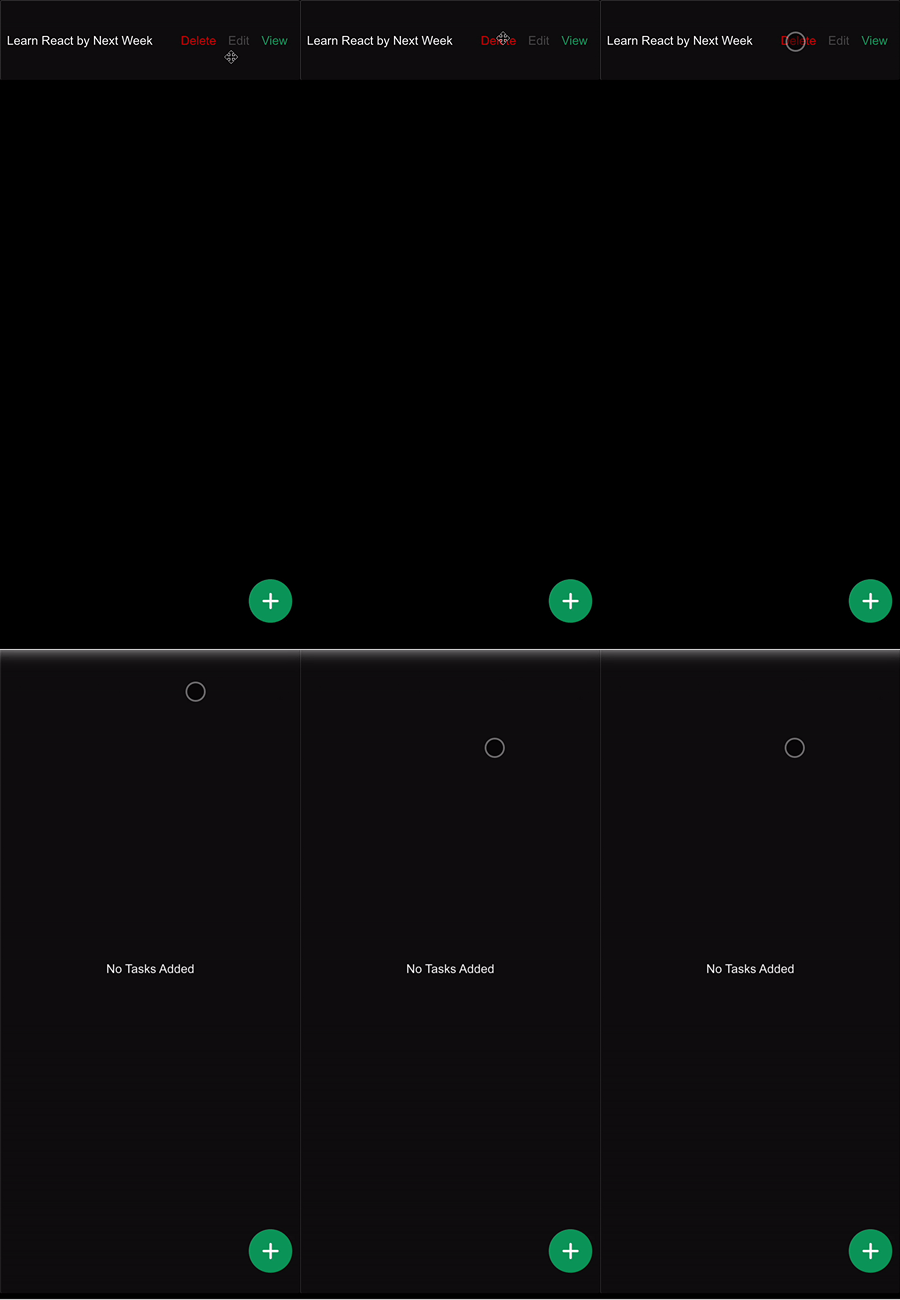
In the code above, we created a deleteTask function that deletes a task using its id. the function also appends the tasks and updates the global tasksAtom with the task. It also persists the updated tasks to localStorage.
Sample code Repository
Reference Links
- https://jotai.org/
- https://github.com/pmndrs/jotai
- https://egghead.io/lessons/react-derive-state-from-a-jotai-atom-in-react
Conclusion
In this tutorial, We learned how Jotai as a state management system works as well as illustrated how to build a simple task application with Jotai. Seeing the capabilities of Jotai shown in this article will encourage you to adopt Jotai as a state management solution for building your React application.

