


This tutorial explains how I created a simple app using React Routing.
Table of Contents
- Motivation
- Getting Started
- Introduction to react-router-dom
- Let’s create the app
- Additional Work
Motivation
As a full-stack developer, I was used to jQuery for front-end development. However, lately, I’m much into React because it makes creating interactive UIs painless. After learning React core concepts, I created my first production React application. While creating this, I tried to create my own routing library using onpopstate, window.history, etc (PLEASE DON’T DO THAT). Finally, I understood that it’s one of the biggest mistakes I did in 2019.
For the first single-page app I created in 2020, I decided to use the React Router. Wow! Creating the app was 1000 times easier than earlier, and no headaches 🤗 (That’s why 800k+ repositories use this router).
The first thing I did was to learn how to use the React Router. For this, I used a learning-by-doing method. In this article, I’ll explain how I created a simple app using React Routing.
Getting Started
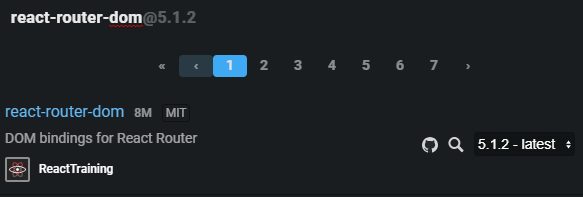
In this guide, we will be using the latest version (5.1.2) of the react-router-dom library, which includes DOM bindings for the react-router library. So, we can use it in our web app.
To get started, first, let’s create a React app. The first option is by using create-react-app to get started (Not used in this tutorial). If you aren’t familiar with it, you can learn more from the create-react-app getting started guide.
If you like that option, here’s the way.
npx create-react-app routing-app
cd routing-app
Then, install the react-router-dom package (~415KiB).
npm install react-router-domFinally, start the dev server, which will watch for file updates and automatically reload the app in real-time.
npm start
However, I don’t like to download 100MB+ packages to my computer for a small learning project like this. Many developers faced the same problem. codesandbox.io is the solution.
Visit the platform and use the template React (react-create-app).
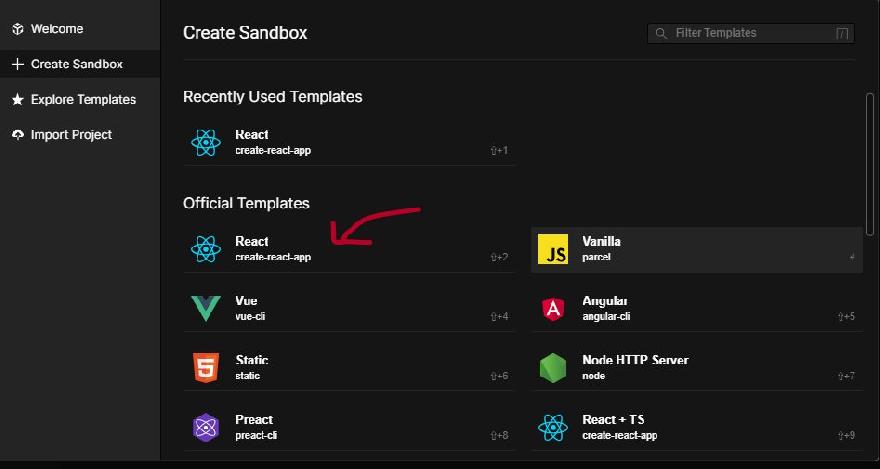
Then, add the dependency react-router-dom (Choose the latest version).
It’s the same process as doing in the local machine. Instead of the local environment, here you have a virtual one. You can save it and share it with friends too.
Introduction to react-router-dom
In my opinion, react-router-dom is a great invention (and the only option available) to handle the browser routes in React. If you know how to think in react, you know how to use the library already.
Before we start coding the app, let’s familiarize ourselves with the library react-router-dom.
This library includes three main component types.
- Wrapper (Router) –
<BrowserRouter>and<HashRouter> - Navigators –
<Link>,<NavLink>, and<Redirect> - Route Matchers –
<Route>and<Switch>
1. Wrapper (Router)
Called “Router” in the official documentation and the package, these are actually wrappers. You have to wrap Navigators and Route Matchers in a Router.
<BrowserRouter>uses regular paths.<HashRouter>use (ugly, at least for me) hash of the URL.
Most of the new apps use regular paths to keep the URLs professional and clean. So, we will use <BrowserRouter> in this tutorial.
2. Navigators
As the name explains, these are used to navigate through the app.
<Link>– This is a<a>element. However, when clicked, rather than reloading the page, this will change the path.toattribute is used to specify the path.<NavLink>– Same as<Link>, but includes the special attributeactiveClassNameattribute which we can use to add a class when thetois matched. We will be using in this tutorial
Ex:
<NavLink to="/account" activeClassName="active">Account</NavLink>

//
// this will render
//
// on /account page,
// <a href="/account" class="active">Account</a>

// on other pages
// <a href="/account">Account</a>
Cool right? However, I (maybe you too) have the question of why developers of react-router-dom didn’t add that attribute to <Link>. If you know, share it in comments.
<Redirect>– Used to redirect to a page.
Ex: If you need to redirect from / to /app:
<Route path="/" exact>
    <Redirect to="/app" />
</Route>
3. Route Matchers
These are like conditionals in Javascript. If the path is matched, the inner JSX will be rendered. (You may have inferred it already from the last example).
<Route>– like an if statement.
<Route path="/" exact>
    <SomeComponent />
</Route>
<Route path="/app">
    <SomeOtherComponent />
</Route>
By default, path="/" will match all /, /app, etc. exact is used to prevent it. You can also use the component attribute. (<NavLink> also support exact)
<Route path="/app" component={App} /><Switch>– like a switch statement with break statements in all the cases. It can wrap<Route>and will only render the first matched element.
Another use of Switch is to render 404 pages. When no path is defined in Route, Switch will render it. So, in the end, we can add a 404 page.
<Switch>
    <Route path="/" component={Home} exact />
    <Route path="/about" component={About} />
    <Route path="/contact" component={Contact} />
    <Route component={TheNotFoundPage} />
</Switch>
So, here’s the stack we will be using in this tutorial.
<BrowserRouter><NavLink>- Both
<Route>and<Switch>
Let’s create the app
We will be creating a blog using the single-page app model. Usually, blogs like WordPress reload pages when navigating. We can use react to create a single-page blog.
Here’s our plan:
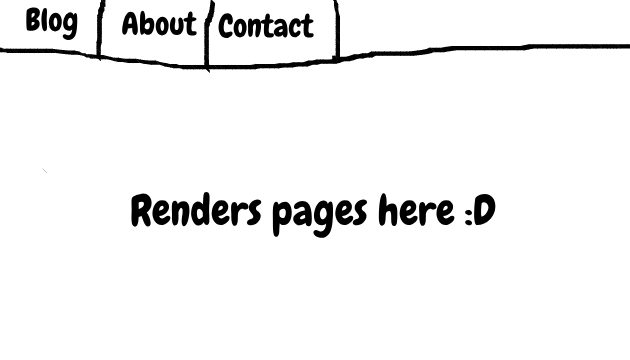
If you get stuck anywhere during this tutorial, you can refer to the codesandbox URL given at the bottom of this tutorial. A demo is also available.
Let’s start creating App.js.
import React from "react";
import "./styles.css";
import { BrowserRouter } from "react-router-dom";
import Header from "./Header";
import Body from "./Body";

export default function App() {
  return (
    <BrowserRouter>
      <div className="App">
        <Header />
        <Body />
      </div>
    </BrowserRouter>
  );
}
Here we wrap the whole app in a <BrowserRouter> (Imported via import { BrowserRouter } from "react-router-dom";).
The view is divided into two components: <Header> and <Body>.
Header.js
In the header, we include the links using <NavLink>. To prevent repetition of className and activeClassName, I’ve created a new function HeaderNavItem.
import React from "react";
import { NavLink } from "react-router-dom";

export default function Header() {
  return (
    <header>
      <HeaderNavItem exact to="/" name="Blog" />
      <HeaderNavItem to="/about" name="About" />
      <HeaderNavItem to="/contact" name="Contact" />
    </header>
  );
}

function HeaderNavItem(props) {
  return (
    <NavLink
      to={props.to}
      className="nav-item"
      exact={props.exact ? true : false}
      activeClassName="active"
    >
      {props.name}
    </NavLink>
  );
}
Body.js
Body is where we will render the components based on the URL path. In the body, we use <Route> and <Switch> from react-router-dom.
import React from "react";
import { Route, Switch } from "react-router";
import About from "./About";
import Blog from "./Blog";
import Contact from "./Contact";
import Post from "./Post";

export default function Body() {
  return (
    <Switch>
      <Route path="/" exact component={Blog} />
      <Route path="/about" component={About} />
      <Route path="/contact" component={Contact} />
      <Route path="/post/:slug" component={Post} /> { /* what's :slug? You'll learn it */ }
    </Switch>
  );
}
<About> and <Contact> are simple components like the following. You can customize them if needed.
About.js
import React from "react";

export default function About() {
  return (
    <div className="about">
      <h1>I am a mysterious person!</h1>
      <p>I'm only available in the internet</p>
    </div>
  );
}
Contact.js
import React from "react";

export default function Contact() {
  return (
    <div className="contact">
      <p>
        You can contact me via Ghost mail. Don't know what it is? Then you are
        not a Ghost like me.
      </p>
    </div>
  );
}
<Blog> (Blog.js) is where we list the posts. However, we need some posts first to load. You can fetch it from an API (Check my previous post) or load it from files. To learn react router, how you load posts is not significant. Here, I have used a JSON file to store the posts to make it simple.
_posts.json
[
  {
    "title": "Hello World",
    "slug": "hello-world",
    "content": "This is the Hello World post. WordPress says edit or delete this kind of posts. I say just keep it."
  },
  {
    "title": "React Lesson 1",
    "slug": "react-lesson-1",
    "content": "The first lesson of React is to learn Javascript first. So, search 'Javascript Tutorial' in Google and follow it. Then, come back here. You'll see the tutorial when you are an Javascript expert. (MAGIC)"
  }
]
You can add whatever posts you need. (Those are just some funny posts)
Blog.js
import React from "react";
import { Link } from "react-router-dom";

// read JSON data
const postsData = require("./_posts.json");

export default function Blog() {
  const posts = postsData.map(post => {
    return (
      <Link to={"/post/" + post.slug} key={post.slug}>
        <div className="post-listing">
          <h1>{post.title}</h1>
        </div>
      </Link>
    );
  });

  return <div className="blog">{posts}</div>;
}
As we don’t need an active class added when the post is shown, I have used <Link> instead of <NavLink>. When the user clicks on post-listing, the location will be changed to /post/whatever-slug-in-json-file.
We list the posts by looping through the postsData. (See React Lists and Keys) for more details.
If we look at our Body.js, you will notice this.
<Route path="/post/:slug" component={Post} />Here we use :slug as an URL parameter. So, <Post> component will be able to access the part after /post/ easily using props or hooks.
Finally, Post.js (where Posts are shown)
import React from "react";
import { useParams } from "react-router";

const postsData = require("./_posts.json");

export default function Post() {
  var { slug } = useParams(),
    post = findPostBySlug(slug);

  return (
    <div className="post-content-view">
      <h1 className="title">{post.title}</h1>
      <content>{post.content}</content>
    </div>
  );
}

function findPostBySlug(slug) {
  return postsData.find(o => o.slug === slug);
}
import { useParams } from "react-router" is used to import the useParams hook. useParams returns an object containing all URL parameters with their key and value. Use object destructuring to get the needed value (slug in this case).
findPostBySlug() is a simple function to find the article by slug. (Thanks to Šime Vidas on Stackoverflow)
However, if you aren’t comfortable with React hooks, you can access the URL parameters via props.match.params.
export default function Post(props) {
  var slug = props.match.params.slug;
}
Additional Work
1. Adding CSS
First, make sure your app is beautiful. Add some CSS! Here’s what I used.
body {
  margin: 0;
}
.App {
  font-family: sans-serif;
}

a {
  color: #000;
  text-decoration: none;
}

header {
  background-color: #fafafa;
  height: 60px;
}
header .nav-item {
  padding: 0 15px;
  border-right: 2px solid #eee;
  height: 100%;
  display: inline-flex;
  align-items: center;
}
header .nav-item.active {
  background: #000;
  color: #fff;
}

.about,
.contact {
  padding: 100px;
  text-align: center;
}

.post-content-view,
.blog {
  padding: 40px;
  width: 600px;
  max-width: 100%;
  margin: auto;
}

.post-listing {
  background-color: #fafafa;
  border-radius: 5px;
  margin: 20px;
  padding: 15px;
}
2. Programmatical Navigation
You can use <Redirect> when rendering as shown above. If you need it to do in any other function in a child component of <Route>, use props.history.push function.
function Contact(props) {

    const handleClick = () => props.history.push('/some-other-page');

    return (
        <div>
            { /* some other components */ }
            <button onClick={handleClick}>Navigate</button>
        </div>
    );
}
Summary
Here’s how we routed our app.
/– Posts Listing/post/:slug– A post/about– About page/contact– Contact page
Test it out.
Conclusion
Here’s what I found on a rating website.
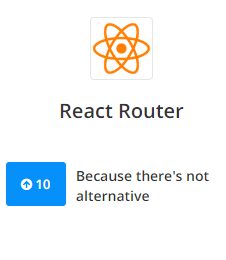
The React Router doesn’t have an alternative because it does everything. There’s a lot of other options/features you can use in the Router. The official documentation by react training outlines those with examples.
Have questions? Let me know below.
Thank you for reading.