


Working with React is a great experience but can be quite challenging for junior developers unfamiliar with the intricacies of the framework, client-side routing, page layout, and so on. Fortunately, there are a few solutions that exist that greatly simplify the creation of single-page applications, and it would be a shame not to take advantage of them. In this article, we’ll tackle one of those solutions, namely NextJS, cover the differences between NextJS and other available frameworks, answer some frequently asked questions about NextJS, as well as help you get started with this framework.
What is NextJS?
NextJS is one of the React frameworks that is server-rendered by default, a zero-configuration, single-command toolchain for React apps. Basically, what NextJS is capable of doing is helping you to easily build a React app and handle server-side rendering for you.
NextJS Features/Advantages
Now let’s summarize NextJS features that you can expect from the framework:
- Server-rendered by default
- Simple client-side routing that’s page based
- Automatic code splitting for faster page loads
- Webpack-based development environment (which supports Hot Module Replacement)
- Implementation with Express or any other NodeJS HTTP server
- Customizable with Babel and Webpack configurations
- Single File Components using styled-jsx
- Prefetching thanks to the
Linkcomponent which supports aprefetchprop that automatically prefetches page resources in the background - Dynamic components: possibility to import JavaScript modules and React components dynamically
- Static exports: with the
next exportyou can export a fully static site from your application.
NextJS vs React vs Create-React-App vs Gatsby vs Express
First of all, NextJS is the React framework. React is a library for building user interfaces. NextJS uses React, a framework for server-rendered React applications. What NextJS does is it renders React apps on the server (SSR). Two can’t really be compared, because NextJS wraps React, and they basically work together.
Create React App (aka create-react-app and CRA) is a client-side rendering technology which is not an ideal option if you care for your website’s SEO; Gatsby is a static site generation technology, which creates static pages of a website and pushes them to the browser. NextJS is a server-side rendering technology. ExpressJS is a NodeJS web app framework for building single and multi-page and hybrid web applications.
Tutorial: Getting Started with NextJS

For the purposes of this simple tutorial, we’ll use NextJS Github repo and instructions from NextJS official website.
First, create a folder where you’ll store your first NextJS project. Open the folder within the editor of your choice. We’ll use Sublime in this tutorial. Then open a command prompt and type in the path to that folder followed by npm init.
Hit Enter several times until you see “Is this Okay? (yes)” message followed by the path to your NextJS folder. We’ve just created a package.json within that folder.
Now, following the instructions from the NextJS GitHub repo, type in npm install --save next react react-dom to install NextJS into your project.
By doing so, we’ve installed NextJS, React, and ReactDOM to manipulate with the Document Object Model.
During or right after installation, create a new folder inside your existing folder in Sublime and call it “pages”, herein we’ll store the pages we’ll create during this tiny “NextJS crash course.” To create an entry script, create a file named “index.js” within your new “pages” folder.
Inside “index.js” file create a simple React functional component like so:
export default () => (
  <div>
    <p>My first page with NextJS</p>
  </div>
)
Another way to do it is by creating a variable:
const  Index = () =>  (
  <div>
    <p>My first page with NextJS</p>
  </div>
);
export default Index;
Now, time to add a script to your package.json file by adding the following code instead of existing default script:
"scripts": {
  "dev": "next",
  "build": "next build",
  "start": "next start"
},
Since we have a new script named “dev,” let’s invoke it in command prompt by typing npm run dev.
Now, if you visit localhost:3000, you’ll see the component we created earlier in “index.js” automatically rendered. Simple as that.
Create a second page called “contacts.js” within your “pages” folder and type in:
const  Contacts= () =>  (
  <div>
    <p><a href="mailto:vorontsova_mi@blog.soshace.com">Contact me!</a></p>
  </div>
);
export default Contacts;
Now, visit localhost:3000/contacts. What you’ll see is your second page. Exactly because of “hot reloading,” you don’t have to restart the npm process, NextJS does this automatically for you.
NextJS also ships with the Link module to navigate to your filebase or pagebase routs, all you need to do is import it with
Import Link from ‘next/link’
And then you can use it as follows:
<Link href=”/”><a>Main page</a></Link>
<Link href=”/contacts”><button>Contacts</button></Link>
To navigate between pages we’ll use the Link module discussed above.
To do so type in the following in your ‘index.js” and “contacts.js” files right above your code, followed by the Link href code and pages you want to link to like so:
import Link from ‘next/link’
const  Index = () =>  (
  <div>
    <ul>
      <li><Link href=”/”><a>Main page</a></Link></li>
      <li><Link href=”/contacts”><a>Contacts</a></Link></li>
    </ul>
    <p>My first page with NextJS</p>
  </div>
);
export default Index;
and
import Link from ‘next/link’
const  Contacts= () =>  (
  <div>
    <ul>
      <li><Link href=”/”><a>Main page</a></Link></li>
      <li><Link href=”/contacts”><a>Contacts</a></Link></li>
    </ul>
    <p><a href="mailto:vorontsova_mi@blog.soshace.com">Contact me!</a></p>
</div>
);
export default Contacts;
Otherwise, you can create a navbar component to not repeat yourself and organize your code neatly. To create a separate navbar component, you’ll need to first create a “components” folder within your root folder, in our case it is the “reactnext” folder. Within the “components” folder, create a separate file with a name “navbar.js”
In the “navbar.js” write the following:
import Link from ‘next/link’
const  Navbar = () =>  (
  <div>
    <ul>
      <li><Link href=”/”><a>Main page</a></Link></li>
      <li><Link href=”/contacts”><a>Contacts</a></Link></li>
    </ul>
  </div>
);
export default Navbar;
So now, instead of the bringing in Link module inside the previous pages, “index.js” and “contacts.js,” we can bring in Navbar instead like so:
import Navbar from ‘../components/Navbar’;
const  Index = () =>  (
  <div>
    <Navbar/>
    <p>My first page with NextJS</p>
  </div>
);
export default Index;
Do the same thing for the Contacts page:
import Navbar from ‘../components/Navbar’;
const  Contacts= () =>  (
  <div>
    <Navbar />
    <p><a href="mailto:vorontsova_mi@blog.soshace.com">Contact me!</a></p>
  </div>
);
export default Contacts;
Now, let’s look at how styled-jsx works and how to add bootstrap to your NextJS app.
To add styles inside your components, use <style jsx>{“}</style>, where inside the backticks within the curly braces, you can add regular CSS like so:
import Link from ‘next/link’
const  Navbar = () =>  (
  <div>
    <ul>
      <li><Link href=”/”><a>Main page</a></Link></li>
      <li><Link href=”/contacts”><a>Contacts</a></Link></li>
    </ul>
    <style jsx>{`
      ul {
        background: #333;
        color: #fff;
        list-style: none;
        display: flex;
      }
      ul  li {
        font-size: 18px;
        margin-right: 20px;
      }
      ul  li  a {
        color: #fff;
        text-decoration: none;
      }
    `}</style>
  </div>
);
export default Navbar;
To get rid of the Navbar in every single page where you’d like your navigation bar to appear, you may create a layout component inside the “components” folder.
Inside of your just created ‘Layout.js’ file, type:
import Navbar from ‘./Navbar’;

const  Layout= (props) =>  (
  <div>
  <Navbar />
    {props.children}
  </div>
);
export default Layout;
Now inside your ‘index.js’ and ‘contacts.js’ files you’ll need to import component like so:
import Layout from ‘../components/Layout’;

const  Index = () =>  (
    <Layout>
      <div>
        <p>My first page with NextJS</p>
      </div>
    <Layout/>
);
export default Index;
Do the same thing for the Contacts page:
import Layout from ‘../components/Layout;
const  Contacts= () =>  (
    <Layout>
      <div>
        <p><a href="mailto:vorontsova_mi@blog.soshace.com">Contact me!</a></p>
      </div>
    </Layout>
);
export default Contacts;
Now, suppose you want to have a title of the page, you want to add Bootstrap instead of less pretty style jsx. To do that you’ll need to import Head from ‘next/head’ in your Layout component as well as add a link to a Bootstrap theme you want to import. For the purposes of this tutorial, we’ll grab a theme from https://bootswatch.com/ called ‘Cosmo.’ Right-click on Download, open in a new tab, and copy the link from the search bar, which should look something like this: https://bootswatch.com/4/cosmo/bootstrap.min.css
Now, let’s see how it’ll look like in the code:
import Head from ‘next/head;
import Navbar from ‘./Navbar’;
const  Layout= (props) =>  (
  <div>
    <Head>
      <title>My first NextJS project</title>
      <link rel=”stylesheet” href=”https://bootswatch.com/4/cosmo/bootstrap.min.css” />
     </Head>
     <Navbar />
      {props.children}
  </div>
);
export default Layout;
This way your Bootstrap theme is going to be applied for every page. If you want to integrate Bootstrap to just a single page, rather than the whole site, you’ll just paste your Bootstrap link into a component you’d like to style.
Now let’s create dynamic pages. Dynamic pages are those that instead of a fixed content, display some data based on some parameters. To see how that works, let’s create a very simple basic blog. We’ll need to change “index.js” file like so:
import Layout from ‘../components/Layout’;
const Post = props => (
  <Layout>
    <li>
    <Link href={`/post?title=${props.title}`}>
      <a>{props.title}</a>
    </Link>
  </li>
)
<Layout/>
);
export default () => (
  <div>
    <h2>My blog</h2>
    <ul>
      <li>
        <Post title="First post" />
        <Post title="Second post" />
        <Post title="Third post" />
      </li>
    </ul>
  </div>
)
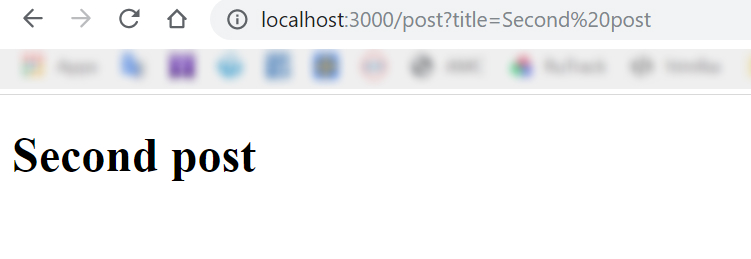
Now create another file in the pages folder and name it as “post.js.” Inside “post.js” type:
export default props => <h1>{props.url.query.title}</h1>
Now when you click on your any of your blog posts on the index page (main page), you’ll be redirected to the page that renders an h1 tag — the post’s name. Like so:
Now, let’s see how you would export your created NextJS app as a static website. You can do so by using the super-fast static site hosts like Netlify or Firebase Hosting. You’ll be required to declare the URLs that compose the site, to learn more about the process head on to the NextJS GitHub repo for a detailed explanation.
To deploy your production-ready copy of the app type in your Command prompt:
npm run build and then npm run start
You can integrate another application by the same company called Now, which is a hosting service for Node.js applications that you can use to deploy your NextJS apps — all you need is to install Now and run the now command in the application folder. Under the hood, Now sets up everything for you, including a server, all you need to do is wait for your app URL to be ready.
FAQ:

NextJS: how to add Bootstrap?
We’ve already described the process earlier with integrating a theme from https://bootswatch.com/ The resulting code looked like this:
import Head from ‘next/head;
import Navbar from ‘./Navbar’;
const  Layout= (props) =>  (
  <div>
    <Head>
      <title>My first NextJS project</title>
      <link rel=”stylesheet” href=”https://bootswatch.com/4/cosmo/bootstrap.min.css” />
     </Head>
     <Navbar />
      {props.children}
  </div>
);
export default Layout;
How to use a database with NextJS?
Using the custom server. Example of a custom express server can be found here: https://github.com/zeit/next.js/tree/canary/examples/custom-server-express
How do I run NextJS-React on two ports in Windows?
If you need to create a separate server but place it in the same project with Next.js, this can be done in the standard way by adding a separate js-file to the root directory with setting the port other than 3000. For example, 3001.
How to migrate from create-react-app to NextJS?
The most significant difference between create-react-app and next.js project is the routing system since Next.js creates different bundles for each base address. For each route, a separate file is created in the page folder. So you need to use next/Link component instead of react-router-dom. Also, keep in mind that for static files the /static folder is used, but not /public, and bundles are located in the folder .next
How to add Angular to NextJS?
Next.js is React framework for SSR. There is Angular Universal for SSR with Angular.
How to use NextJS on Netlify?
Netlify offers serverless backend services for static websites. Next.js can behave as a server-side rendered application but without Node.js server.
package.json
{
  "scripts": {
    "build: "next build",
    "export": "next export",
    "deploy": "npm run build && npm run export"
  }
}
After the “npm run export” command, Next.js will generate every page and subpage as a static application. With Netlify you can select the branch, where you would like to watch the changes. Netlify will copy every new version after commits, and then you can give a command which will take care of the build process. We can use “npm run deploy” as the build command.
https://dev.to/kozakrisz/deploy-nextjs-project-to-netlify-4bd5
How to make an app offline capable using NextJS?
There are two important things to set up, first we need next-offline to wrap your next config.
If you haven’t yet, create a next.config.js in your project.
// next.config.js
const withOffline = require('next-offline')

const nextConfig = {
  ...
}

module.exports = withOffline(nextConfig)
Next, we need to make sure our application is properly serving the service worker, this setup depends on how you’re hosting your application. There is documentation below.
https://www.npmjs.com/package/next-offline
How to view localhost with NextJS?
By default localhost:3000
Folder for static files – static. Files from this folder will be available directly:
/static/file.txt
localhost:3000/static/file.txt
Nextjs: where do I add an external link?
If there is no need using the SPA mechanism for getting the page by link, you can use default a tag in JSX. For internal links is preferable to use Link component
How to add images in NextJS?
Images and other static files (css, js, fonts) could be placed in static folder and will be available directly:
File system path /static/img.jpg
Url: /static/img.jpg
How to handle data server and client-side NextJS?
There are two options.
First one is setting up the custom server and split routes for Next.js rendering and data endpoints. Example of a custom express server can be found here: https://github.com/zeit/next.js/tree/canary/examples/custom-server-express
The second option is to create another js-file for separate node.js instance and run it at another port or even create a separate project for the server using any stack.